
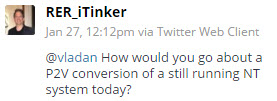
This post is a guest post by Richard Robbins who recently did an interesting task – Convert NT4 physical to VM on ESXi 6.0. He contacted me on Twitter asking which would be the good direction to take and then few tweets later he came up with a working solution in his environment.
As I haven't had the chance in my carreer to do a P2V of NT4 system (once I did a software migration into a new Microsoft domain) I asked him if he would mind to share his experience. And that's what he did.
He also actually started a blog – http://www.itinker.net, but as he told me, it just started. With not much content so far. But who knows? Perhaps over time we might find some other good stories as the one he just send me…
I want to invite other readers of my blog if you guys have an interesting story you want to share, get in touch with me and I'll see if it fits to the our IT resource site which ESX Virtualization certainly is. As you know, since the beginning I update the blog almost daily with posts which are valuable to IT professionals and geeks that we are -:)
Here is his story…
Convert NT4 physical to VM on ESXi 6.0
I needed to do a physical to virtual conversion of a Windows NT 4 system into an ESXi 6.0 environment.
Readily available conversion tools will not work.
I was able to convert the system using the steps listed below, which, at the highest level, amounts to taking a file image of the NT 4 hard disk and using it in the ESXi virtual machine.
Task One — Get VMDK Files
- Create vmdk images of the existing hard drive
Note: I received a vmdk image of the hard drive that was created with VMware Converter 3.0.3. I assume, but have not confirmed, that the results described below could have been attained had I used Acronis to image the drive and then converted the Acronis image to the vmdk format.
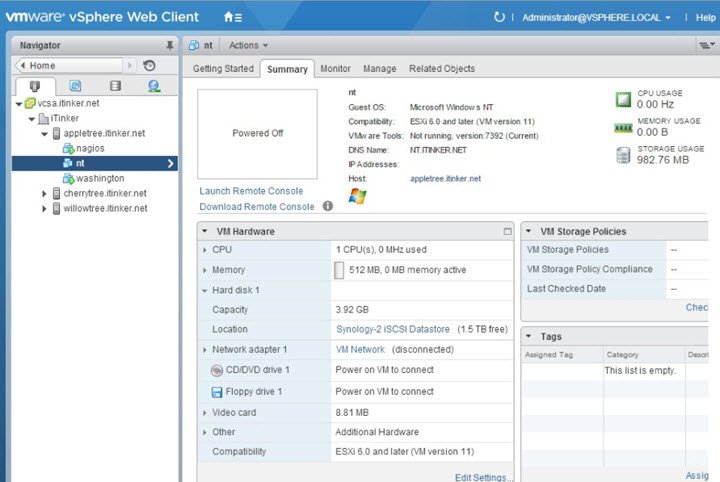
Task Two — Create VM
- Create a VM from the vSphere Web Client
- Compatibility: ESXi 6.0 and later (VM Version 11)
- Guest OS Family: Windows
- Guest OS Version: Microsoft Windows NT (ignore the warning about the OS no longer being supported)
- Customize Hardware:
- You will not be able to specify more than a single CPU
- Set memory as desired, I went with 512 MB
- Delete the hard disk the system created for you (use the X mark that will appear to the right)
- Delete the SCSI controller the system created for you (use the X mark that will appear to the right)
- Make sure the network entry has a check in the Connect at power on box
- Modify the Video card settings to increase the memory as desired, I went with 8.79 MB
- Place the scanned hard drive image in vmdk format into the folder that vSphere created for your new virtual machine
- Use the new device option at the bottom to add the existing hard drive you scanned from the physical machine
- Select the Existing Hard Disk alternative and click add
- Navigate to the folder in your VM datastore to locate the relevant vmdk image file
- After the system creates the device, customize its settings to show up as IDE 0
Note: The system defaulted to a SCSI target and added a new SCSI controller, which I deleted after establishing the hard drive as an IDE device. If your disks are set up as SCSI disks then you will need to use a SCSI controller and targets and not IDE as I did on the system I describe here.
Click Finish.
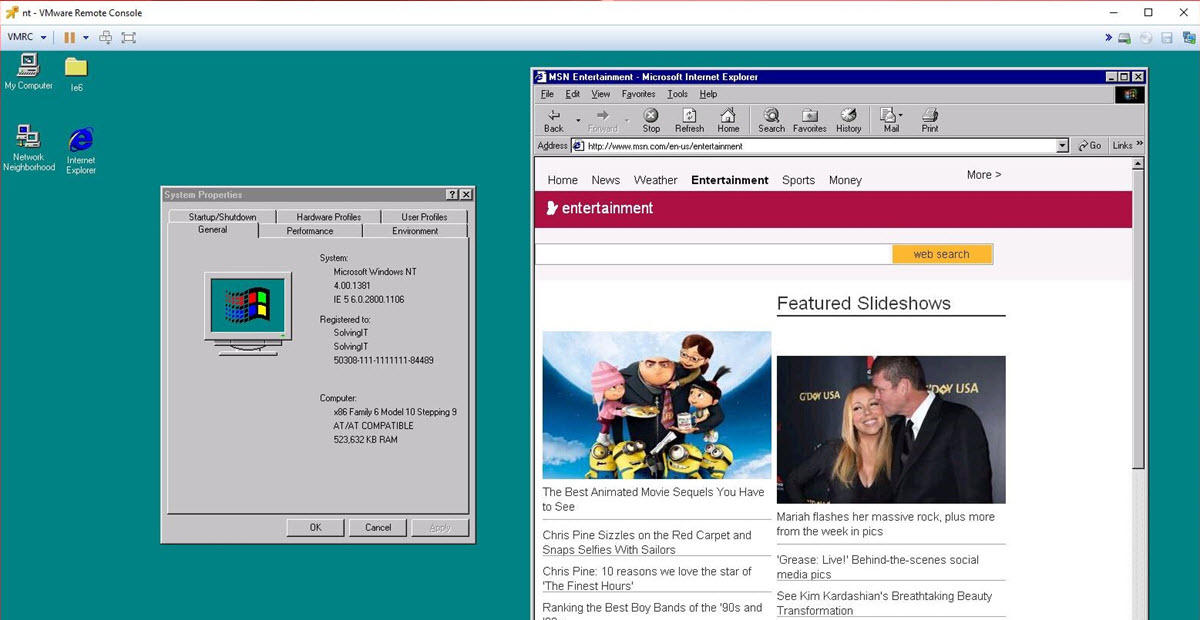
Task Three — Boot VM, Install VMware Tools and Adjust Display Resolution
- Open a Console and Power on the VM (I prefer the remote console)
- Send the Control-Alt-Delete sequence to your VM from the VMRC menu at the upper left of the console
- Install VMware Tools from the Manage -> Install VMware tools option from the VMRC menu
- I did a “complete install” rather than a “typical install” — I don't know if that matters
- You will get a warning about a failure to automatically install a network adapter, that's ok
- The installer will prompt you to reboot, let it do so
- The system should now see the additional video memory you originally provisioned, adjust display resolution from the display NT control panel and reboot
Task Four — Enable Networking
- Remove existing network adapters via the NT Network control panel and reboot
- Add a new VMware Virtual Ethernet Adapter via the Network control panel
- Point the control panel at “C:\Program Files\VMware\VMware Tools\Drivers\vmxnet”
- Configure IP and DNS as you desire
- Reboot
- Upon reboot your system should have network access
Task Five – Add Uniprocessor Support to MPS Installations
If your physical computer has more than one processor you will likely encounter problems running that operating system in the ESXi environment. I found that while the system ran, it used excessive amounts of CPU capacity, even when idling. I believe this is happening because the hardware abstraction layer (HAL) installed on these systems is for multiprocessor systems. ESXi only uses one processor with Windows NT.
To remedy this problem, follow the following instructions, which I found at https://www.vmware.com/support/ws3/doc/ws32_disks7.html
- Copy the hal.dll file and the NTOSKRNL.EXE file from the Windows NT CD-ROM or Windows NT Service Pack CD-ROM (if a service pack is installed) to a temporary folder. On Service Pack CD-ROMs these files are found in the \i386 folder.
- Rename the hal.dll file to unihal.dll, and rename the NTOSKRNL.EXE file to UNIKRNL.EXE.
- Copy the files you renamed in Step 2 to the C:\winnt\system32 folder. (If the system environment variable SYSTEMROOT is not C:, then use the appropriate path instead of C:\winnt\system32.)
- Remove the read-only attribute from the boot.ini file,
attrib -s -h -r C:\boot.ini
- modify the [operating systems] section in boot.ini to read:
[operating systems]
multi(0)disk ….\WINNT40=”Windows NT Server Version 4.00″
multi(0)disk ….\WINNT40=”Windows NT Version 4.00 [UNIHAL]” /hal=unihal.dll /kernel=unikrnl.exe
Note: The last line, from the second multi(0)disk to /kernel=unikrnl.exe, must be on one line.
- Save the boot.ini file, exit the text editor, then restart the computer.
- When the computer reboots, choose Windows NT Version 4.00 [UNIHAL] from the Windows NT boot menu.
This is the configuration you should use in the virtual machine.
Task Six – Remove Unused Hardware Drivers
If your physical NT computer had hardware not included in the virtual environment you should consider removing the related drivers from your virtual NT system. Windows NT is not PNP. It will not be using those drivers. Why not clean things up and remove the chance of conflicts with unused drivers?
Here is another shot from Richard..
This post is a guest post by Richard Robbins who recently did an interesting task – Convert NT4 physical to VM on ESXi 6.0.