
VCP6-DTM Study guide continues today with another chapter covering VMware Mirage which is part of the exam. VCP6-DTM Objective 5.3 – Manage Endpoints is today's topic. Installation of Mirage components as well as their configuration was covered in previous chapter. Then in the follow-up chapter we dived into the management of Mirage layers.
Mirage is very powerful product allowing to protect or migrate endpoints at scale as you can have a cluster of Mirage servers to handle the load. The distributed architecture allows leveraging branch reflectors which makes the downloads from the main site to the branch site very efficient.
Knowledge
- Create and manage upload policies
- Restore snapshots
- Create, manage, and archive collections
- Install the Mirage Client
- Migrate and centralize endpoints
Tools
- VMware Mirage Administration Guide
- VMware Mirage Management console
Create and manage upload policies
Upload policy is a policy which defines which files and directories are uploaded to the main datacenter. Those policies has to be defined before the endpoint is activated.
Info: VMware Mirage is available for purchase at VMware.
You can create upload policies by defining whether files are unprotected or local to the endpoint, or protected. Protected files are uploaded to the Mirage server in the data center. To make things simple it's best to specify the unprotected files only. Like this everything else is protected.
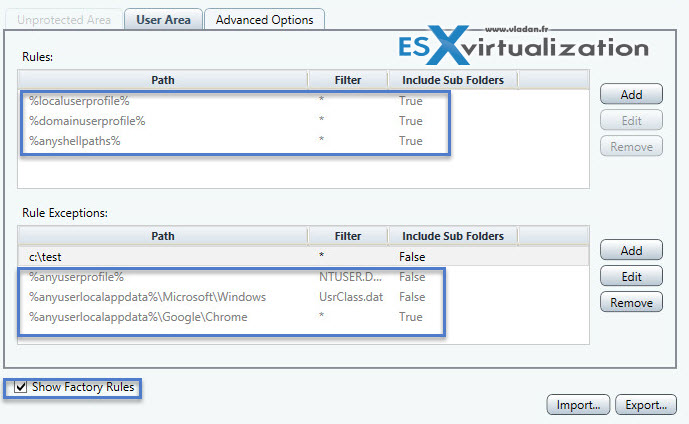
There is an upload policy are to define:
- Unprotected Area – has files and directories which are unprotected. All other files are protected.
- User Area – this area is for user files (My Documents usually). This area is excluded from restoration and is kept on the endpoint, as is. (No restoration).
There are two default policies in Mirage which you can customize to fit your needs:
- Mirage default upload policy – it's on Mirage servers that are managing CVDs on distributed physical devices
- View optimized upload policy – it's on Mirage servers that manages VMs. It's basically the same policy as default policy except there is a checkbox specifying the Optimize for Horizon View.

The upload policy is composed with built-in factory policy and administrator modifications. The built-in factory is not modifiable whether the administrator modifications is. You should check if the built-in policy fits your needs as the built-in policies, for example, do not upload .MP3 and .AVI files to the CVD….
Example when clicked the “show factory rules” checkbox (plus I added “c:\test” folder rule as not to be included as a test)…
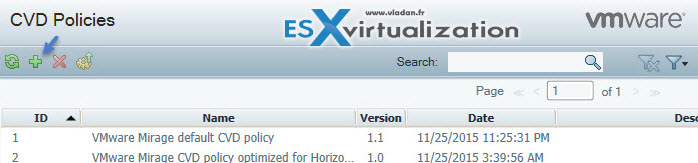
Create new policy: – Mirage console > System Configuration > CVD Policies > Add
Check the advanced options p. 20 of VMware Mirage Administrator's Guide.
Restore snapshots
You can archive CVDs so they retain its state. Those archived CVDs can be restored. You can reinstate archived CVD and assign it to another endpoint. Archived CVDs does not need Mirage license.
To archive CVD: MMC > Inventory > All CVDs > Right click CVD > Manage CVD > Archive > Confirm. The CVD is transfered to CVD archive.
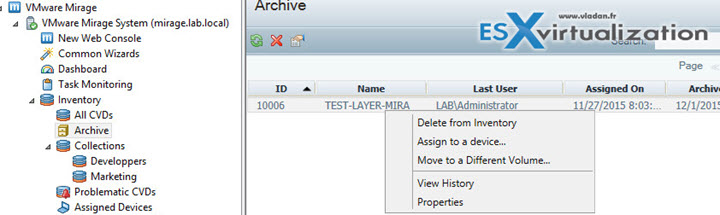
You can then restore the snapshoted CVD to a different device
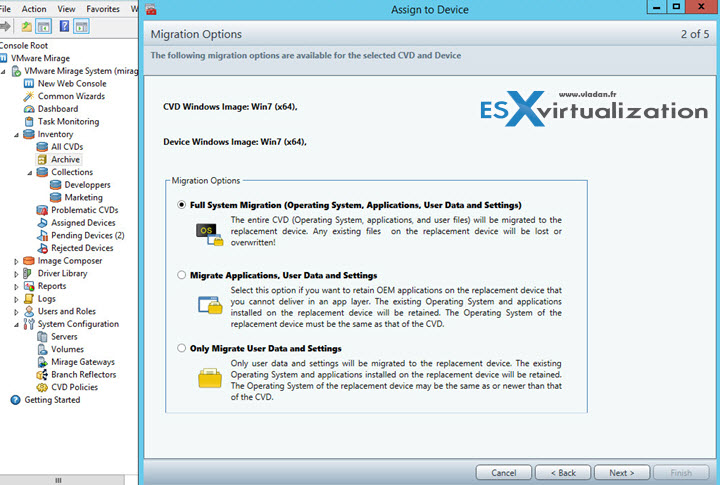
To restore CVD reassign to different device: MMC > Wizard > Hardware Migration > Select CVD > Next > Select device where you want to mirate the CVD > Next > define Hostname, domain to join > OU > select domain account for joining the endpoint to a domain > next > finish.
- Full system restore – Use this option for systems with Windows volume licenses or Windows OEM SLP licenses. Any existing files on the replacement device are lost
or overwritten. - Restore applications, user data and settings – Use this option only when replacing a device that has a different Windows OEM license. Only for the Same OS.
- Only restore user data and settings – Use this when migrate users from Windows XP, Windows Vista, and Windows 7 machines to new Windows 7 machines, or Windows 7 to Windows
8.1 machines.
Create, manage, and archive collections
- Static collections – you can add CVDs manually.
- Dynamic collections – assignments to dynamic collections are calculated based on predefined filters every time an operation is applied to a collection.
Static collections: Mirage console > Inventory > Select All CVDs > Right click a client > Manage CVD > Manage Collection
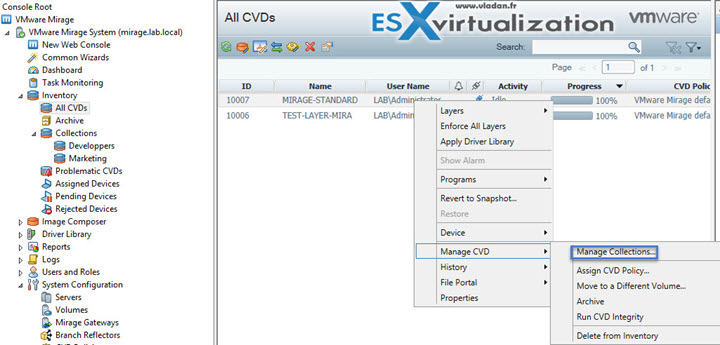
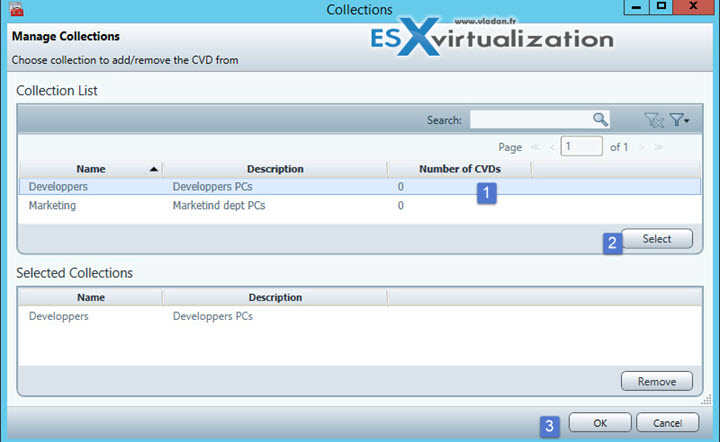
Then you select one of the collections (that you previously created) and you add the CVD's to be included in this collection.
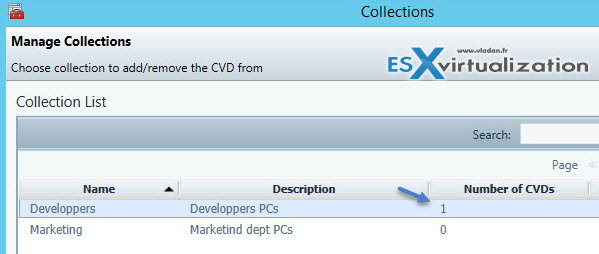
And you can see that the collection called Developers now has the CVD we have just assigned…
For example, you can aggregate all CVDs of users in the marketing department to a folder under a collection called Marketing. Then you can change with a single action the upload policy that all the Marketing CVDs share.
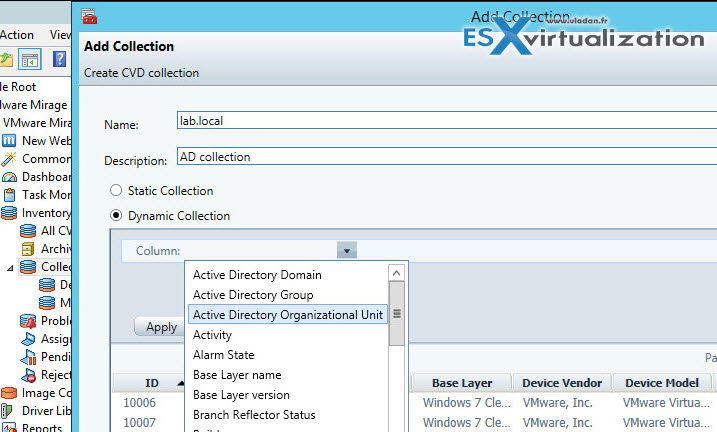
You can use Active Directory (AD) to add a dynamic CVD collection.
You can add CVDs to the collection by Active Directory group, organizational unit, or domain. You can create a filter for multiple Active Directory elements, for example, filter CVDs whose users belong to the Human Resources AD group or to the Marketing AD group. The Active Directory is updated whenever a device is authenticated. Active Directory information might change if the Active Directory is updated for that user or device.
- In the Mirage Management console > Inventory node, right-click Collections > Add a Collection > Name it > select Dynamic Collection
- In the Column drop-down > set the filter to define the dynamic collection by AD group, OU, or Domain > Click Apply > OK.
Install the Mirage Client
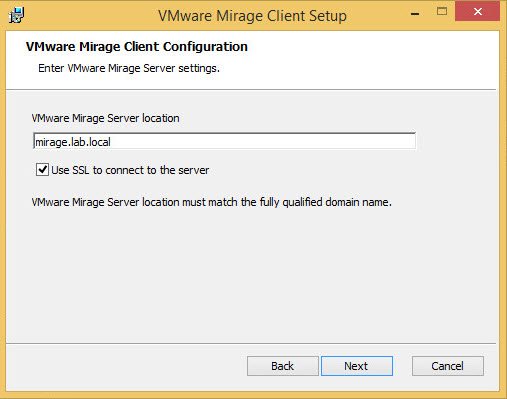
Installation the Mirage client is easy. The only option you have is to specify the mirage server and (if) the SSL option.
You can do silent install via command line. The MSI package has to be hosted on a shared accessible to the endpoint.
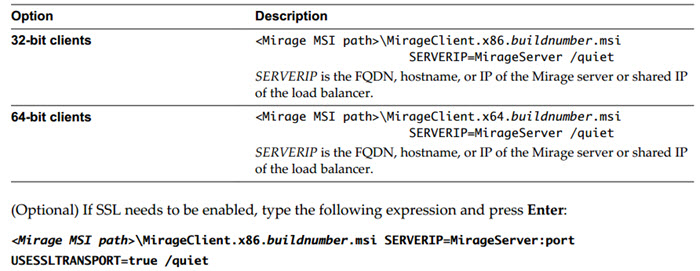
If you're not using SSL then don't use the USESSLTRANSPORT=true option.
If you are using the command line options to install on clients that are external to the corporate network you will need Horizon Mirage Edge Server, so users can contact the Mirage servers without the need to dial into a VPN.
Migrate and centralize endpoints
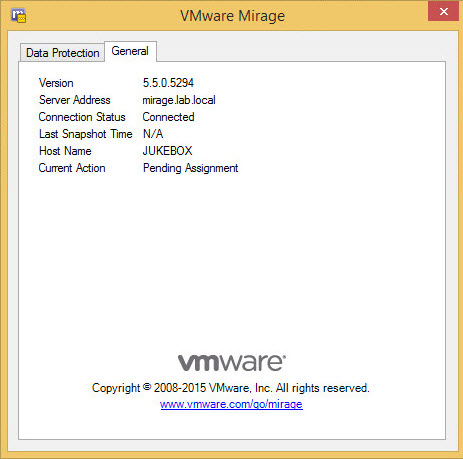
Once the client installed, the PC (endpoint) waits to be assigned to a CVD. You must centralize the device.
The centralization of an endpoint can be one-by-one or automatically – via CVD Autocreation.
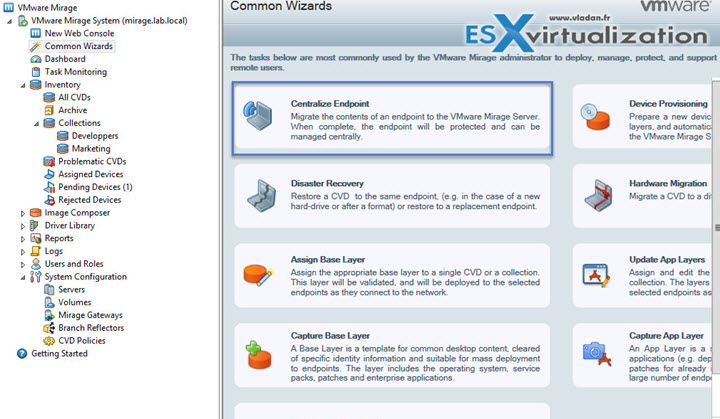
Manual centralization of an endpoint:
MMC > Commmon Wizards > Centralize Endpoint > Select the device > Select the upload policy > add a base layer > Select one or more app layers to which you want to add to the device and click Next. (This step only appears when you have selected a base layer from the previous step).
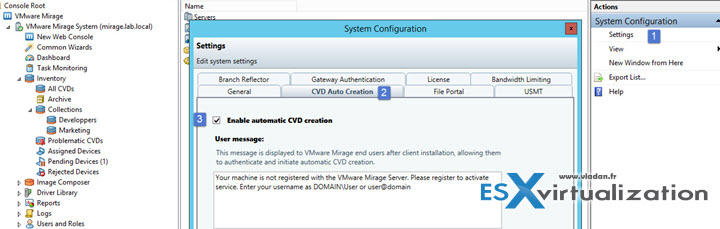
Verify that the administrator enabled CVD autocreation. CVD autocreation is disabled by default. See “Enable CVD Auto Creation,” on page 36.
System Configuration > Settings > CVD Auto Creation tab. > Enable automatic CVD creation > Click OK.
Check out our VCP6-DTM Page for all exam topics.
Info: VMware Mirage is available for purchase at VMware.