FreeNAS – Why I tried FreNAS if I had an good experience with Openfiler in the past?
Well, testing, testing…but also it seems that the FreeNas developing community is more dynamic, and the RC5 of FreeNAS 8 just went out yesterday and apparently it's the last RC before the final version of FreeNAS 8. The navigation through the Freenas 8 RC5 is a flash navigation like one use to have in VMware View 4.6 now. It's very pleasant to play with it. But the object of this article will be the installing of the FreeNAS 7.2 onto the USB stick.
I will guide you through the installation and configuration process of FreeNAS 7.2. Let's move on with the installation process. At first you must downoad FreeNAS and burn the ISO file to a CD. As I said in my previous part, I connected my SATA DVD drive temporarily to my Mini Box and I boot on it. I'll not keep it after the installation is finished. To be able to boot on DVD you must go into the bios (F2 key at boot) and in the boot section choose the first booting device the DVD drive. It depends on your Motherboard model and type what the options are.
The installation process asks where to install the FreeNAS distribution. Take the first option, the USB thumb drive which is plugged inside the box with the internal cables into the connector on the motherboard. When I was choosing the parts for the NAS, the least capacity of USB thumb drives was 2 Gigs…. The FreeNAS won't use all 2 Gigs, not even close, but you won't be able to use the USB drive for anything else (that was one of those installation messages I saw).
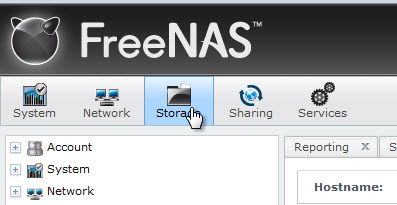 The distro is optimized to run from USB if you choose this option. After the installation finished (it only takes few minutes), all you have to do is to configure static IP address, subnet mask, gateway, DNS server and you're able to connect via your web browser to get the access to the admin interface.
So for example if you setup the IP address with 192.168.0.11 you can start your web browser and type in https://192.168.0.11:80 and login with admin and FreeNAS as a default login/password combination.
After connecting to the admin interface, I was able to see my hard drives and could start the configuration of the software RAID.
But for some of you, which would like to see what's the installation process looks like, I can show you the installation process by using my VMware Workstation 7.1 and create FreeNAS VM…. -:)
Let's start to see how it looks like. It's step by step, you can follow this guide to help you installing FreeNAS.
At first you boot on the CD drive (ISO by using VMware Workstation 7 in my case) you'll see a screen like this one. But the timer goes on and after few seconds the screen disappear.

On the next screen the installer asks you “Where do you want to install the package?”.. and you'll see a screen like this. it's preferable to install FreeNAS on a USB stick, since it saves you the additional IDE/SATA channels for your hard drives which will be used for the Data.

After the validation of option 1, the next screen makes sure that the destination media is where the FreeNAS installation should proceed.

And the next screen just validates all this…..with the possibility to cancel, if you for any reason changes your mind.
Basically all you have to do, if you have already done the IP configuration through the CLI at the end of the installation process, is that you must follow those steps to format your disks and create the software RAID. At firs you must connect to your NAS via web browser. The FreeNAS 7 has the connection port 80 so in my case I had to connect to https://192.168.0.100:80
01. Add Disks
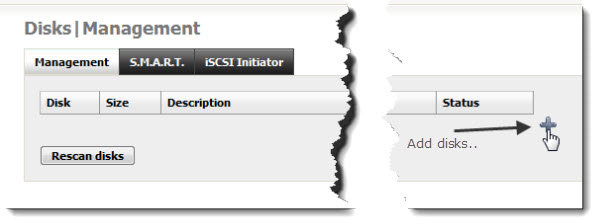
The next screen let's you choose different options. You have to repeat boths steps four times, if you have four hard drives to put into your RAID 5. If you have more (less) drives, you add the number of disks you need.
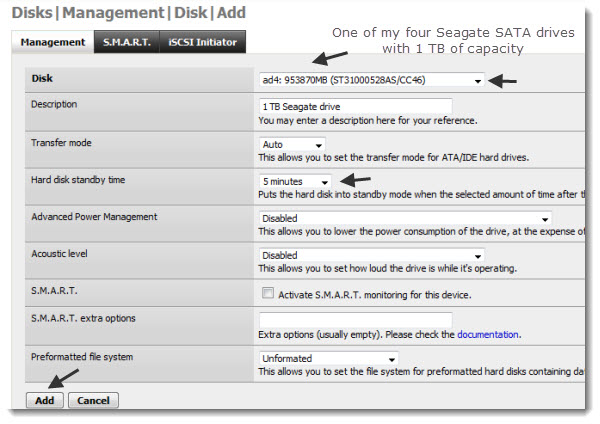
On every screen look for that button… Apply Changes
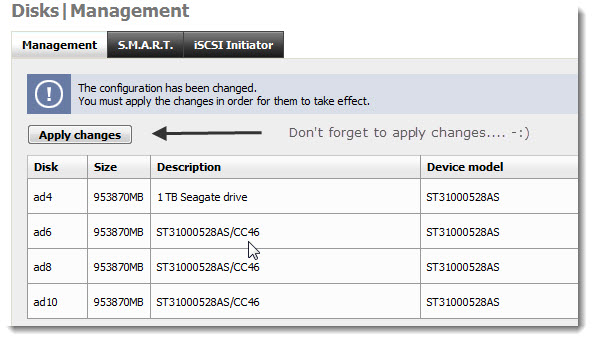
The disks should be now unformatted and Online
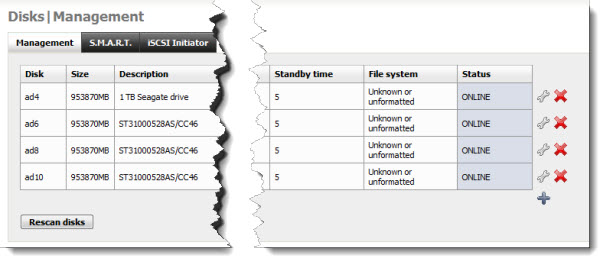
02. Format Disks for “Software RAID”
Now you'll format those disks. A s a format you choose Software Raid. Repeat for all disks participating in the RAID 5.
You have to go to the menu Disks > format
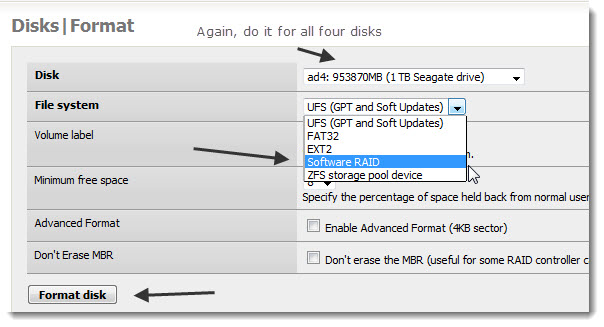
03. Create the RAID array using the previously formatted for “Software RAID”
You'll go to the Disks > Software Raid > RAID 5
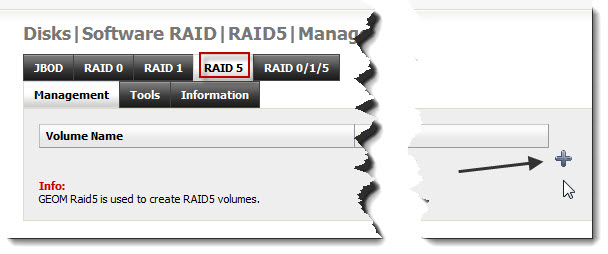
And CTRL + click to select all the disks participating in the RAID 5 volume….
Note: If you don't see your disks here, it means that you did not format them as a “Software RAID”..
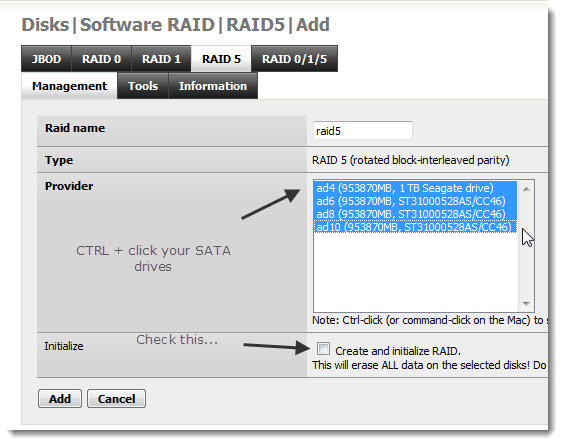
Don't forget to click on the Apply Changes button, as usually, to validate the changes….. -:)
After that, the status should look like this. It should show REBUILDING state. But you can already use that volume to finish your configuration. No need to wait until the rebuild process finishes. It can take long, long time depending of the size of your disks participating in the RAID 5.

04. Format the newly created RAID array in UFS filesystem
You must format the volume before creating mount point. If not, you'll get an error “Wrong partition type or partition number.”
Go to the menu Disks > format
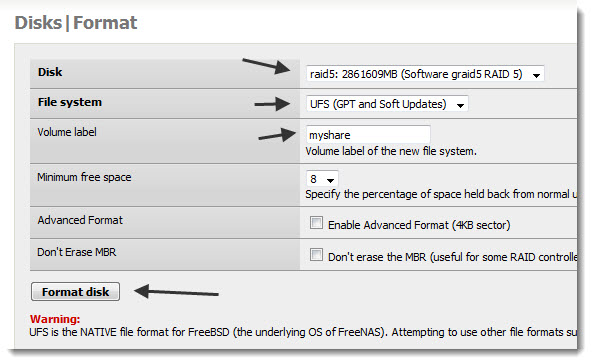
To the window pop-up just say OK.
05. Add Mount Point.
Next step is to create a mount point. You go for it in the menu Disks > Mountpoint
And again.. click on Apply changes button.
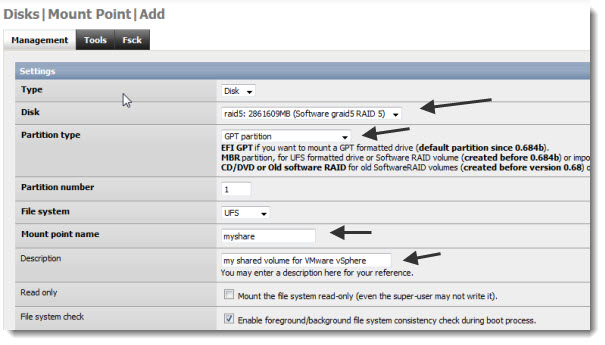
So the status of the Mount Point should look like this. With OK as a status.

06. Add Services.
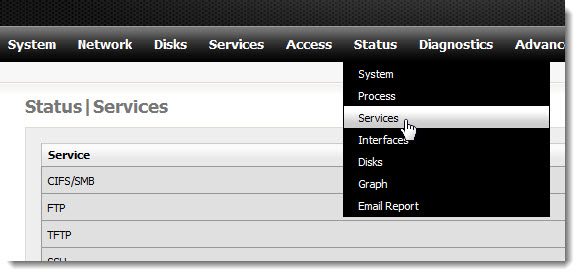
The next step you have to enable services (shares) you want to use with your NAS. (CIFS, FTP, NFS etc.). To do that you go to the
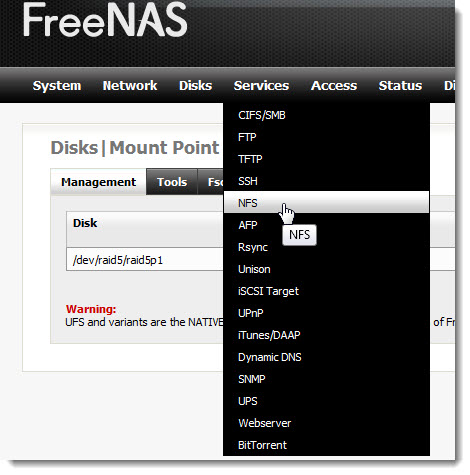
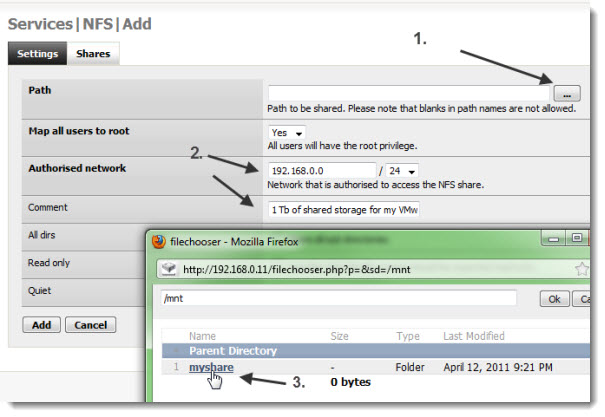
07. Enable the NFS service.
I think that it's enough for this MEGA post right now, Ill see if i can do a connection with my ESXi host in this post and see some performance of such a NAS box.
- How to build a low cost NAS for VMware Lab – introduction
- How to build low cost shared storage for vSphere lab – assembling the parts
- VMware Home Lab: building NAS at home to keep the costs down – installing FreeNAS – this post
- Performance tests with FreeNAS 7.2 in my homelab
- Installation Openfiler 2.99 and configuring NFS share
- Installing FreeNAS 8 and taking it for a spin
- My homelab – The Network design with Cisco SG 300 – a Layer 3 switch for €199.
- Video of my VMware vSphere HomeLAB
- How to configure FreeNAS 8 for iSCSI and connect to ESX(i)
- Haswell ESXi Whitebox


Nice write up.
With regards to FreeNas 8, I had a number of issues trying to install that, whatever I tried I would always get an issue with defective hardware (I tried a USB CD\DVD and SATA DVD, all the same results). I eventually got it installed however.
Over all I am impressed with the results (so far it appears to be better than OF) but more testing is required. As a side note, RC4 was ‘supposed’ to be the final candidate but there were way too many bugs in it which is why they rushed out RC5 yesterday.
Good luck with the lab 🙂
UFS and ZFS are one of the best FS available with the FreeNAS… I definitely like it 🙂
I fear that the speed is just not there, but I’ll see and do some testing this week end… -:l)
Actually you may be surprised, my testing with RC5 has shown it to be a little faster than OpenFiler when comparing RaidZ and Raid 5 NFS (I haven’t gotten iSCSI working yet on RC5).
I will have to test the 7.2 first, write down the results and then compare with the RC5.. This week end? Hopefully.. -:)
Great series of articles, thanks for writing them. I’m really interested in seeing some performance numbers.