
This is another How-to post to get you started on Ravello. Today we'll learn How-to Assign a Public IP Which Persist Across Reboots for Ravello VMs. It may be, after all, a good idea to access your VMs after creating them, no?
For those of you who don't know Ravello, just quickly recap what Ravello can do. Basically, Ravello has a highly optimized Hypervisor which allows you to run not only traditional VMs, but also nested ESXi hosts and have labs in the cloud at Ravello. With a bit of learning is possible to be up and running quite fast. That's why this small series of posts.
One of the first things you'll need to understand is how to get started with Ravello upload tool which can save your time. You don't have to create VMs from scratch if you have your VMs already configured and installed in your environment. But here is also how-to create a simple VM and Install VMware tools. The basics.
Usual use cases I can think of, to have a remote lab at Ravello are, that it avoids investment into hardware. You may not need to keep your workloads running after conducting your testing. You may want to test the latest patch or new version of software and just don't have enough capacity in your environment:
- Development and test
- Sales demos
- Training
- POCs/evaluations
- Deployment testing
How-to Assign a Public IP Which Persistent Across Reboots for Ravello VMs
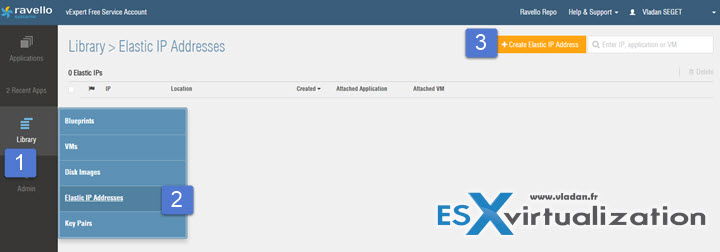
Ravello UI has a possibility to create a Persistent public IP for your VMs. The feature is called Elastic IP address. You can find it when you click on the Library > Elastic IP Addresses > Create Elastic IP Addresses.
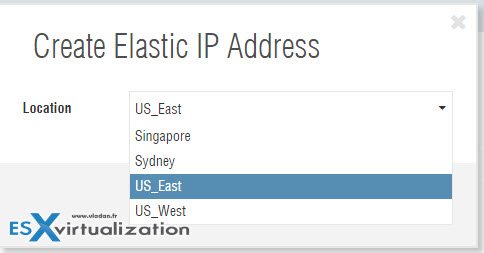
Click that button and chose a region from the drop-down list.
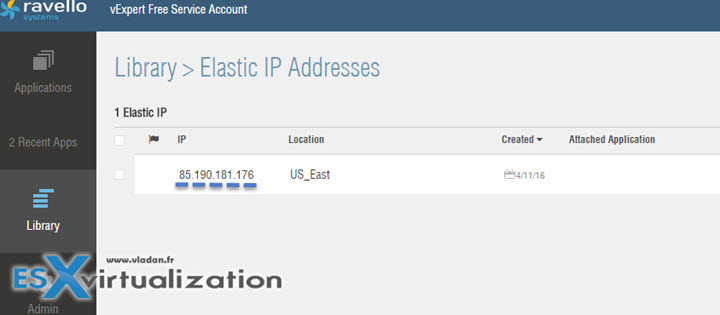
Then validate, and the address will appear on the list. For now, the colon Attached Application is empty as no VMs is using it. We must go and modify one of our VMs in order to use it.
Once you have created that Elastic IP you can go ahead and select your VM:
- Choose Network TAB
- Radio button Elastic IP
- Click the Select button > Choose the elastic IP address we just created (if there are several)
- Hit Save > Done!

You can see on the image above that the other option is Public IP. This IP address IS publicly available too, but it changes with each reboot.
Note that if you need to have several other VMs accessible from the Internet, and your requirement IS to keep the same IP address for each of those VMs, you must create additional Elastic IP addresses.
If you don't, then the Elastic IP address is simply not available (there is a lock icon). You can also see the Attached Application and VM.

The number of Elastic IP addresses is limited per account. In my case, I could see that I could create no more than two of those. It's obvious because Ravello's public IP's pool has limited number of public IP addresses….. The workaround could be to just check the public IP address radio button, but this option does not guarantee the same IP address after reboot.
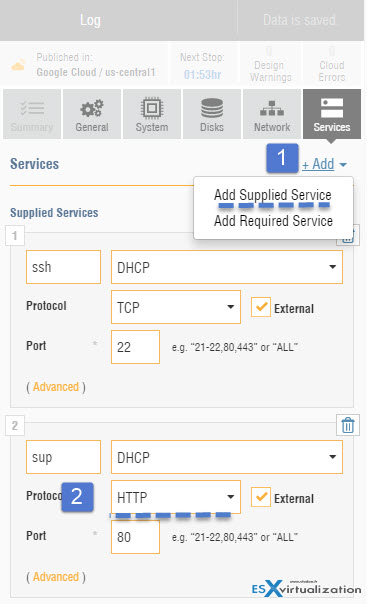
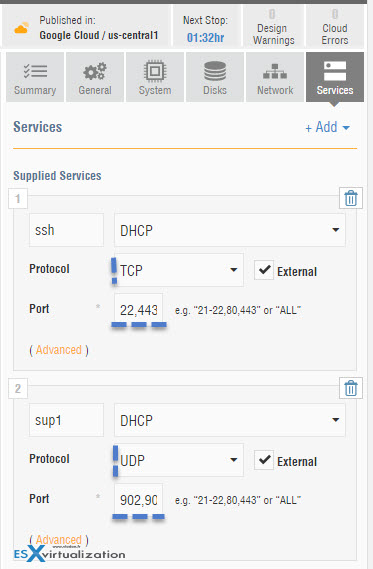
Let's Add also HTTP service to our VM so we can also access it via port 80. We can do that by selecting the Services tab > Add Supplied Service > Dropdown menu select Http
Click Save > Update and then fire up the web browser and copy paste the IP address. If you have installed a web server in that VM you should see the default web server page. Quite simple, isn't it.
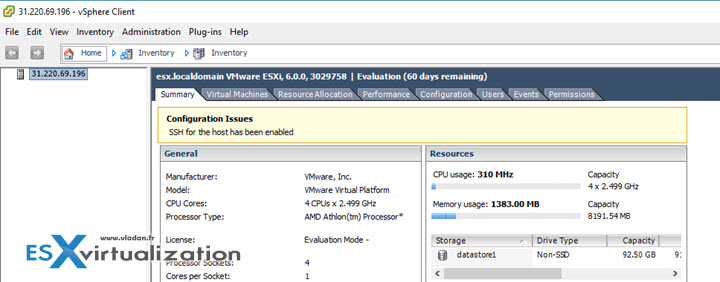
Now that you can access your VM from your laptop, desktop over the Internet, let me show you an example of nested ESXi accessible via vSphere client in Ravello…. For this to work you have to add some required ports (902, 903 TCP/UDP) as per vSphere 6.0 documentation.
I added those two services (with several ports separated by a coma):
So in my case I enabled:
- 22,443,902,903 for TCP
- And 902,903 for UDP
Note that I opened the 443 port so I can also access the nested ESXi via ESXi host client. Having the ESXi host client vib installed (now the ESXi 6.0 U2 has it already pre-installed) I can also access the nested ESXi over https via ESXi host client! Let's have a look…
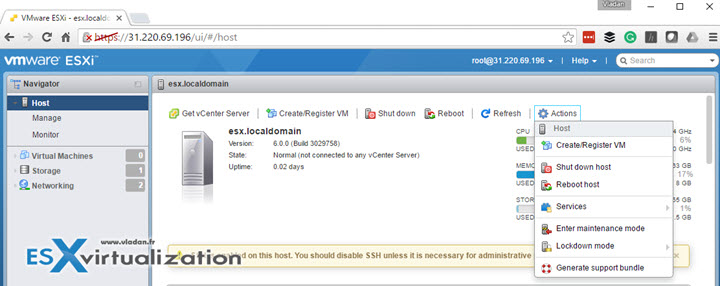
As you can see, the config of access to your VMs over the internet isn't difficult. Some folks might feel intimidated a bit when you're telling them about opening firewall ports at Ravello in ordere to access the VM from the outside. In reality, it's not difficult at all and I'm trying to detail it as much as I can so even folks that are newbies to IT or virtualization can learn the technology.
Even if Ravello systems were acquired by Oracle recently, this does not mean that you still cannot use those resources for your learning. And if the budget is a constraint, then Ravello is certainly a way to go as their pricing is quite unbeatable. Because when the lab is not running you do not have any costs. You pay only for running VMs.
And new update.
Update: New Post – Ravello Bare-Metal Option for VMware VMs
Check other posts about Ravello, to get you started:
- How to create a simple VM in Ravello?
- How to Get Started with Ravello Systems – VM Import Tool
- Run Nested ESXi in AWS or Google with RavelloSystems
- How-to Install VMware Tools on VM which runs in Ravello Cloud?
- How to configure RDP for your VM in Ravello Cloud
- How to Assign a Public IP Which Persist Across Reboots for Ravello VMs– (This post)
- How to create a multi VM application In Ravello
- How to Hot-Clone a VM and upload to Ravello Cloud
Enjoy.. -:) Stay tuned through RSS, and social media channels (Twitter, FB, YouTube)