
The Atlantis USX deployment is dead easy. It's a simple virtual appliance which gets deployed to your host via vSphere client. File > Deploy OVF template is your friend. You'll chose the obvious network informations and disk types (thin/thick/zeroeagerthick)… That's the easy part…. but what's next is not difficult but needs some planning. You'll need vmkernel port adapter in each host with a label and also virtual machine port group for the USX VM storage interface.
Don't forget the check out the Part 1: Atlantis USX in my lab – Introduction
Obviously lab environments does not always match real production environments, but we do our best. If you only have flat network or you got only 1Gb network it's ok for the test, but what you need to test the Hybrid volume types is minimum three hosts.
The default login/password combination is admin/poweruser.
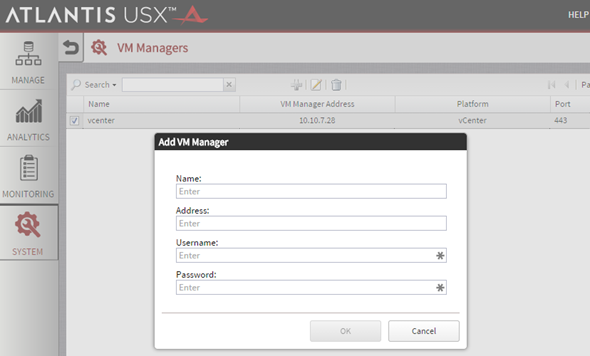
After login in it's the time to hook the solution to our vCenter(s). They call it “VM Manager”.
To add your vCenter, click the Plus icon and fill in the IP and login informations.
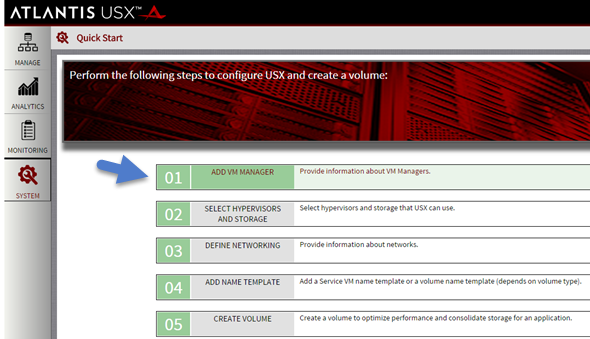
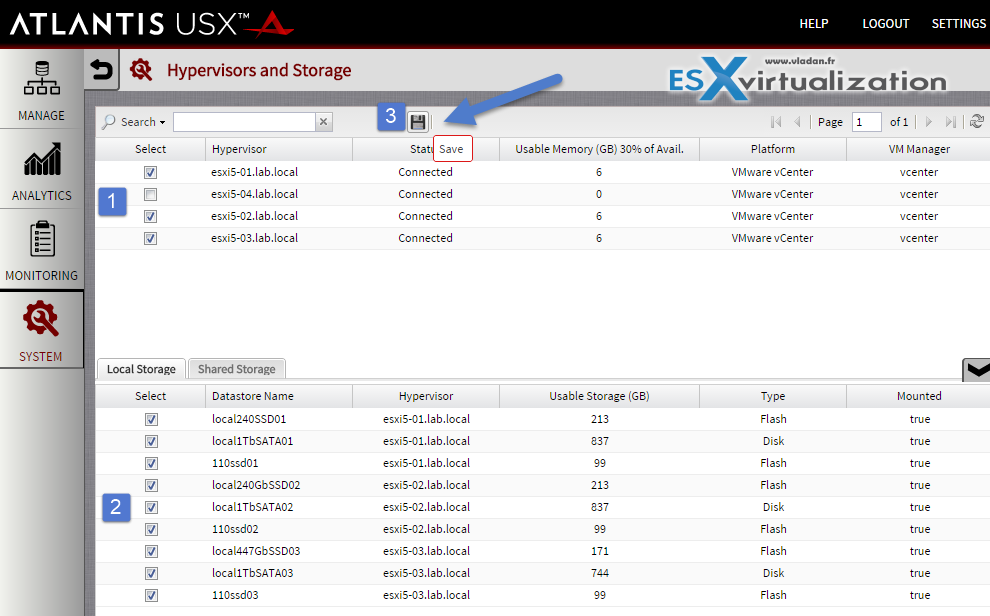
You then choose the second point – Select hypervisors and storage. Make sure to hit the floppy to save your settings… -:) You can click to enlarge…
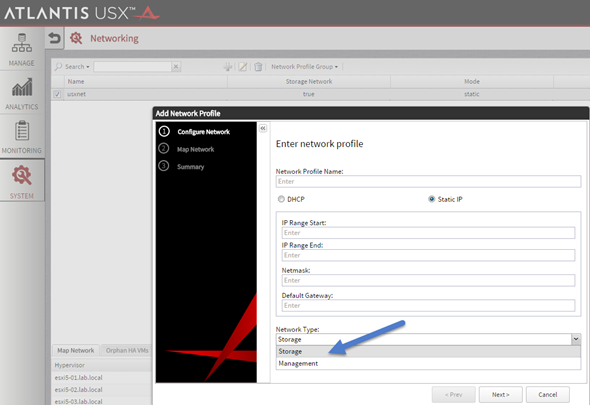
Third point is the network. You can create two network types (storage and management).
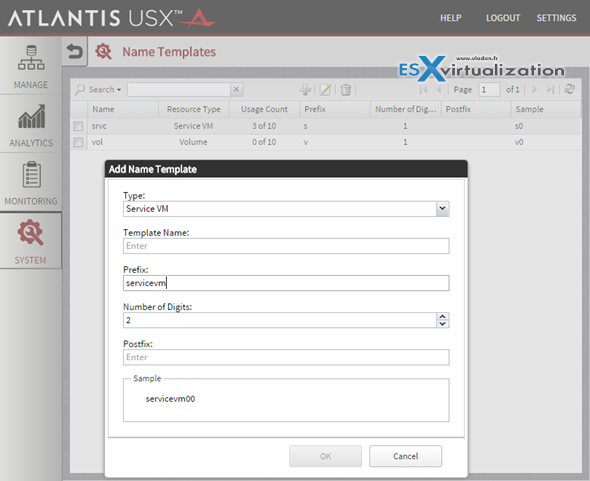
Fourth point is name template. The name template is necessary point as based on that template, the service VMs or the USX Volumes are named. The system and the scripting which runs under the cover needs that….
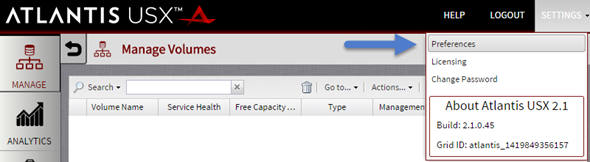
Before going to the point 5 – creating volume I should point out that you may (or may not) needs to go and take a look at the settings.
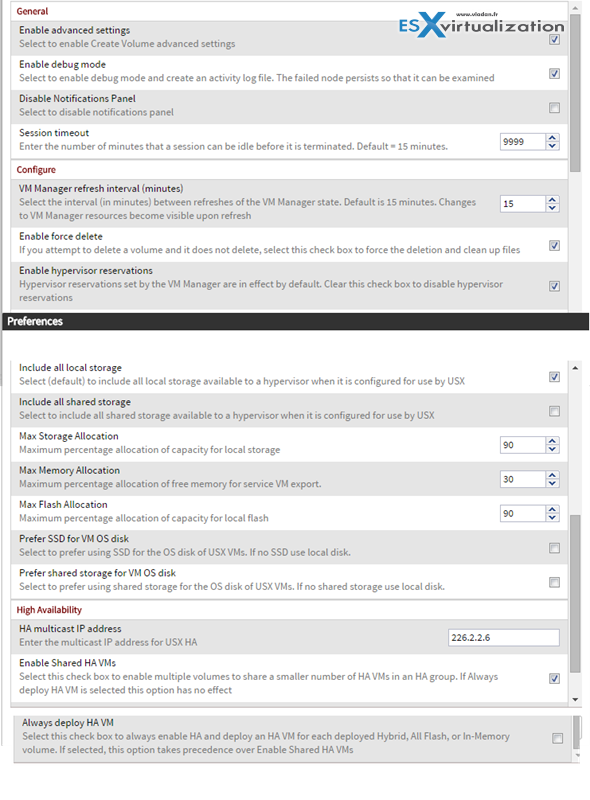
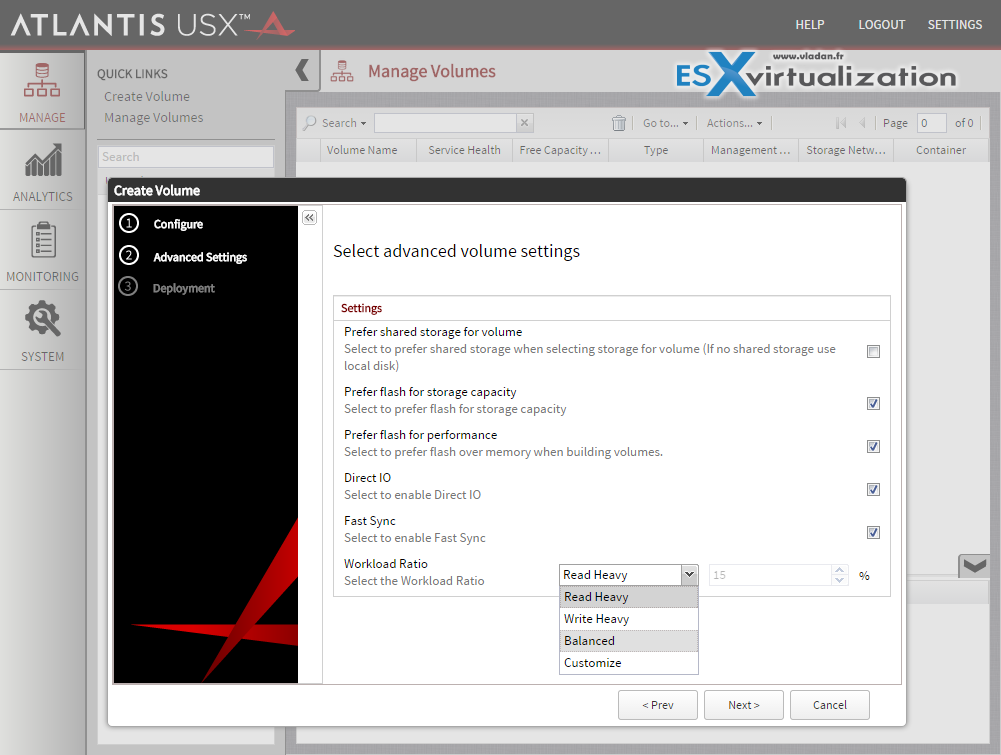
The advanced settings might be your interest as it gives you some more options which are otherwise hidden during the volume wizard assistant. During the creation of the volumes.
The preferences page gives you possibility also to tweak the maximum values that are allowed for the storage allocation for local storage, flash and memory. Quite exhaustive…
If you you can go and create a volume.

On the next page you have other options (those might differ in case you did not go into preferences page, like I did). You can check out the Atlantis computing blog on which preferences to check (uncheck) here. You'll find a whole series on the deployment as well.
Note that if you're using lab software (which is quite limited in my case) you might get an error that there is no host with enough memory. Then if no errors you should see some nice progress bars when deploying the volume…
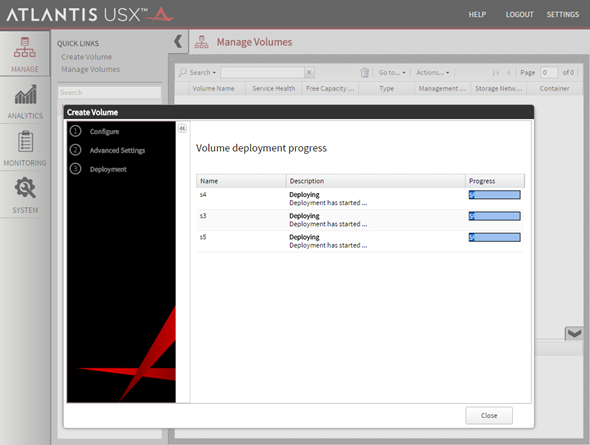
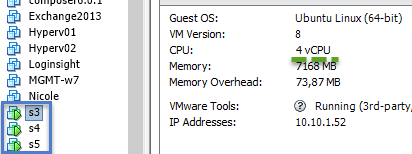
So in my case the service VMs got deployed first…. Here is the shot from my vSphere client.
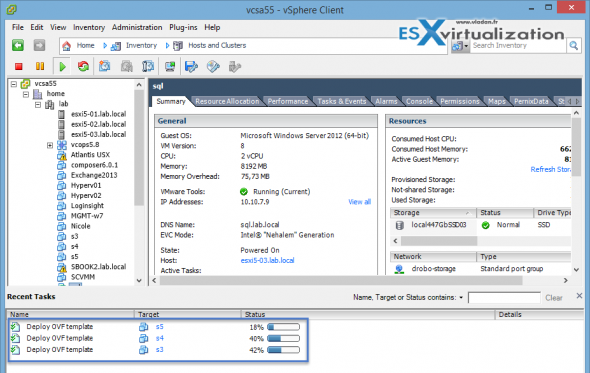
First the service VMs gets deployed. Each one on different host. Those VMs are quite beefed (16 vCPUs….)
Then the “reconfiguring service VM” message is on…
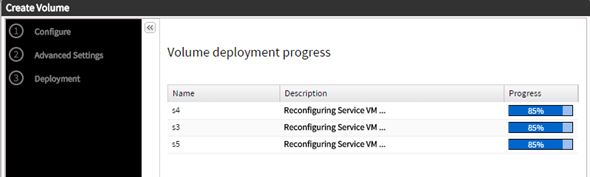
and the VM gets some more convenient resources… (4 vCPU).
Followed by PowerOn and Bootstrap…
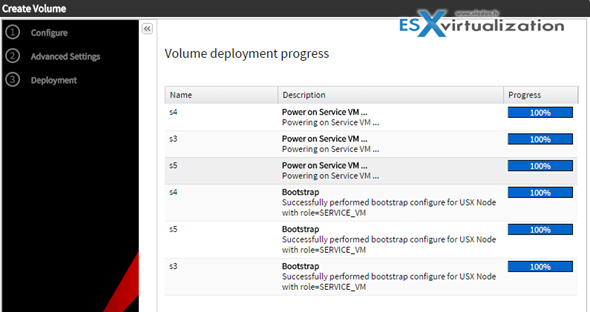
Next, the volume VM gets deployed, automatically. All this orchestration happens behind the scenes without user's interaction. Next time I should have probably shoot a small video -:).
![]()
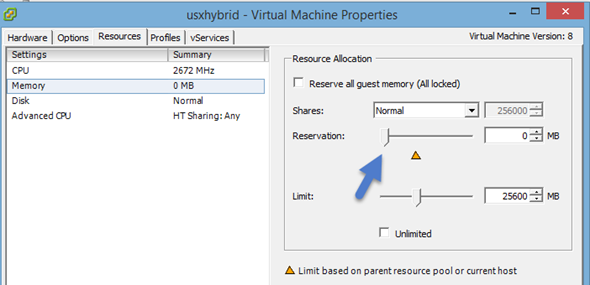
Note: I had to modify the reservation for the volume VM otherwise it would not power on. (which is no good in prod.) But in my lab which is memory constrained it was the only way to move on… So manual start of the VM and off we goes…
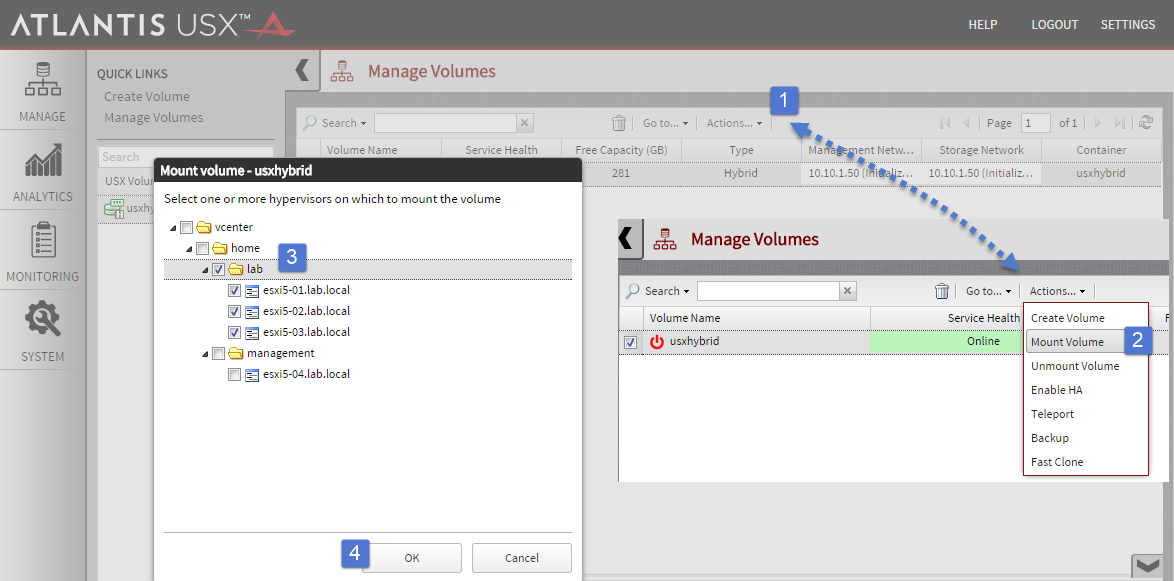
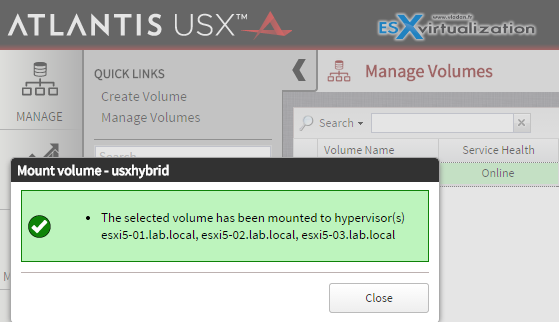
Once the VM fully initialized you should get a view like this where you can mount the volume to your selected ESXi hosts as an NFS share…
Message confirming that will appear…
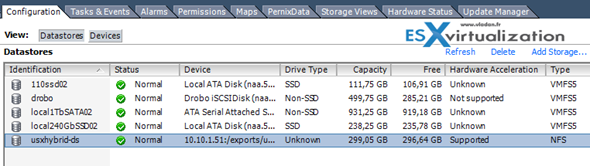
And to confirm, just check the storage any of those ESXi to which we asked to mount the NFS datastore…
So as you can see, the process is quite straightforward and without much hassle. It took me definitely more time to take the screenshots than to configure and mount the volume… -:)
Note the hardware acceleration column. It says supported. It's because I installed a VAAI plugin provided by Atlantis which can accelerate some VM operations like cloning etc… It's a simple vib which needs to be installed in each of your ESXi hosts which are connected to the NFS datastore. The installation is simple, you have the choice between CLI or you can use vSphere update manager for the job.
01. First, copy the plugin VIB file to the ESXi host, either by placing the VIB on an accessible HTTP server, or by using pscp or scp to copy the file to the ESXi host.
02. Set the acceptance level to accepted for the ESXi packages.
esxcli software acceptance set –level=accepted
03. Install the bundle using the following command:
esxcli software vib install –viburl=https://<path to vib>/AtlantisILIO_VAAI_Plugin_2.0-1.vib
Note that reboot of the host is necessary after installing the VIB.
Deploying VMs into this new volume does not need any write up as it does not differ from standard process of deploying a VM to shared storage or VSAN.
The Atlantis USX hyperconverged solution is relatively easy to Install and (or) implement. There is a lot of the “behind the covers” scripting and orchestrating going on behind the scenes and as an admin there is not much to worry about. Particular attention must be however taken when working with hosts which does not carry much RAM (my lab case) so then you're fairly limited in terms of volume creation. Because less RAM you have, lower capacity volumes you'll be able to create. If you don't have RAM capacity then you won't be able to create a volume. A message saying that there is no host with enough memory….
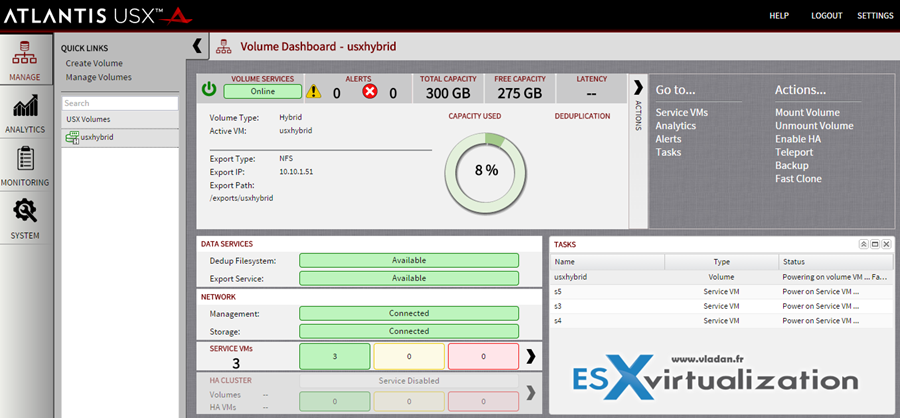
The final screen showing the volume details through the USX dashboard.
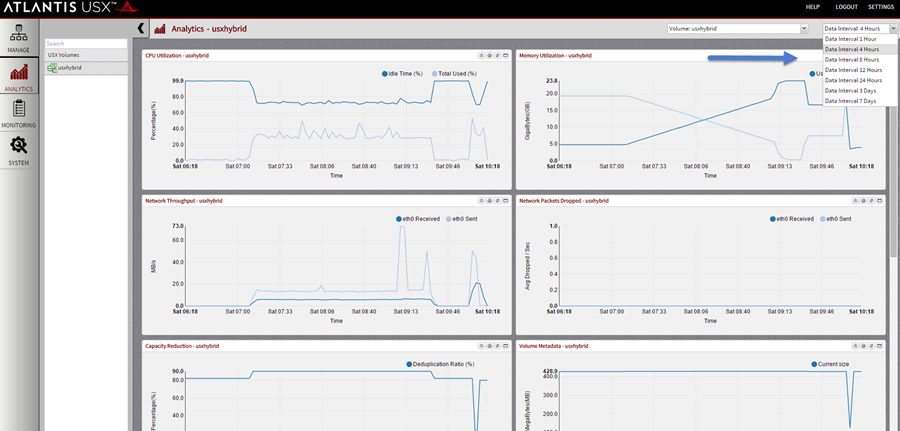
You also have an access to a analytics screen showing detaliled informations about your environment. A monitoring of CPU, Network throughput, Memory utilization, IOPs offload, disk throughput, disk utilization, etc…
Generaly I liked this solution by its relative simplicity of deployment, as the deployment process is reduced to the minimum. The 5 step to complete screen helps a lot in which taks to accomplish first and which one to carry on a next one. I haven't been able to create every possible volume type or try the large majority of the USX features (teleport, fastclone, HA ….) as my lab environment does not allow that.
Don't forget the check out the Part 1: Atlantis USX in my lab – Introduction.