
Welcome back to our VMware Certified Professional – VMware vSphere Foundation Administrator (2V0-16.25) study guide series! This section is part of the upcoming VCP-VVF Study Guide Page, which will be released as a PDF when completed—check it out at https://www.vladan.fr/vcp-vvf-administrator/.
Today, we’re continuing with Objective 4.1 – VVF: Deploy and Configure, focusing on Given a scenario, configure Supervisor within a Cluster. The Supervisor in VMware vSphere Foundation (VVF) 9.0 enables Kubernetes-based workload management within a vSphere cluster, allowing administrators to run containers and VMs side-by-side.
This objective is critical for the 2V0-16.25 exam, testing your ability to configure the Supervisor for modern application workloads. Building on our previous posts (Objective 4.1, Part 1 on identifying VVF components and Part 2 on deploying a VVF environment), we’ll provide detailed steps, practical tips, and exam-focused guidance using a realistic scenario, aligned with VMware’s official vSphere 9.0 documentation https://techdocs.broadcom.com/us/en/vmware-cis/vsphere/vsphere/9-0.html. Let’s get technical and configure the Supervisor!
Why Configuring Supervisor Matters
The Supervisor is a Kubernetes control plane integrated into vSphere, enabling containerized workloads and Tanzu Kubernetes Grid (TKG) clusters within a VVF 9.0 environment. It leverages vSphere’s infrastructure (compute, storage, networking) to manage containers and VMs consistently, supporting modern applications like microservices. Objective 4.1, Part 3, evaluates your ability to configure the Supervisor in scenarios requiring container support alongside traditional VMs. We’ll outline the steps to enable and configure the Supervisor on a vSAN-based cluster, ensuring you’re prepared for the exam and real-world administration.
Scenario: Configuring Supervisor in a VVF Cluster
Let’s use a typical exam scenario: A medium-sized business has deployed a VMware vSphere Foundation (VVF) 9.0 environment with a 4-host cluster (“VVF-Cluster”) running 20 VMs (10 web servers, 5 databases, 5 VDI desktops) on a vSAN datastore (“vSAN-Datastore”), managed by vCenter 9.0 (IP: 192.168.1.20, hosts at 192.168.1.10-13). The environment includes vSphere HA, DRS, and a vSphere Distributed Switch (“vDS-VVF”) with port groups for VM traffic (VLAN 20), vMotion (VLAN 30), vSAN (VLAN 40), and management (VLAN 10).
The business now wants to deploy containerized microservices for a new application alongside the existing VMs. You must: configure the Supervisor within “VVF-Cluster” to support Kubernetes workloads, including enabling Workload Management, configuring namespaces, and setting up storage and networking for containers. This scenario tests your ability to configure the Supervisor for the 2V0-16.25 exam.
Configuring Supervisor within a Cluster:
Configuring the Supervisor in a VVF 9.0 cluster involves enabling Workload Management, setting up namespaces, and configuring storage and networking for Kubernetes workloads. Below is a detailed guide with manual steps for the scenario, using the vSphere Client.
1. Verify Prerequisites for Supervisor
Purpose: Ensure the cluster meets the requirements for enabling the Supervisor, including licensing, hardware, and networking.
Detailed Process:
- Check Licensing: Confirm VVF 9.0 licensing includes Supervisor capabilities (included in vSphere Foundation).
- Navigate to Home → Administration → Licensing → Licenses in vCenter (192.168.1.20) to verify the VVF license is assigned.
Verify Cluster Configuration:
- Ensure “VVF-Cluster” has:4 ESXi 9.0 hosts (192.168.1.10-13) with 2 CPUs, 128 GB RAM, 1 NVMe SSD (400 GB cache), 2 SSDs (1 TB capacity) per host.
- vSAN enabled with “vSAN-Datastore” (~2 TB usable capacity, Objective 2.3, Part 3).
- vSphere HA and DRS enabled (Objective 4.1, Part 2).
- Check Hosts and Clusters → VVF-Cluster → Summary for host and service status.
Verify Networking:
- Confirm “vDS-VVF” has port groups for VM traffic (VLAN 20), vMotion (VLAN 30), vSAN (VLAN 40), and management (VLAN 10).
- Ensure 10 GbE NICs with MTU 9000 for vMotion and vSAN (Objective 2.4, Part 1).
Check Storage:
- Verify vSAN storage policies exist (e.g., “Web-VDI-Policy” for RAID-1, “DB-Policy” for RAID-5, Objective 2.3, Part 4).
- Ensure sufficient capacity for container workloads (~200 GB for microservices).
Scenario Example: Verify that “VVF-Cluster” has a VVF license, 4 compatible hosts, vSAN enabled, and networking configured for Supervisor deployment.
Study Tip: Memorize Supervisor prerequisites (VVF license, 3+ hosts, vSAN, vDS) and practice checking them in VMware Hands-On Labs https://labs.hol.vmware.com/.
2. Enable Workload Management (Supervisor)
Purpose: Enable the Supervisor to integrate Kubernetes control plane functionality into “VVF-Cluster” for containerized workloads.
Detailed Process:
Access Workload Management:
- Log in to vCenter at https://192.168.1.20/ui using SSO credentials (e.g., [email protected]).
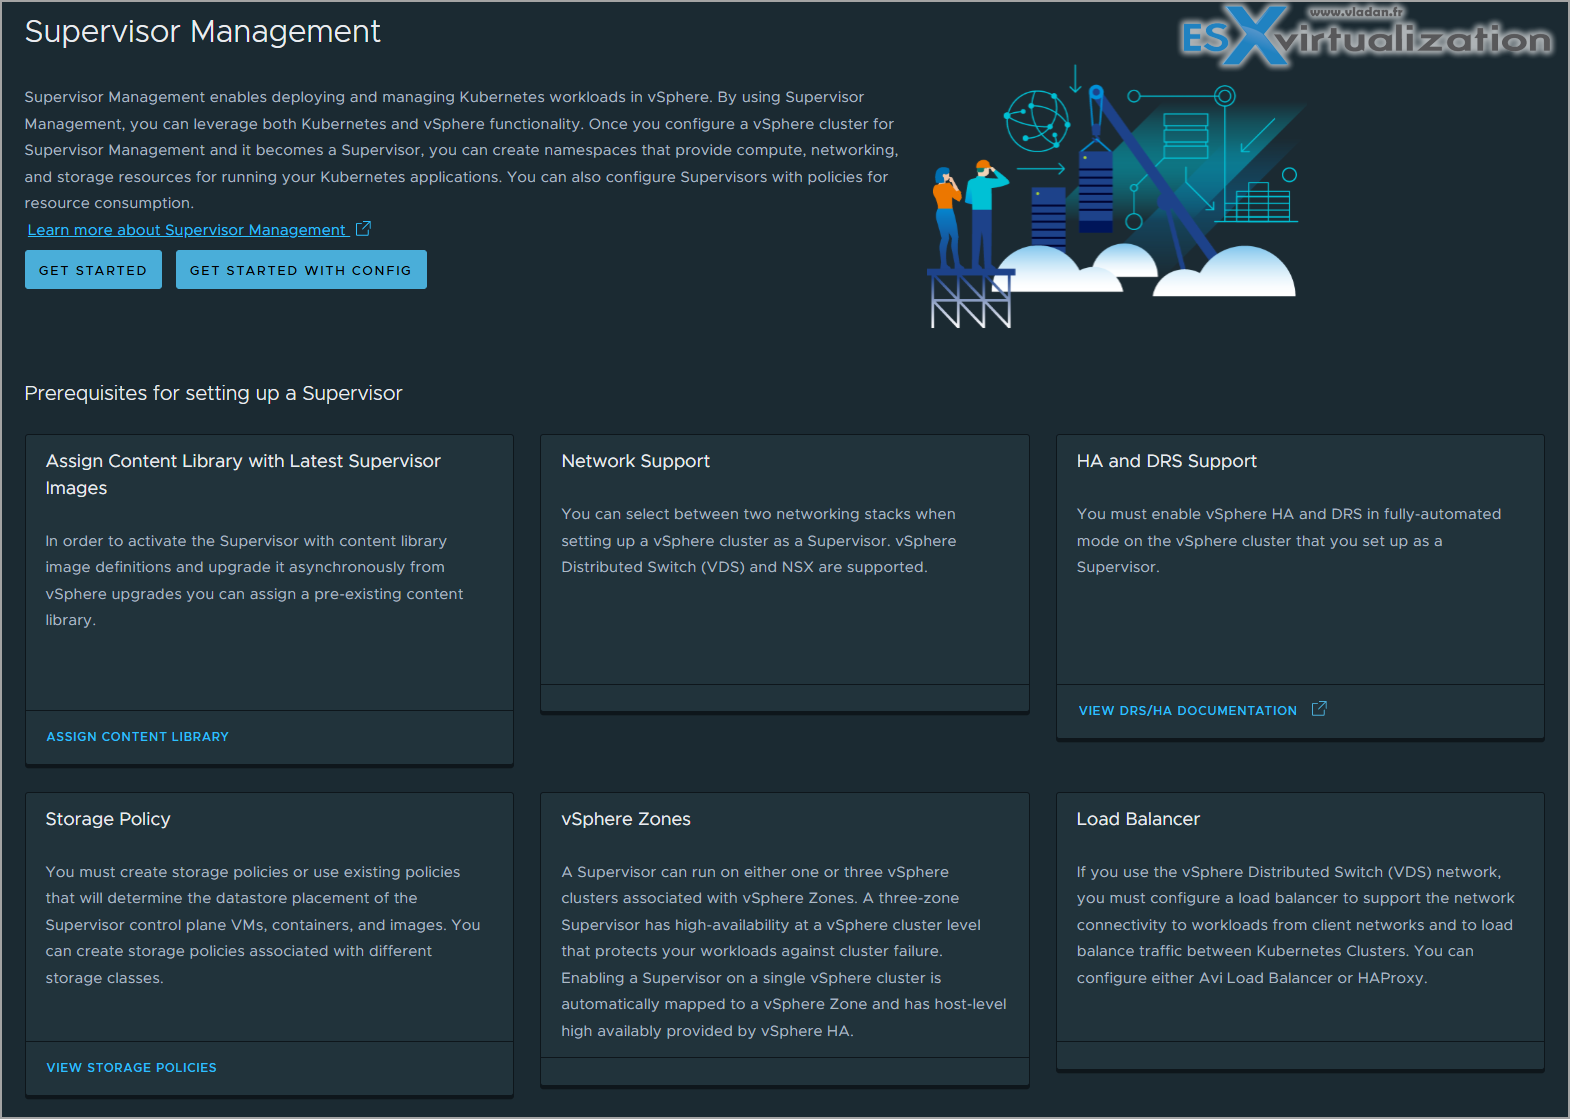
- Navigate to Menu → Workload Management → Get Started.
Example getting started screen
Configure Supervisor:
- Select VVF-Cluster and click Set Up.
- Control Plane Size: Choose Small (2 vCPUs, 8 GB RAM) for the microservices workload (suitable for small-scale deployments).
Networking:
- Load Balancer: Select NSX-T or HAProxy (use HAProxy for VVF simplicity, deployed as a VM).
- Network: Assign “vDS-VVF” with “VM-Traffic” port group (VLAN 20) for Supervisor control plane and workload traffic.
- IP Range: Specify 192.168.20.50-100 for Kubernetes control plane and services.
Storage:
- Select “vSAN-Datastore” as the storage backend.
- Choose “Web-VDI-Policy” (FTT=1, RAID-1, thin provisioning) for Supervisor control plane VMs.
Management Network:
- Use “Management” port group (VLAN 10, IPs 192.168.10.50-53 for control plane VMs).
- Click Finish to deploy the Supervisor (takes ~10-15 minutes).
Verification:
- Check Workload Management → Supervisors → VVF-Cluster for “Running” status.
- Verify Hosts and Clusters → VVF-Cluster shows 3 Supervisor control plane VMs (e.g., “supervisor-vm-1” to “supervisor-vm-3”).
Scenario Example: Enable Workload Management on “VVF-Cluster” with a Small control plane, HAProxy, “vDS-VVF” (VLAN 20), and “vSAN-Datastore” with “Web-VDI-Policy”.
Study Tip: Practice enabling the Supervisor in a lab, focusing on networking and storage settings. Understand control plane sizing (Small, Medium, Large) for the exam.
3. Configure Namespaces for Kubernetes Workloads
Purpose: Create namespaces to isolate and manage containerized microservices, providing resource limits and user access.
Detailed Process:
Create a Namespace:
- Navigate to Workload Management → Namespaces → New Namespace.
- Name: “Microservices-Namespace”.
- Cluster: Select “VVF-Cluster”.
- Resource Limits: Set CPU (10 GHz), memory (20 GB), and storage (200 GB) to support microservices containers.
- Permissions: Add a user group (e.g., “[email protected]”) with Edit access for deploying workloads.
Configure Storage Policy:
- Assign “Web-VDI-Policy” (FTT=1, RAID-1) to the namespace for container storage.
- Navigate to Namespaces → Microservices-Namespace → Storage → Add Storage and select the policy.
Verification:
- Check Workload Management → Namespaces → Microservices-Namespace for resource and policy settings.
- Verify user access: Log in as a dev-team user and confirm ability to deploy workloads.
Scenario Example: Create “Microservices-Namespace” with resource limits (10 GHz CPU, 20 GB RAM, 200 GB storage) and “Web-VDI-Policy” for microservices containers.
Study Tip: Memorize namespace configuration steps and their role in isolating workloads. Practice creating namespaces in a lab for the exam.
4. Configure Networking for Supervisor Workloads
Purpose:Ensure containerized workloads have network connectivity via the Supervisor’s networking stack.
Detailed Process:
Configure Load Balancer:
If using HAProxy (deployed in Step 2), verify its VM is running: Hosts and Clusters → VVF-Cluster → haproxy-vm.
- Configure HAProxy IP range (e.g., 192.168.20.200-250) for Kubernetes services.
- Navigate to Workload Management → Supervisors → VVF-Cluster → Configure → Load Balancer and confirm settings.
Assign Port Group:
- Ensure container workloads use the “VM-Traffic” port group (VLAN 20) on “vDS-VVF”.
- Verify Networking → vDS-VVF → VM-Traffic for connectivity and VLAN settings.
Verification:
- Deploy a test container in “Microservices-Namespace” (e.g., using kubectl: kubectl run test-pod –image=nginx).
- Check Workload Management → Namespaces → Microservices-Namespace → Workloads for pod status.
- Ping the pod’s service IP (e.g., 192.168.20.200) to confirm connectivity.
Scenario Example: Configure HAProxy and “VM-Traffic” port group (VLAN 20) for microservices connectivity in “Microservices-Namespace”.
Study Tip: Understand the Supervisor’s networking stack (load balancer, port groups). Practice deploying a test pod in a lab for the exam.
5. Test and Verify Supervisor Functionality
Purpose: Validate that the Supervisor supports containerized workloads alongside VMs in “VVF-Cluster”.
Detailed Process:
- Deploy a Test Workload:Log in to the Supervisor using kubectl (obtain credentials from Workload Management → Supervisors → VVF-Cluster → Summary).
- Run: kubectl -n Microservices-Namespace run nginx-pod –image=nginx –port=80.
- Create a service: kubectl -n Microservices-Namespace expose pod nginx-pod –type=LoadBalancer.
Verify Workload:
- Check Workload Management → Namespaces → Microservices-Namespace → Workloads for “nginx-pod” status.
- Access the service IP (e.g., 192.168.20.200) to confirm the NGINX welcome page.
Check Cluster Health:
- Verify Cluster → Monitor → vSAN → Health for storage health.
- Check Cluster → Monitor → vSphere HA to ensure HA protects Supervisor VMs and workloads.
- Monitor Cluster → Monitor → Performance for resource usage (CPU, memory, storage).
Scenario Example: Deploy an NGINX pod in “Microservices-Namespace”, expose it via a LoadBalancer service, and verify connectivity and cluster health.
Study Tip: Practice deploying a simple Kubernetes workload in a lab. Understand how Supervisor integrates with vSAN and HA for the exam.
Exam Scenarios and Tips
Scenarios:
Scenario: Supervisor deployment fails. What should you check?
Answer: Verify VVF license, vSAN health, vDS configuration, and sufficient resources (CPU, memory, storage).
Scenario: Containers cannot connect to the network. What’s a likely issue?
Answer: Misconfigured load balancer (e.g., HAProxy) or incorrect port group (VLAN mismatch).
Scenario: Developers cannot deploy workloads. What should you configure?
Answer: Namespace permissions for the dev-team user group.
Study Tips:
Practice configuring the Supervisor in VMware Hands-On Labs https://labs.hol.vmware.com/.
Memorize: Supervisor prerequisites, Workload Management setup, namespace configuration, and networking requirements.
Review VMware vSphere 9.0 documentation https://techdocs.broadcom.com/us/en/vmware-cis/vsphere/vsphere/9-0.html for Supervisor details.
Focus on scenario-based questions involving Kubernetes integration and workload deployment.
Resources:VCP-VVF Study Guide Page: https://www.vladan.fr/vcp-vvf-administrator/
VMware vSphere 9.0 Documentation: https://techdocs.broadcom.com/us/en/vmware-cis/vsphere/vsphere/9-0.html
Sample Exam Questions
What is a prerequisite for enabling the Supervisor in a VVF 9.0 cluster?
A. vSphere Standard Switch
B. vSAN Datastore
C. Thin Provisioning
D. Content Library
Answer: B. vSAN Datastore.
Which component provides networking for Supervisor workloads?
A. vSphere HA
B. vSphere Distributed Switch
C. VMkernel Adapter
D. vSAN Policy
Answer: B. vSphere Distributed Switch.
What is the purpose of a namespace in the Supervisor?
A. Configures vSAN storage
B. Isolates Kubernetes workloads
C. Enables DRS automation
D. Manages ESXi hosts
Answer: B. Isolates Kubernetes workloads.
Final Words
Configuring the Supervisor within a VVF 9.0 cluster is part of the knowledge for the 2V0-16.25 exam and modern virtualization administration. By enabling Workload Management, setting up namespaces, and configuring storage and networking, you can support containerized workloads alongside VMs. The upcoming VCP-VVF Study Guide Page, available at https://www.vladan.fr/vcp-vvf-administrator/, will be released as a PDF to support your preparation. Stay tuned for the next part of Objective 4.1! Happy studying, and good luck on your VCP-VVF journey!
More posts from ESX Virtualization:
- 5 New VMware Certifications for VVF and VCF
- VMware Alternative – OpenNebula: Powering Edge Clouds and GPU-Based AI Workloads with Firecracker and KVM
- Proxmox 9 (BETA 1) is out – What’s new?
- Another VMware Alternative Called Harvester – How does it compare to VMware?
- VMware vSphere 9 Standard and Enterprise Plus – Not Anymore?
- VMware vSphere Foundation (VVF 9) and VMware Cloud Foundation (VCF 9) Has been Released
- Vulnerability in your VMs – VMware Tools Update
- VMware ESXi FREE is FREE again!
- No more FREE licenses of VMware vSphere for vExperts – What’s your options?
- VMware Workstation 17.6.2 Pro does not require any license anymore (FREE)
- Migration from VMware to another virtualization platform with Veeam Backup and Replication
- Two New VMware Certified Professional Certifications for VMware administrators: VCP-VVF and VCP-VCF
- Patching ESXi Without Reboot – ESXi Live Patch – Yes, since ESXi 8.0 U3
- Update ESXi Host to the latest ESXi 8.0U3b without vCenter
- Upgrade your VMware VCSA to the latest VCSA 8 U3b – latest security patches and bug fixes
- VMware vSphere 8.0 U2 Released – ESXi 8.0 U2 and VCSA 8.0 U2 How to update
- What’s the purpose of those 17 virtual hard disks within VMware vCenter Server Appliance (VCSA) 8.0?
- VMware vSphere 8 Update 2 New Upgrade Process for vCenter Server details
- VMware vSAN 8 Update 2 with many enhancements announced during VMware Explore
- What’s New in VMware Virtual Hardware v21 and vSphere 8 Update 2?
- vSphere 8.0 Page
- ESXi 7.x to 8.x upgrade scenarios
- What is The Difference between VMware vSphere, ESXi and vCenter
- How to Configure VMware High Availability (HA) Cluster
Leave a Reply