The way of installing or creating ESXi hosts as VMs (mean nested virtualization) has changed many times in the past. But as VMware introduces new features and improvements in every release of vSphere, the time has come again to check what's the best practices and How to create a nested ESXi 6.5 template. It is useless to remind you that running nested ESXi is unsupported, but very useful when learning VMware virtualization technology.
You can have a powerful workstation or server and run a complete VMware cluster of nested hypervisors with, on the top, small VMs allowing you to test all VMware virtualization technologies such as vMotion, HA, DRS or VSAN. All this with a single physical host.
By having a template which is ready to be imported, you save time when creating multiple ESXi hosts. Of course, it is not the only way to create and spin virtual ESXi hosts. You could use PowerCLI scripting or VMware AutoDeploy (with the new GUI) to deploy stateless ESXi hosts, but in this post we will focus only on the template creation.
This post is meant to help new people coming to learn some virtualization, by using VMware technology. Whether you saw this information elsewhere, it is possible. I'm still making it available for free and for everyone interested in learning.
There are two ways that you can proceed and use two different VMware Products to create nested ESXi 6.5 template:
- Use VMware Free ESXi hypervisor – Installed on bare metal hardware. Good for 24/7 lab and the performance are usually better than when using desktop virtualization products. However, you'll need to access this system via a management workstation/laptop in order to manage this system.
- Use VMware Workstation (Player) – When you have a “beefed” workstation and enough RAM and SSD capacity you can easily build nested vSphere 6.5 environment and still benefit of dedicated Windows/Linux/Hackintosh system to do some family videos or gaming. Don't expect to have as good speed out of it as VMware Workstation (Player) is what's called “second level hypervisor” product it means that it is not installed directly onto the bare metal hardware but at the top of an Operating System. I've built such a system two years ago – Lab Time – 64Gb RAM Box With Hexa Core CPU.
How to create a nested ESXi 6.5 Template – The steps:
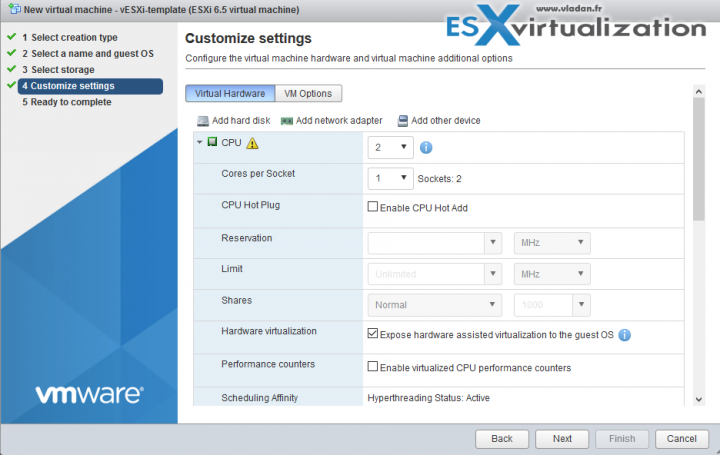
I'm demonstrating the creation of the template via the ESXi Host Client which is now built-in, but you can perfectly use the old Windows C++ client as well, except the part where you need to check the box on CPU > Hardware virtualization > Expose hardware assisted virtualization to the guest. It is useful if you're planning to have a “double-nested” environment and to run a VM on the top of the virtual ESXi host.
Here is the walkthrough.
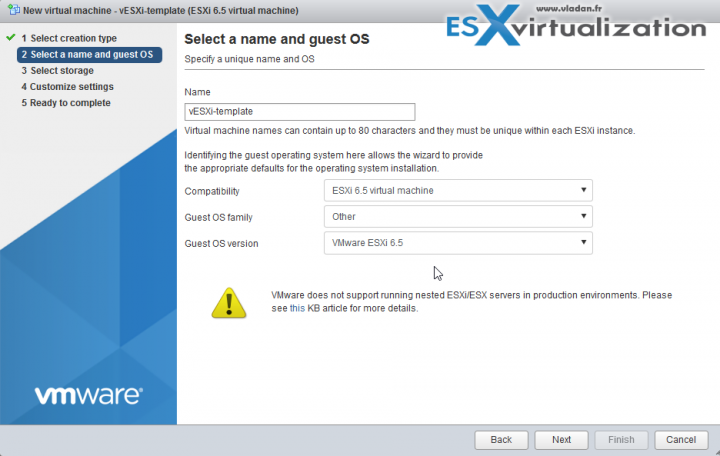
After picking the Guest OS version “VMware ESXi 6.5” you'll get to pick a storage (I'm not showing this screen), and then you'll have a screen where you'll need to change few things.
You'll need to:
- Set 2 vCPU
- Check the box “Expose hardware assisted virtualization to the guest OS
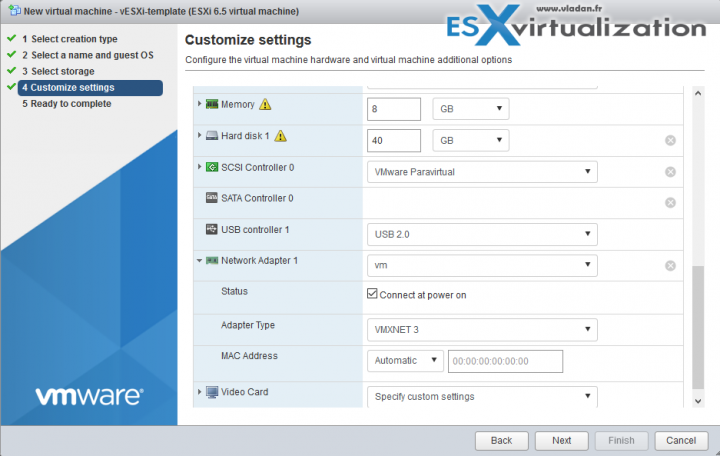
Then when you scroll further down, you can add more memory. Especially if you prefer turning up VMware VSAN. You might notice that now as networking adapter there is the VMXNET3. Previously the E1000 was the recommended option.
The VMXNET3 apparently has better performance and lower CPU usage. Also, the use of VMware paravirtual is the default option for nested ESXi. As you know, VMware paravirtual adapter has higher throughput and lower CPU usage too.
Click next and then finish to end the creation of the template. Note that it is not actually a template but regular VM which we will export. There is no possibility on the ESXi free version to convert the regular VM into a template, but there is the export. We will use that.
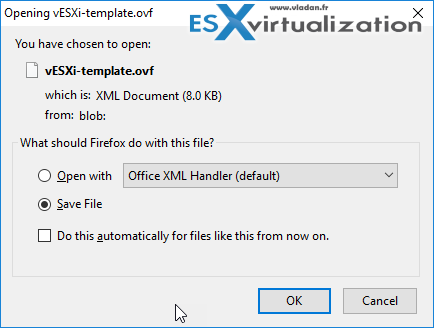
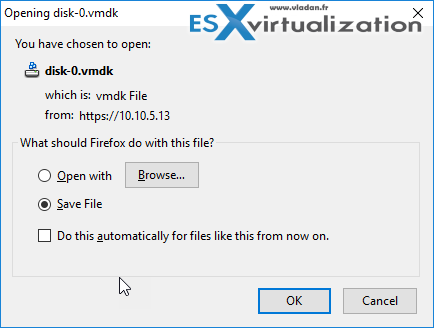
Then you'll receive a small prompt that you'll have two pop ups.
Here is the first one. It is the OVF file.
And here is the second one, which is the VMDK file.
We are done.
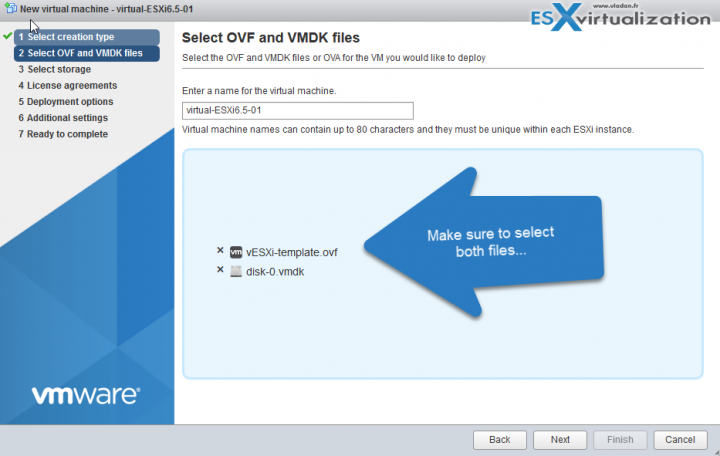
So when you want to deploy a new ESXi VM you can use it. How? Simply when creating the new VM, select the second option – “Deploy a virtual machine from an OVF or OVA file.
Then select the OVF we have just created as well as its associated virtual hard disk (2 files!!).
After the template is deployed you can attach and connect ESXi 6.5 ISO and start the installation. We have done this many times in the past and it's pretty easy.
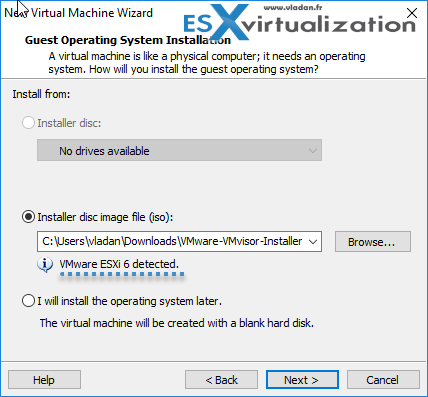
VMware Workstation (Player) Template
When selecting the ESXi 6.5 iso, the Workstation (Player) software detects ESXi 6.0 software. (not ESXi 6.5). Also, you don't have a possibility to select VMware Paravirtual driver or VMXNET 3 which are features available only when creating the template from a “bare metal” ESXi host.
But still, it is a working scenario and useful when you can't afford to spend money on dedicated ESXi hardware. I'd expect that next version of VMware Workstation will be updated and will provide the latest ESXi 6.5 OS template.
You can check our dedicated vSphere 6.5 page here.
Other ESX Virtualization posts:
- Three Ways to Enable ESXi Shell and Timeout
- Free VMware OS Optimization Utility
- How to create a custom ESXi 6.5 ISO with VMware Image Builder GUI
- VMware VSAN configuration steps with nested ESXi hypervisors
Also
Stay tuned through RSS, and social media channels (Twitter, FB, YouTube)

