pfSense is one of the most powerful open-source firewalls and routers available. Running it inside VMware Workstation Pro 17 (the current 2025 version) is an excellent way to build a lab or even protect a small home/office network without dedicating physical hardware. I wanted to write this blog post years ago, but you know, how it is. You get aped by other projects, other articles, so hey, I'm a human only… -:). But here it is. Quick write up so some students can take it and learn from it. This post is detailed so if you're advanced and know what you doing, it will probbably not show you much, but for those who startin their carreer it might be useful. Please share -:).
I'm running a nested lab only on a beefed PC from 3 years ago (64Gb of RAM, 16-core AMD 5950X). For me, its flexible and I can use the same system for other tasks. The underlying OS is W11. It is a homelab on steroids, ok, but know that you can also set-up a backups -:). In fact, users running nested labs with VMware Workstation can also backup their VMs on regular bases automatically with a software called Vimalin. I have done the writed up couple of years ago, in case you missed it – How To backup running VMs on VMware Workstation with schedule.
But let's go back to our lab and our pfSense article.
Prerequisites
Let's talk about what you need. First, you need your VMware Workstation Pro to be up and running. it's a free software now. You can download it at VMware/Broadcom (a free account is necessary).
- Windows 10/11 or Linux host with decent specs (at least 8 GB RAM, quad-core CPU recommended)
- VMware Workstation Pro 17 installed (latest 2025 build)
- pfSense ISO (download the latest stable version from https://www.pfsense.org/download/) → Choose: Architecture = AMD64, Installer = DVD Image (.iso), latest stable version
- Unzip the ISO so you can attach it to VMware Workstation as a source.
Create the pfSense Virtual Machine
- Open VMware Workstation Pro → “Create a New Virtual Machine”
- Choose “Typical” → Next
- Select “Installer disc image file (iso)” → browse to your downloaded pfSense ISO → Next
- Guest operating system: It will detect FreeBSD Automatically (if not, select “FreeBSD (64-bit)” as pfSense is FreeBSD-based)
- Name the VM (e.g., “pfSense-Firewall”) and choose location
- Disk size: Default 16–32 GB is fine (you can expand later)
- Customize Hardware before finishing:
- Memory: Minimum 2 GB (4 GB+ recommended)
- Processors: 2–4 cores
- Network Adapter 1 (WAN): Set to “NAT” or “Bridged” (Bridged if you want real public IP passthrough)
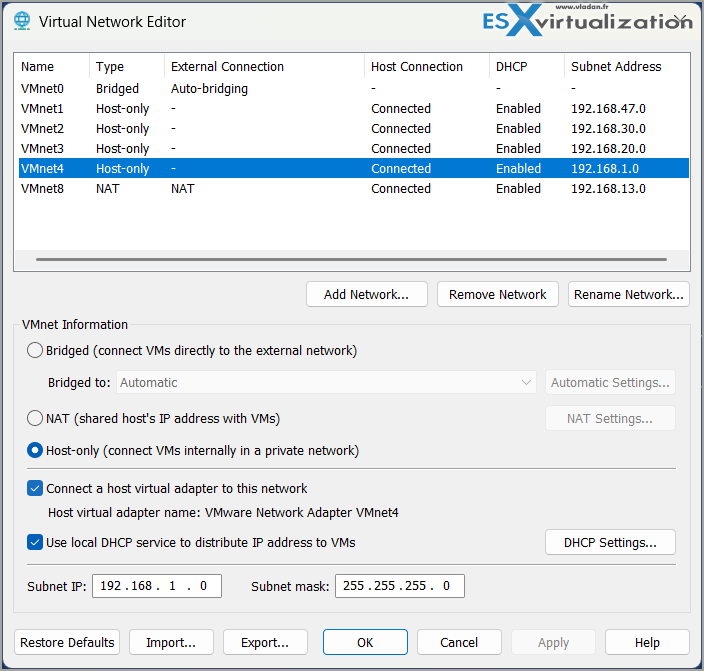
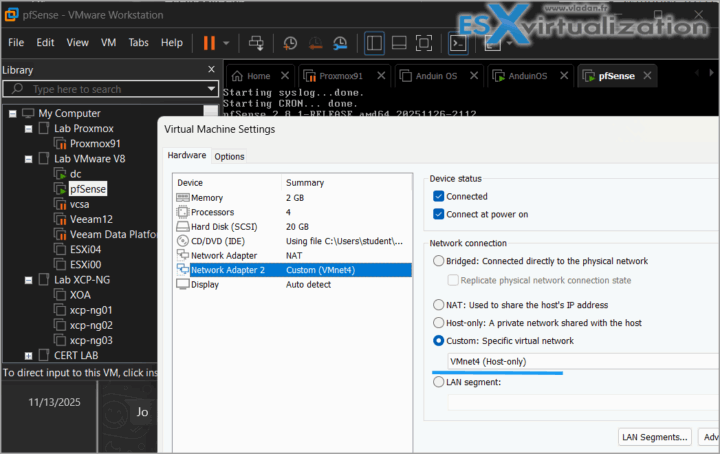
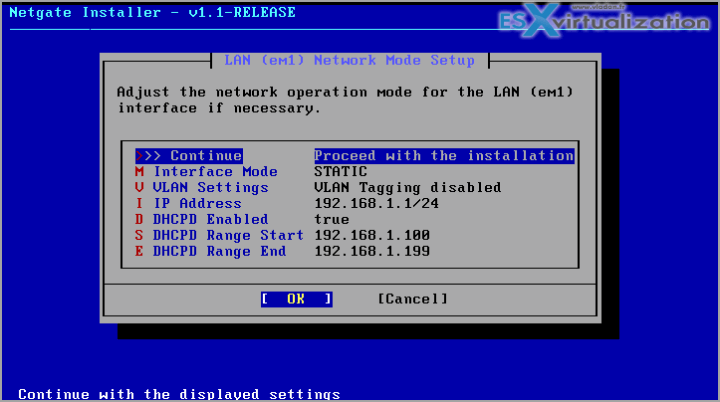
- Network Adapter 2 (LAN): Set to “Host-only” or create a new VMnet (recommended for isolated lab) or “Bridged” if you want your physical LAN behind pfSense. I put mine on VMnet4 which I adapted to fit the 192.168.1.x network, as my other VMNet networks were already occupied.
8. In VMware Workstaition: Edit > Virtual Network Editor > Change Settings button
I had to put the LAN interface on VMnet4 because the VMnet1-3 were already used for other lab purposes…
9. Then put the second network adapter (this will be the LAN) on this network.
(Optional) Add a third adapter if you want DMZ or more zones later.
Finish and power on the VM
You will need your internet connection to be active.
You should have the WAN bridged and LAN on host only. Then the recap should looks like this:
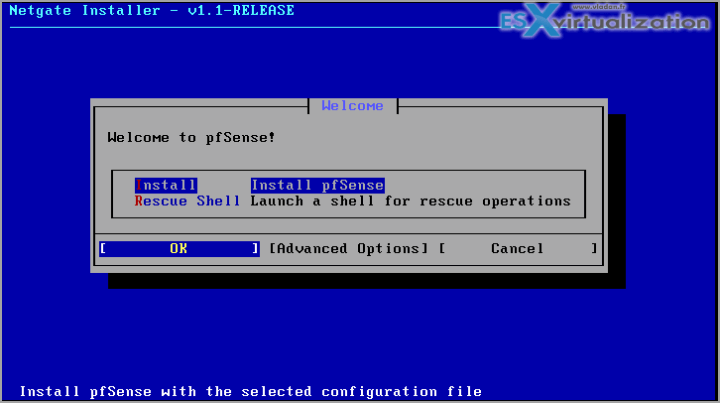
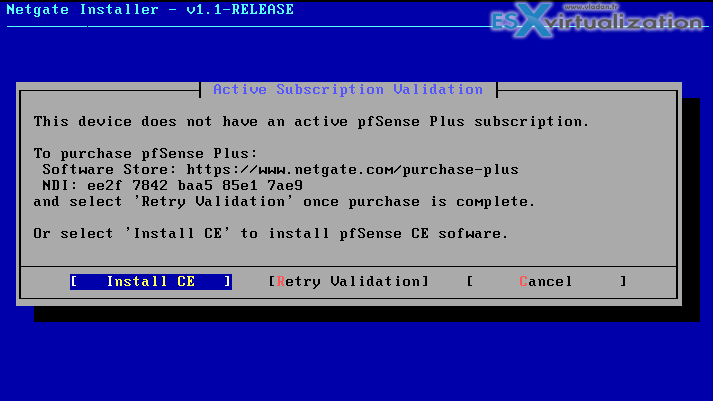
The Community Edition (CE) is pre-selected. Just hit enter. Or, if you're installing a commercial edition, you should have and ID ….
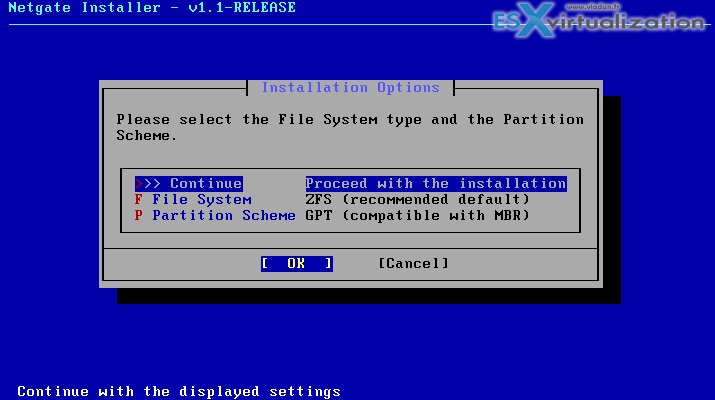
The file system – here we keep it simple.
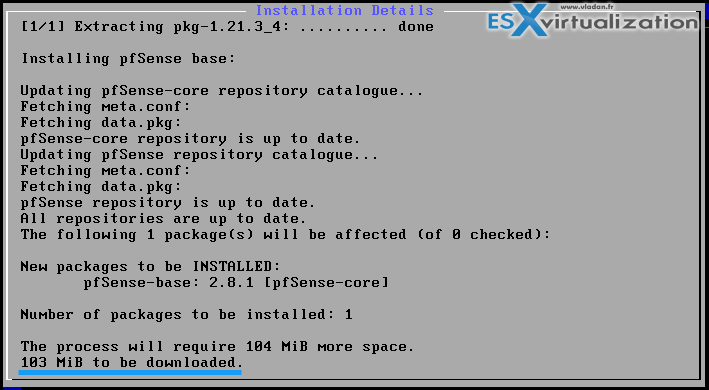
and then we need to download some packages from the internet….
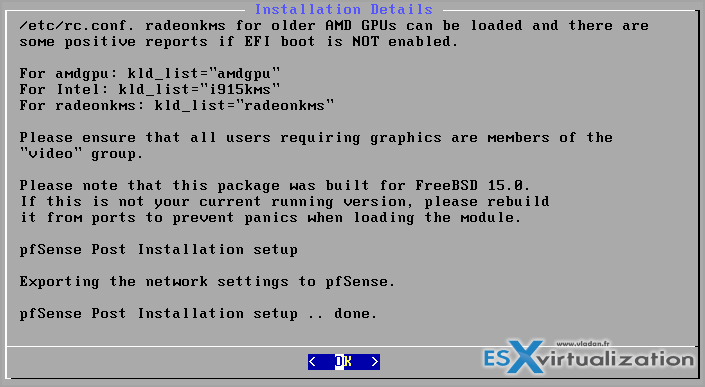
And then finish.
Hit enter to reboot. While halted, I edit the VM's config and removed the USB and Soundcard (not needed).
Setup a management VM
You need to be on the 192.168.1.x network to access the default login screen. Any VM you already have on your VMware Workstation up and running (probbably currently on the “bridged or “NAT” network, you will need to change it to the “custom” and pick the VMnet4 (in my case) for VM to access the LAN interface of your pfSense.
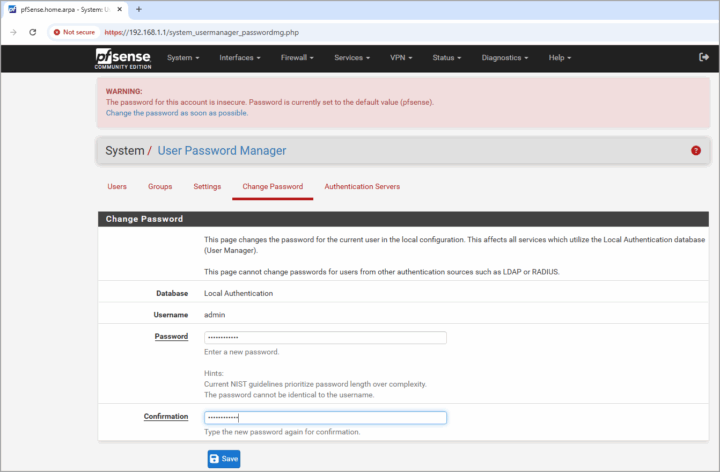
Default user name and password for the pfSense
- Username: admin
- Password: pfsense
- Change ASAP to something different. Even lab needs to be protected -:)
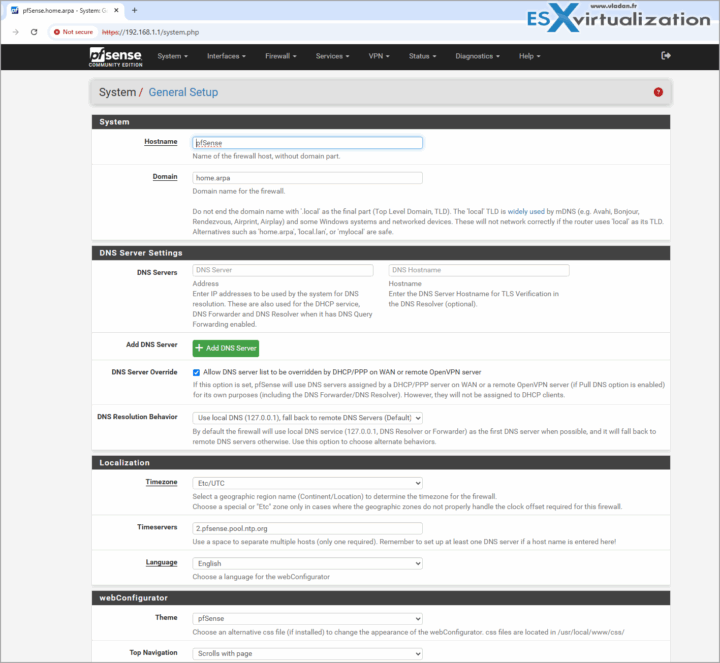
Well, this is it. (as for the initial setup). If you want to go further, I'd invite you to go and check
pfSense has a clean UI with menus at the top. There is tons of options.
Backup & Export Config
Before starting to break things up, remember to take a snapshot of the VM or do a config backup.
Dashboard → Diagnostics → Backup & Restore → Download configurationSave the XML file somewhere safe. You can restore it in seconds on a new VM.
Links: pfSense Download CE
Final Words
pfSense is a great piece of FREE software (CE Edition) which is nice to have in the lab for learning, protecting the environment, and so on. This setup took me perhaps few dozens of minutes, maybe an hour with all those screenshots, but next time it can be up and running in no time.
You now have a fully functional pfSense firewall running inside VMware Workstation Pro 17. It can protect a lab, a home network, or serve as a powerful learning platform.Enjoy the incredible flexibility — multi-WAN, VLANs, captive portal, traffic shaping, and enterprise-grade features, all for free.
For a homelab – pfSense turns a $200 mini-PC or even a VM into a firewall that can do things most consumer routers can only dream of. You get real-world experience with enterprise tools, unlimited experimentation, and rock-solid stability.
For small and medium businesses – pfSense (especially with official Netgate hardware or support) routinely replaces $10,000–$50,000 firewall + UTM stacks while delivering equal or better performance and far more transparency. Thousands of MSPs and businesses worldwide trust it in production because it simply works and doesn’t nickel-and-dime you for every little feature.
More posts from ESX Virtualization:
- Veeam Backup and Replication Upgrade to v13 on Windows – Yes we can
- 3 New Advanced Certifications from VMware/Broadcom Released
- Winux OS – Why I like it?
- VMware Alternative – OpenNebula: Powering Edge Clouds and GPU-Based AI Workloads with Firecracker and KVM
- Proxmox 9 (BETA 1) is out – What’s new?
- Another VMware Alternative Called Harvester – How does it compare to VMware?
- VMware vSphere 9 Standard and Enterprise Plus – Not Anymore?
- VMware vSphere Foundation (VVF 9) and VMware Cloud Foundation (VCF 9) Has been Released
- Vulnerability in your VMs – VMware Tools Update
- VMware ESXi FREE is FREE again!
- No more FREE licenses of VMware vSphere for vExperts – What’s your options?
- VMware Workstation 17.6.2 Pro does not require any license anymore (FREE)
- Two New VMware Certified Professional Certifications for VMware administrators: VCP-VVF and VCP-VCF
- Patching ESXi Without Reboot – ESXi Live Patch – Yes, since ESXi 8.0 U3
- Update ESXi Host to the latest ESXi 8.0U3b without vCenter
- Upgrade your VMware VCSA to the latest VCSA 8 U3b – latest security patches and bug fixes
- VMware vSphere 8.0 U2 Released – ESXi 8.0 U2 and VCSA 8.0 U2 How to update
- What’s the purpose of those 17 virtual hard disks within VMware vCenter Server Appliance (VCSA) 8.0?
- VMware vSphere 8 Update 2 New Upgrade Process for vCenter Server details
- What’s New in VMware Virtual Hardware v21 and vSphere 8 Update 2?
- vSphere 8.0 Page
- ESXi 7.x to 8.x upgrade scenarios
- VMware vCenter Server 7.03 U3g – Download and patch
- Upgrade VMware ESXi to 7.0 U3 via command line
- VMware vCenter Server 7.0 U3e released – another maintenance release fixing vSphere with Tanzu
- What is The Difference between VMware vSphere, ESXi and vCenter
- How to Configure VMware High Availability (HA) Cluster
Stay tuned through RSS, and social media channels (Twitter, FB, YouTube)

Leave a Reply