
In the previous part I've detailed the specs of this board, talked a bit about the 2011-3 CPU architecture and possibilities, but also touched a bit on IPMI management. Since it's something new in my homelab as previous builds were always done from consumer (desktop) boards I thought that it might be a good idea to share my thoughts so far. The Single CPU Board for ESXi Home lab got a Low power E5-2630L v3 Intel Xeon CPU which has 55W TDP only. You can start reading the whole serie for building Energy efficient ESXi homelab here – Energy Efficient Home Server – Start with an Efficient Power Supply.
The board has an IPMI for remote management and Supermicro is one of the manufacturers which dose not require an additional license to use this feature (Fujitsu, HP, Dell and others does….) This is one of the reasons that Supermicro boards are so popular and that’s why I decided to take the plunge and start to build a ESXi platform based on this board.
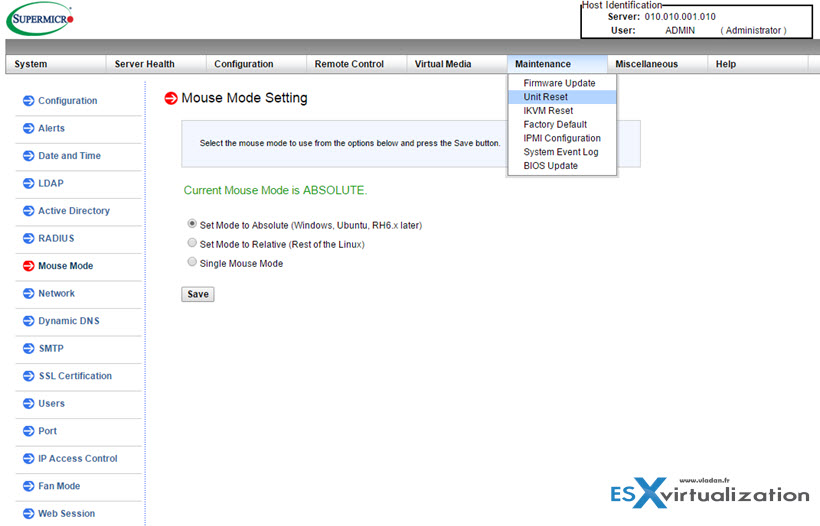
How does the IPMI on this Supermicro Board works and what's the options?
For those of you who owns Supermicro board in your lab it might be something not so interesting as you already know the insight out, but probably for was majority of the readers of this blog might not. There is a NIC dedicated for the IPMI so you configure the IP on that management interface through the BIOS. To go to the BIOS you'll need to hit F2 key, and so on…. But let's start from the part where we have already done the IPMI configuration in the bios and we just want to for example… power On our host.
Start, stop, reset the host remotely…
The web based UI starts with a connection screen. It's probably the first thing to do … change the ADMIN/ADMIN user's name and password. (note the admin/password are in CAPITALS).
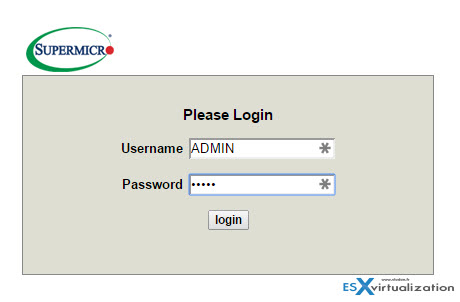
Supermicro Single CPU Board for ESXi Home lab – X10SRH-CLN4F. This is the default IPMI login screen
Once logged in, the default screen shows System Information, where you can hit the Power On button. As our server is right not shut down, the Preview Image does not show anything…
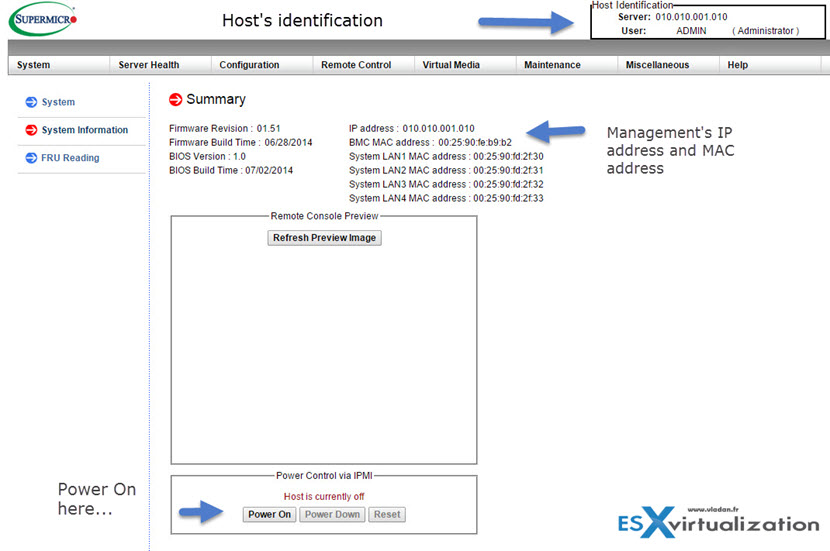
Supermicro Single CPU Board for ESXi Home lab – X10SRH-CLN4F. Here we can start the server remotely. Pretty cool… -:)
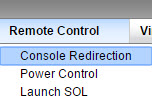
Well, cool enough. What's the options then? We can imagine you have your server in the basement and want to Power it On from the comfort of your desktop. Still not sold? Wait there is more. If you want to bring a remote window where you can see the remote server's screen as if your monitor was actually plugged in, then there is something called console redirection.
 It uses Java (Oh well..), but it works without hassle. Your browser downloads small java file which you need to execute, and then accept the security prompt from Java. That's it. A new window will show up which is the actual remote screen of the server.
Sometimes it might be a bit cumbersome to use the keyboard as the keys you have on your keyboard does not exactly reflect the keys you need to hit in this window. (in my case actually the F2 key to get me into the BIOS does not work. In this case you can use the built-in virtual keyboard which can be launched from the Virtual Media > Virtual Keyboard menu.
And in this case it brings a small software keyboard which you can use when needed special keys which do not work for you when typing on your normal (physical) keyboard….
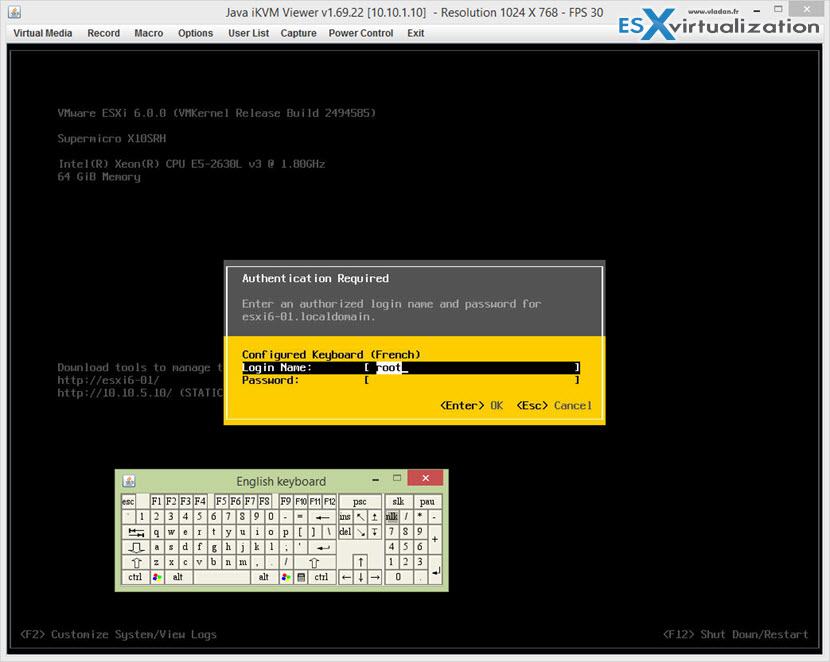
The screenshot shows login screen on the ESXi host and the software keyboard….
But wait, this isn't the most useful, as you can do a remote login through SSH and Putty and type “DCUI” to obtain the same thing, right? Yes, but what you cannot do is to actually install a system remotely or change some BIOS settings, Storage controller card settings (RAID) remotely….
Let's start on showing how to attach ISO file remotely so you can start an Installation of new system. First launch the console redirection window if you haven't already done so and then through the menu Virtual Media > select the second option – Virtual Storage
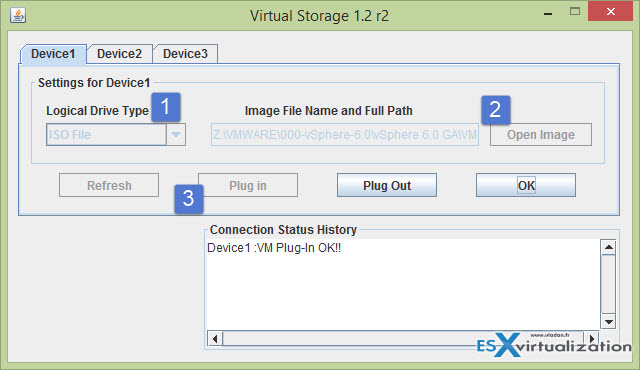
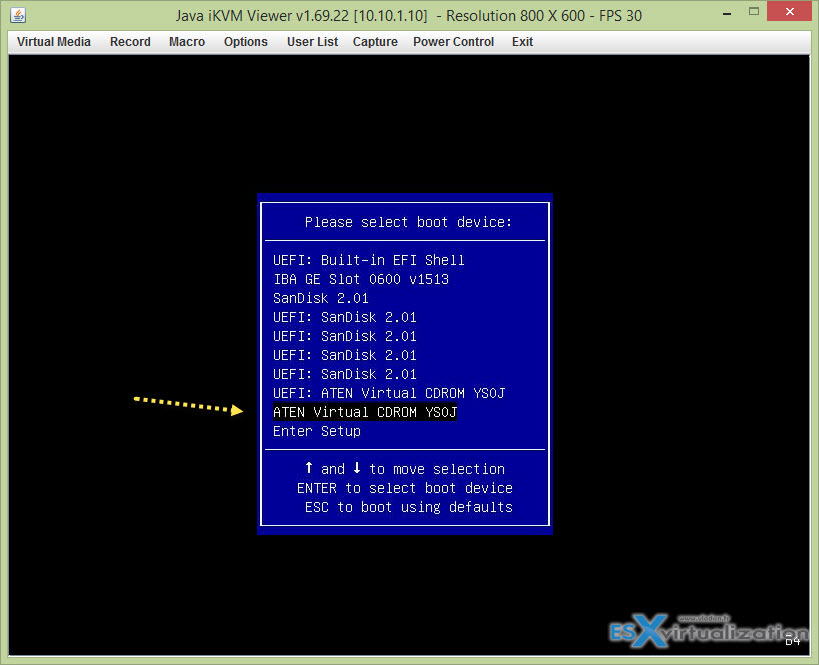
Then boot the server and enter the BIOS to change the boot order to boot from the ISO…
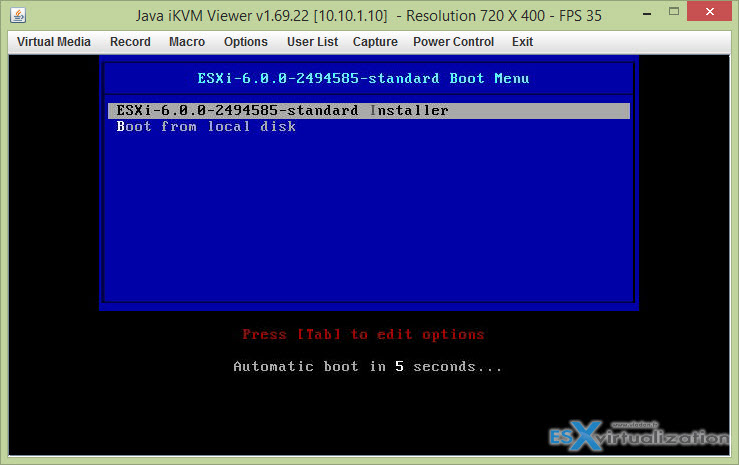
And this will boot from the ISO. As I have presented the ESXi 6.0 boot ISO it shows the ESXi installer which will start installing the system…. cool enough? You have probbably done that already on your nested lab through Workstation software, or in a lab where you had your server next to you, but thanks to the IPMI this can be done remotely over long distance….
Is there is more that IPMI on the Supermicro board can offer?
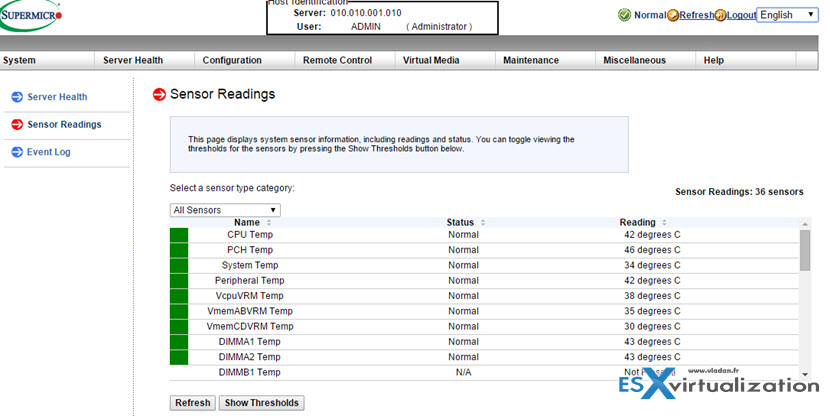
I have talked about remote console, or remote virtual keyboard, but note that the hardware monitoring is also very powerful. You can check the sensors, fans, CPU, Memory…
Last, but not least you can also do a Firmware update through IPMI…. pretty neat…
This is the screen…
Wrap up:
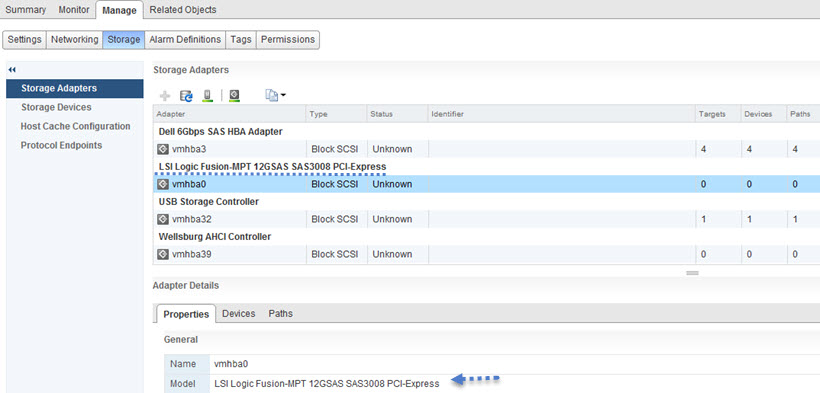
This board has LSI 3008 built-in 12 Gbps SAS adapter, which recently has made its apparition on the VMware HCL, so it works out of the box (OOB) without additional drivers installation. No tests were done so far by me (upcoming post), but the queue depth of this adapter is 600… You can see other storage controller card plugged in, which is my Dell Perc H310 flashed by IT firmware and which has also queue depth 600 (after the flash).
The board has 4 1Gb NICs – Intel i350-AM4 Quad port. (also works OOB)
There are 8 RAM slots which allows to boost the single server up to total of 512 GB of RAM when using DDR4 LRDIMMs. Or when used with lower capacity DDR4 1.2V-2133 RAM ECC sticks (8 or 16Gb RAM sticks) you can go up to 64Gb or 128Gb of RAM respectively.
In the same category at Supermicro you can find a board less expensive, with only 2 Intel 1Gb NICs, or a board without the storage controller from LSI. Here are the 3 Single CPU boards for 2011-3 architecture with DDR4 8 memory slots, (all boards are ATX format):
- Supermicro X10SRH-CLN4F-O (with LSI 3008 SAS, SATA, IPMi) – the board I use
- Supermicro X10SRH-CF-O (with LSI 3008 SAS, SATA, 2 NICs, IPMi)
- Supermicro X10SRI-F-O ( with 2 NICs, IPMi)
Energy Efficient ESXi Home Lab:
- Efficient Home Server – Start with an Efficient Power Supply
- ESXi Home lab – Get a quality and comfortable case
- Supermicro Single CPU Board for ESXi Homelab – X10SRH-CLN4F
- Supermicro Single CPU Board for ESXi Homelab – X10SRH-CLN4F – Part 2 – this post
- Supermicro Single CPU Board for ESXi Home lab – Upgrading LSI 3008 HBA on the X10SRH-CLN4F – Part 3
- Building Energy Efficient ESXi Home Lab – parts list [this post]
- Homelab – Airflow Solar System
Hi Vladan,
Impressive Lab you have. From a cost perspective, i would appreciate if you could provide a break down of all the pieces you bought to build the new supermicro lab.
Thanks!
Faisal
Our last two VMWare cluster hardware purchases were SuperMicro, but not because IPMI/KVM isn’t an add-on cost, but the fact that Dell was like $1,000 a server more for the equivalent box now. In the past the difference was much smaller, and could justify Dell’s value add/warranty, but now OEMs will stand behind the whitebox SuperMicros and still have equivalent hardware for much less.
I actually disagree – I find the Supermicro ‘remote/ILO’ functionality very frustrating, albeit mostly caused by their use of Java;
* I get prompted to upgrade Java every time I open the console, regardless of what version I’m on
* The certificate Supermicro have used is blocked by default by recent Java versions due to their use of MD2 etc. This needs a CLI setting to work around (more about the fix here – http://michlstechblog.info/blog/java-error-failed-to-validate-certificate-the-application-will-not-be-executed/)
* I’ve also tried using Supermicro’s IPMI Utility (a GUI based console) as an alternative but that doesn’t seem to work with my Supermicro board (it’s not even three years old, bought in July 2012 – X9DRL-3F)
* Java. Enough said.
I’ve been using Supermicro for three years in my lab and 50% of the time remote access isn’t usable for one of the above or a myried of other reasons – I’ve learnt not to rely on it and to avoid it where possible. It also doesn’t support firmware upgrades without a costed upgrade, which I couldn’t even find a UK reseller for.
Grade D. Must improve.
Thanks for your input Ed. The W8.1 workstation I’m using to manage the lab has never prompted me to update the Java so far (Its only few days I’m using the board’s remote IPMI console actually). By curiosity I checked the Java settings in Control Panel > Java > update, where I found the checkbox for an automatic updates actually checked. (I think it’s default settings).
As for the certificates, haven’t used so far, so can’t tell.
For me so far, finger crossed, what I need to do is to switch on the system (it’s not running 24/7 just yet) because it’s upstairs and I don’t want to go upstairs every time I want to Power on the system … -:). The remote console is a bonus which works for me, but once the system is installed I always have SSH to log in… so less important.
Best,
Vladan
Ed, the Java strikes back. After 2 weeks on, the Java annoyances you describing is happening to me as well. Oh dear…
Vladan,
I usually use the IPMI view tool from SuperMicro itself. You can also save the jnlp somewhere (Runapps folder, pendrive) .. and make a shortcut to that. The last option saves you from opening the webpage. JUst click and voila “remote screen”
http://www.supermicro.nl/solutions/SMS_IPMI.cfm
Ymmv,
M.
Thanks for the heads up Mario. Did not know this one….
Hi Mario,
Could you explain a bit more about saving the jnlp? I have to get new jnlp from IPMI web gui every single time since old one “expires” and can not use it again… Otherwise that would be a really nice option to have.
Thanks! BR, Matic
Thank you so much, saved me from lots of pain going through iso install