
Welcome back to our VMware Certified Professional – VMware vSphere Foundation Administrator (2V0-16.25) study guide series! This section is part of the upcoming VCP-VVF Study Guide Page, which will be released as a PDF when completed. Today, we’re diving into Objective 2.2 – VMware Compute Fundamentals, focusing on Given a scenario, deploy and configure virtual machines.We follow the official VMware Blueprint for the exam – VMware vSphere Foundation Administrator (PDF).
Virtual machines (VMs) are the heart of any VMware vSphere Foundation (VVF) environment, and mastering their deployment and configuration is critical for both the 2V0-16.25 exam and real-world administration. This objective tests your ability to create, customize, and optimize VMs in various scenarios, such as provisioning workloads for a business application or troubleshooting performance issues. Building on our previous posts (deploying ESXi/vCenter and configuring a vSphere cluster), we’ll provide detailed steps, scripting methods, and exam-focused tips using a practical scenario. Let’s get into it!
Why VM Deployment and Configuration Matters
Virtual machines are the workloads that run on ESXi hosts, managed by vCenter Server in a vSphere cluster. Objective 2.2, Part 3, evaluates your skills in deploying VMs (from scratch, templates, or OVAs) and configuring their settings (CPU, memory, storage, networking) to meet specific requirements. This is a key exam topic, as VMs are central to virtualization, and you’ll encounter scenario-based questions on provisioning, resource allocation, and optimization. We’ll cover manual and automated methods, leveraging VMware’s official documentation https://techdocs.broadcom.com/us/en/vmware-cis/vcf/vcf-9-0-and-later/9-0.html for VVF 9.0, and include practical tips for the exam and real-world administration.
Scenario: Deploying and Configuring VMs
Let’s use a typical exam scenario: A medium-sized business with a 4-host vSphere cluster (configured in Part 2) needs to deploy and configure 10 VMs to support a new web application. The VMs require specific CPU, memory, and storage settings, with some deployed from a template and others from an OVA file. The cluster uses vSAN for storage and vSphere HA/DRS for resilience and load balancing. Configure the VMs for optimal performance and availability. Assume the cluster (“VVF-Cluster”) is managed by vCenter 9.0 (IP: 192.168.1.20), with ESXi hosts at 192.168.1.10-13, and a vSAN datastore.
Deploying and Configuring Virtual Machines: Step-by-Step
Deploying and configuring VMs involves creating VMs, assigning resources, and optimizing settings. Below is a detailed guide, including manual steps, PowerCLI scripting, and considerations for the scenario.
1. Deploy Virtual Machines
Overview: VMs can be deployed manually (from scratch or an OVA) or from a template for consistency. We’ll cover both methods for the scenario’s 10 VMs (5 from a template, 5 from an OVA).Deploy a VM from Scratch:
1. Access vCenter:
- Log in to the vSphere Client at https://192.168.1.20/ui using SSO credentials (e.g., [email protected]).
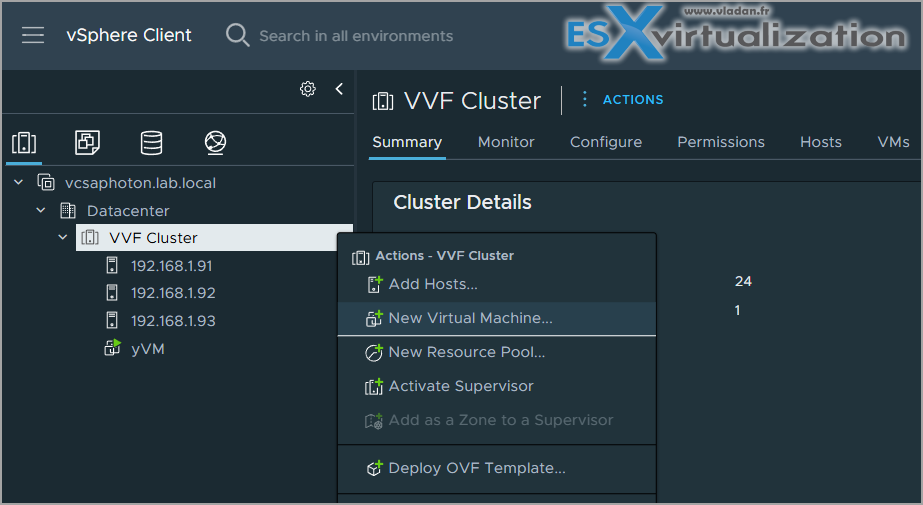
2. Create a New VM:
Navigate to Hosts and Clusters → VVF-Cluster, right-click, and select New Virtual Machine.
Choose Create a new virtual machine.
3. Configure VM Settings:
- Name: “Web-VM-01” (increment for others).
- Datastore: Select the vSAN datastore.
- Guest OS: Select the OS (e.g., Ubuntu 22.04 LTS for the web app).
- Hardware:
- CPU: 2 vCPUs (based on app requirements).
- Memory: 4 GB RAM.
- Disk: 40 GB (thin-provisioned on vSAN).
- Network: Connect to “VM Network” port group (VLAN 10).
- CD/DVD Drive: Mount an ISO (e.g., ubuntu-22.04.iso) from a datastore or content library.
4. Power On and Install OS:
- Power on the VM and install the OS via the vSphere Client console.
- Install VMware Tools for enhanced performance and monitoring.
Deploy a VM from a Template:
Create a Template:
- Deploy a base VM (e.g., “Ubuntu-Template”), install the OS, VMware Tools, and updates.
- Right-click the VM, select Clone → Clone to Template, and save to the vSAN datastore
Deploy VMs from Template:
- Navigate to VMs and Templates, right-click “Ubuntu-Template”, and select New VM from This Template.
- Name the VMs (e.g., “Web-VM-02” to “Web-VM-06”).
- Select “VVF-Cluster” and the vSAN datastore.
- Customize settings (e.g., hostname, network) during deployment.
Scenario Example: Deploy 5 VMs (Web-VM-02 to Web-VM-06) from the Ubuntu-Template, each with 2 vCPUs, 4 GB RAM, and 40 GB disk.
Deploy a VM from an OVA:
Import the OVA:
- Obtain an OVA file (e.g., a preconfigured web server OVA from the app vendor).
- Navigate to Hosts and Clusters → VVF-Cluster, select Actions → Deploy OVF Template.
- Upload the OVA file, select “VVF-Cluster” and the vSAN datastore.
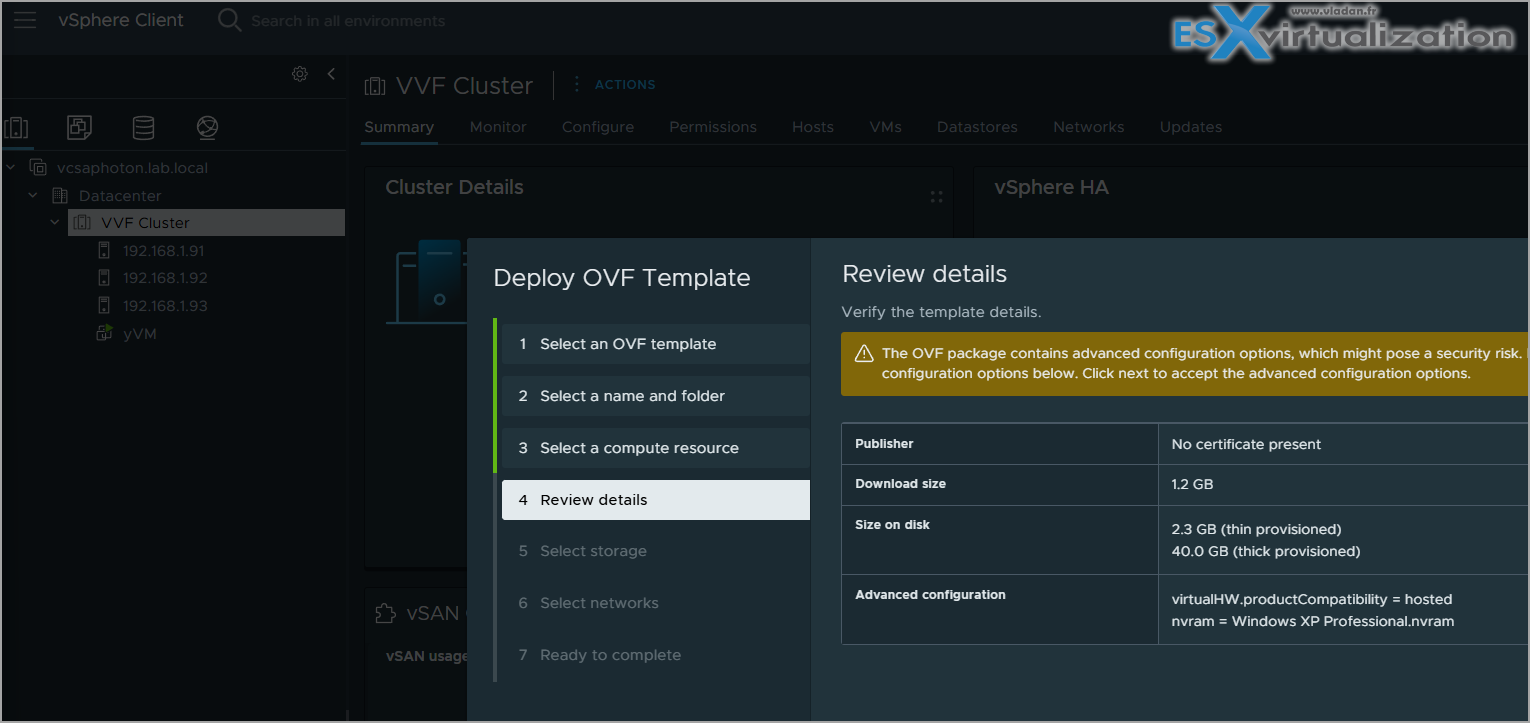
Configure OVA Settings:
- Name the VMs (e.g., “Web-VM-07” to “Web-VM-11”).
- Customize network settings (connect to “VM Network” on VLAN 10).
- Accept EULA and configure any app-specific options.
Scenario Example: Deploy 5 VMs (Web-VM-07 to Web-VM-11) from the OVA, ensuring compatibility with vSAN.
Study Tip: Practice deploying VMs in VMware Hands-On Labs https://labs.hol.vmware.com/. Memorize the deployment options: New VM, template, OVA.
2. Configure Virtual Machine Settings
Overview: Configuring VMs involves setting CPU, memory, storage, and network parameters, plus enabling features like VMware Tools and HA/DRS integration.
Detailed Process:
Resource Allocation:
- Edit each VM’s settings in the vSphere Client (Actions → Edit Settings).
- CPU: 2 vCPUs, enable CPU Hot Add if the app supports dynamic scaling.
- Memory: 4 GB, enable Memory Hot Plug for flexibility.
- Disk: 40 GB thin-provisioned on vSAN, ensure the vSAN storage policy (FTT=1) is applied.
- Network: Connect to “VM Network” port group (VLAN 10), ensure a 10 GbE-backed vSwitch.
VM Options:
- Enable VMware Tools for heartbeat monitoring (required for HA VM monitoring).
- Set Boot Options to UEFI if needed (e.g., for modern Linux distros).
- Configure VM Startup/Shutdown: Set critical VMs (e.g., Web-VM-01) to start automatically with the host.
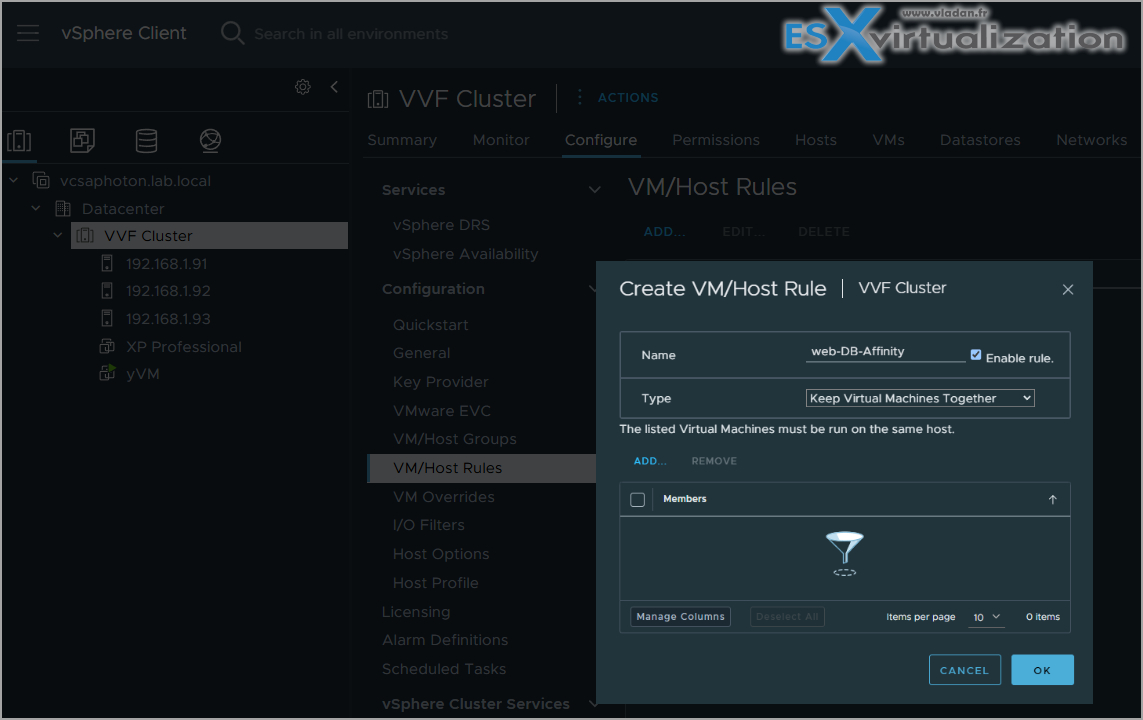
HA/DRS Integration:
- Apply DRS affinity rules to keep web and database VMs together: Cluster → Configure → VM/Host Rules → Add (e.g., “Web-DB-Affinity”).
- Enable VM Monitoring in HA settings to restart VMs if they fail (requires VMware Tools).
Snapshots (optional):
- Take a snapshot before major updates: Actions → Snapshots → Take Snapshot.
- Example: Snapshot “Web-VM-01” before applying a web server patch.
Scripting with PowerCLI:
Configure VM Settings:
$vm = Get-VM -Name “Web-VM-01”
Set-VM -VM $vm -NumCPUs 2 -MemoryGB 4 -Confirm:$false
Set-NetworkAdapter -NetworkAdapter (Get-NetworkAdapter -VM $vm) -NetworkName “VM Network”
Create Affinity Rule:
New-DrsRule -Cluster (Get-Cluster -Name “VVF-Cluster”) -Name “Web-DB-Affinity” -KeepTogether $true -VM (Get-VM -Name “Web-VM-01″,”DB-VM-01”)
Hardware Considerations:
- Cluster Resources: Ensure the 4-host cluster (16 cores, 64 GB RAM per host) supports 10 VMs (2 vCPUs, 4 GB each = 20 vCPUs, 40 GB total). Avoid overcommitment beyond 4:1 CPU ratio.
- vSAN Datastore: Verify sufficient capacity (e.g., 8 TB total from 4 hosts, each with 2 TB capacity disks) for 10 VMs (400 GB total).
- Network: Use 10 GbE NICs for vSAN and VM traffic to avoid bottlenecks.
Scenario Example: Configure the 10 VMs with 2 vCPUs, 4 GB RAM, and 40 GB disks on the vSAN datastore. Set an affinity rule for Web-VM-01 and a database VM, and enable VMware Tools for HA monitoring.
Study Tip: Practice VM configuration in a lab, focusing on resource allocation and DRS rules. Understand thin vs. thick provisioning and vSAN storage policies.
Optimize and Troubleshoot VMs
Overview: Optimizing VMs ensures performance and compatibility with HA/DRS/vSAN. Troubleshooting is key for exam scenarios.Optimization:
- Resource Allocation: Avoid over-allocating CPU/memory to prevent contention. Use DRS to balance VMs.
- VMware Tools: Ensure the latest version is installed for performance and monitoring.
- Storage Policies: Apply vSAN policies (FTT=1) to ensure redundancy.
- Network: Use VMXNET3 adapters for high-performance networking.
Troubleshooting Common Issues:
- VM Fails to Power On: Check for sufficient host resources or vSAN policy mismatches.
- Poor Performance: Verify no CPU/memory contention (use vSphere Client’s Monitor → Performance tab).
- Network Issues: Ensure the VM is connected to the correct port group (VLAN 10).
Scripting Example (Check VM status):
Get-VM -Name “Web-VM-01” | Select-Object Name,PowerState,NumCPUs,MemoryGB
Study Tip: Review VMware’s troubleshooting guides https://techdocs.broadcom.com/us/en/vmware-cis/vcf/vcf-9-0-and-later/9-0.html for VM-related issues. Practice diagnosing performance in a lab.
Exam scenarios and Tips
Scenarios:
- Scenario: A VM fails to deploy from an OVA due to “Insufficient resources.” What should you check?
- Answer: Verify host CPU/memory availability and vSAN datastore capacity.
- Scenario: Web VMs experience latency. How do you optimize?
- Answer: Enable DRS Fully Automated mode and use VMXNET3 adapters.
- Scenario: A critical VM doesn’t restart after a host failure. What’s the issue?
- Answer: VMware Tools not installed or HA VM Monitoring disabled.
Study Tips:
Practice deploying VMs (new, template, OVA) in VMware Hands-On Labs https://labs.hol.vmware.com/.
Memorize: VM deployment methods, resource settings, vSAN policy application.
Use PowerCLI to automate VM creation and configuration for efficiency.
Review VMware VVF 9.0 documentation https://techdocs.broadcom.com/us/en/vmware-cis/vcf/vcf-9-0-and-later/9-0.html for VM management details.
Resources:
VCP-VVF Study Guide Page: https://www.vladan.fr/vcp-vvf-administrator/
VMware VVF 9.0 Documentation: https://techdocs.broadcom.com/us/en/vmware-cis/vcf/vcf-9-0-and-later/9-0.html
Sample Exam Questions
Which method deploys multiple VMs with consistent settings?
A. Deploy from scratch
B. Deploy from template
C. Deploy from ISO
D. Deploy via Auto Deploy
Answer: B. Deploy from template.
What is required for HA to monitor and restart a VM?
A. vSAN enabled
B. VMware Tools installed
C. DRS Fully Automated
D. Thick-provisioned disk
Answer: B. VMware Tools installed.
Which PowerCLI command creates a VM with 2 vCPUs and 4 GB RAM?
A. Set-VM
B. New-VM
C. New-DrsRule
D. Import-VApp
Answer: B. New-VM.
Final Words:
Deploying and configuring virtual machines is a core skill for the 2V0-16.25 exam and VVF administration. By mastering manual and scripted methods, optimizing resources, and troubleshooting issues, you’ll be ready for any VM-related scenario. The upcoming VCP-VVF Study Guide Page, available at https://www.vladan.fr/vcp-vvf-administrator/, will be released as a PDF to support your preparation.
More posts from ESX Virtualization:
- 5 New VMware Certifications for VVF and VCF
- VMware Alternative – OpenNebula: Powering Edge Clouds and GPU-Based AI Workloads with Firecracker and KVM
- Proxmox 9 (BETA 1) is out – What’s new?
- Another VMware Alternative Called Harvester – How does it compare to VMware?
- VMware vSphere 9 Standard and Enterprise Plus – Not Anymore?
- VMware vSphere Foundation (VVF 9) and VMware Cloud Foundation (VCF 9) Has been Released
- Vulnerability in your VMs – VMware Tools Update
- VMware ESXi FREE is FREE again!
- No more FREE licenses of VMware vSphere for vExperts – What’s your options?
- VMware Workstation 17.6.2 Pro does not require any license anymore (FREE)
- Migration from VMware to another virtualization platform with Veeam Backup and Replication
- Two New VMware Certified Professional Certifications for VMware administrators: VCP-VVF and VCP-VCF
- Patching ESXi Without Reboot – ESXi Live Patch – Yes, since ESXi 8.0 U3
- Update ESXi Host to the latest ESXi 8.0U3b without vCenter
- Upgrade your VMware VCSA to the latest VCSA 8 U3b – latest security patches and bug fixes
- VMware vSphere 8.0 U2 Released – ESXi 8.0 U2 and VCSA 8.0 U2 How to update
- What’s the purpose of those 17 virtual hard disks within VMware vCenter Server Appliance (VCSA) 8.0?
- VMware vSphere 8 Update 2 New Upgrade Process for vCenter Server details
- VMware vSAN 8 Update 2 with many enhancements announced during VMware Explore
- What’s New in VMware Virtual Hardware v21 and vSphere 8 Update 2?
- Homelab v 8.0
- vSphere 8.0 Page
- ESXi 7.x to 8.x upgrade scenarios
- VMware vCenter Server 7.03 U3g – Download and patch
- Upgrade VMware ESXi to 7.0 U3 via command line
- VMware vCenter Server 7.0 U3e released – another maintenance release fixing vSphere with Tanzu
- What is The Difference between VMware vSphere, ESXi and vCenter
- How to Configure VMware High Availability (HA) Cluster
Leave a Reply