
Bare metal restore with Veeam from a recovery partition is a method to avoid using USB media by installing the Veeam Recovery Media directly onto a dedicated partition on the server's internal drive. This approach allows for faster recovery times and eliminates the need to access the BIOS to change boot order during a crisis. Also, each physical server is usually different hardware so it the drivers necessary are part of the recovery process and not stored on an USB stick (which can be lost or ruined by ageing).
Sure, it takes more time than simply storing on USB, it takes some preparation and configuration ,but at the end, when having a stress situation, you saving precious minutes/hours.
To implement this, you must create a separate partition on the server and use the Recovery Media Creator tool to generate the bootable ISO with the “include hardware drivers from this system” option enabled. After copying the ISO contents to the new partition, you have two options: Use built-in Microsoft's BCDEdit command line tool or use third-party boot manager software like EasyBCD to add a multiboot entry pointing to the recovery image files (specifically sources\boot.wim).
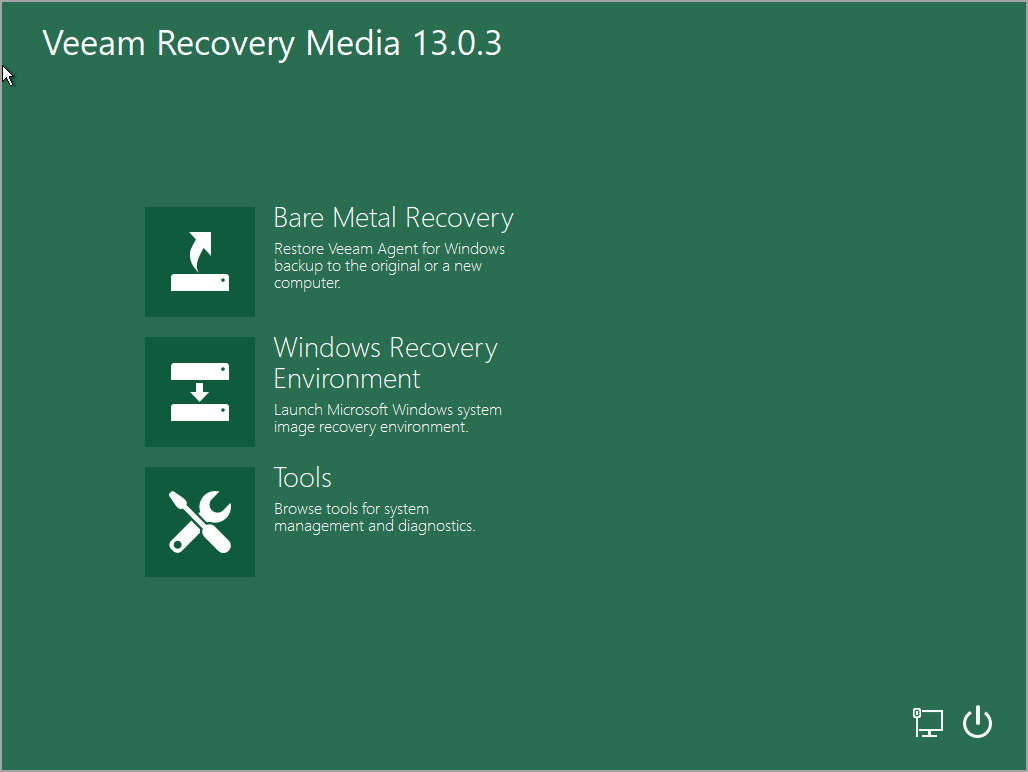
When a failure occurs, the system boots into the Veeam Recovery Environment from the internal partition, launching the recovery agent in RAM. This environment allows you to import the backup file into the Veeam Agent database and restore the system, effectively erasing existing data and reconstructing the partition structure using system metadata before creating a new boot loader.
Here are the steps:
Step 0: Before we get started, make sure that you create a separate partition on your server. This partition will be used to store the Veeam Recovery environment files. In our case we simply use the built-in Windows disk managemetn tool:
Right click Disk > shrink volume > in our case I entered 10000Mb which is aprox 10 GIGs partition > Format NTFS
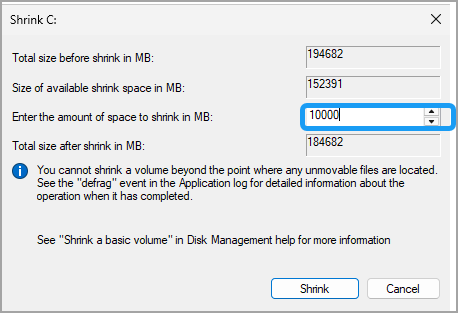
So as a result, you'll create a partition at the end of the disk. In our case it took a E: letter as my CD-ROM has been using the D: letter. So far so good?
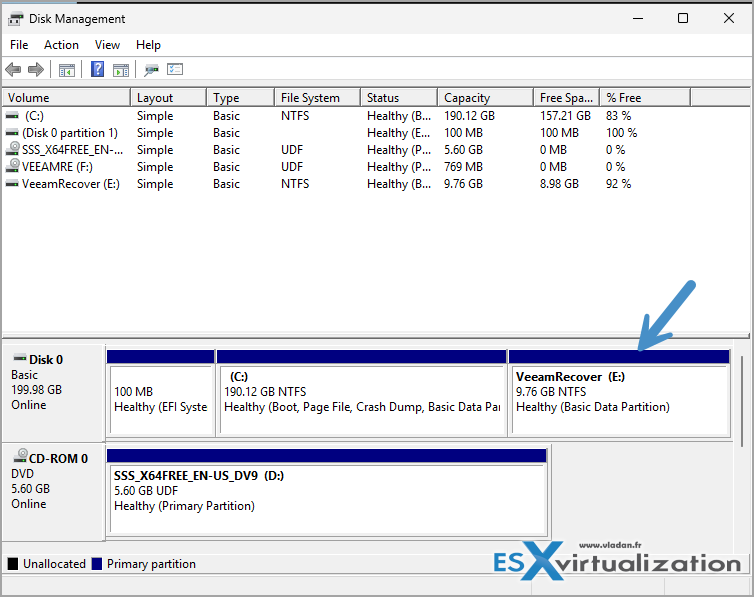
Step 1: If you haven't installed Veeam Agent yet, please do so. Next, create a recovery ISO including the hardware drivers from the system. All necessary drivers will be copied into the ISO.
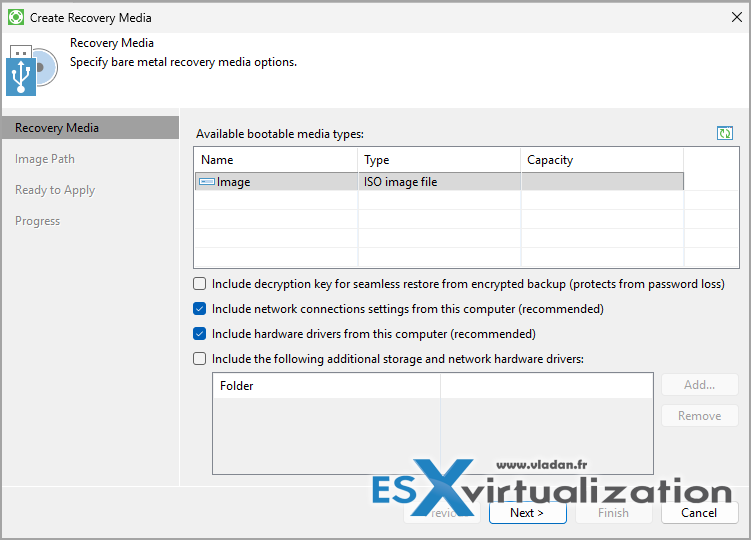
The other steps:
You can use the built in BCDEdit command-line tool, or if you're unfamiliar with it, you can follow our blog post which has been published a while ago, where we use an open source third party tool called EasyBCD software community edition.
Here are the steps for using the BCDEdit.
Creating a second boot entry on Windows Server 2025 allows you to dual-boot multiple operating system installations or different configurations (e.g., Safe Mode, Debug Mode) on the same server. The process relies on the Boot Configuration Data (BCD) store, managed via the BCDEdit command-line tool.
Prerequisites and Safety
Before modifying boot entries, ensure you have Administrator privileges and a current backup. Incorrect BCD modifications can render the system unbootable.
- Backup BCD: Export the current configuration to a file:
bcdedit /export C:\BCD_Backup
- Disable Protections: Temporarily suspend BitLocker or disable Secure Boot if they prevent BCD writes.
Copying an Existing Entry (Recommended)
This is the safest method for adding a second Windows Server installation on a different partition or creating a test environment. It duplicates a known working configuration.
Step-by-Step Commands
1. Copy the Current Boot Entry
This clones your working Windows entry to preserve hardware settings.
bcdedit /copy {current} /d “Veeam Bare Metal Recovery”
- Action: Copy the GUID returned (e.g., {xxxxxxxx-xxxx-xxxx-xxxx-xxxxxxxxxxxx}). Let's call this {NEW_GUID}.
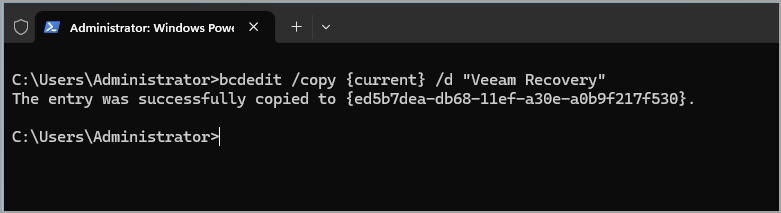
2. Configure Ramdisk Options for Drive E:
This tells the boot manager where to find the disk image loader on your separate partition.
Create ramdisk options (safe to run even if it exists)
bcdedit /create {ramdiskoptions} /d “Ramdisk Options”
Point specifically to Partition E: for the SDI file
bcdedit /set {ramdiskoptions} ramdisksdidevice partition=E:
bcdedit /set {ramdiskoptions} ramdisksdipath \boot\boot.sdi
Note: Ensure the path \boot\boot.sdi matches your actual folder structure on E:.
3. Modify the Copied Entry to Load from E:
Replace {NEW_GUID} with the ID from Step 1. This redirects the boot loader to the Veeam image on the E: partition.
Set device to load boot.wim from E: via ramdisk
bcdedit /set {NEW_GUID} device ramdisk=[E:]\sources\boot.wim,{ramdiskoptions}
Set OS device to match (required for WinPE)
bcdedit /set {NEW_GUID} osdevice ramdisk=[E:]\sources\boot.wim,{ramdiskoptions}
Set the loader path (use winload.efi for UEFI, winload.exe for Legacy)
bcdedit /set {NEW_GUID} path \windows\system32\winload.efi
Enable WinPE mode and set system root
bcdedit /set {NEW_GUID} winpe yes
bcdedit /set {NEW_GUID} systemroot \windows
bcdedit /set {NEW_GUID} detecthal yes
4. Verify and Reboot
Check the new configuration by running bcdedit /v (verbose mode) to ensure paths are correct. The new entry is automatically added to the boot menu. Restart the server to see the selection screen.
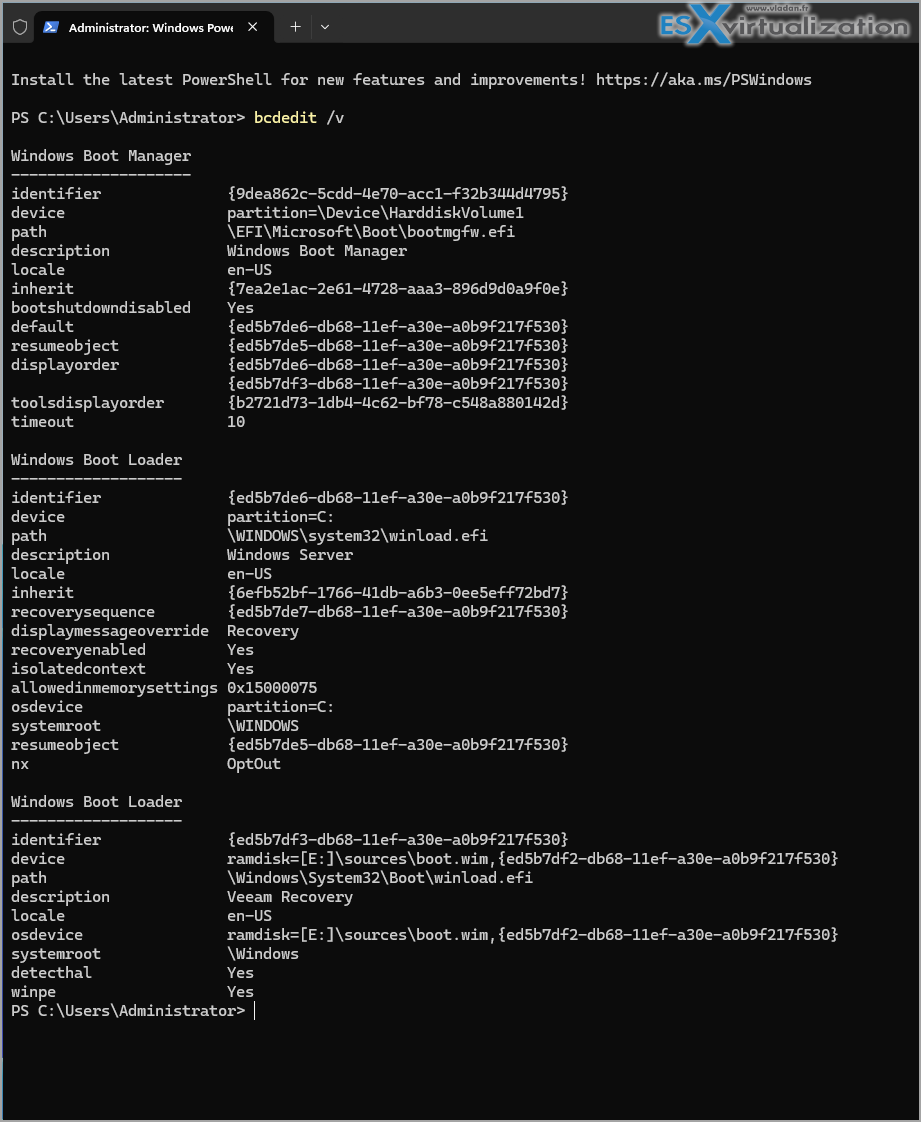
Get help with bcdedit /? if necessary.
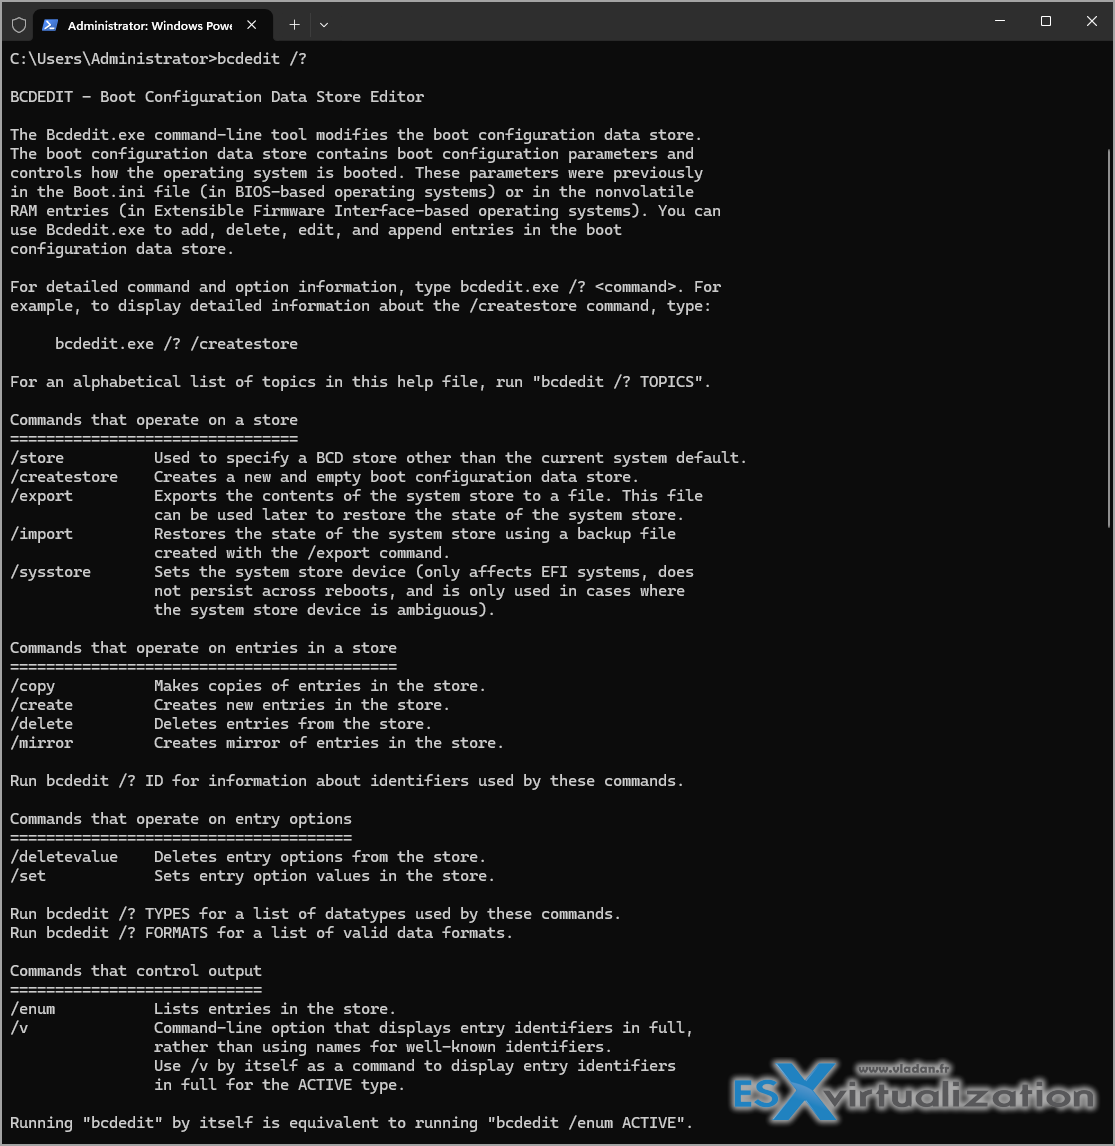
BCDEdit command reference Windows Server 2025
When restarting the server, you should have a 10 seconds to select Veeam Recovery from the menu.
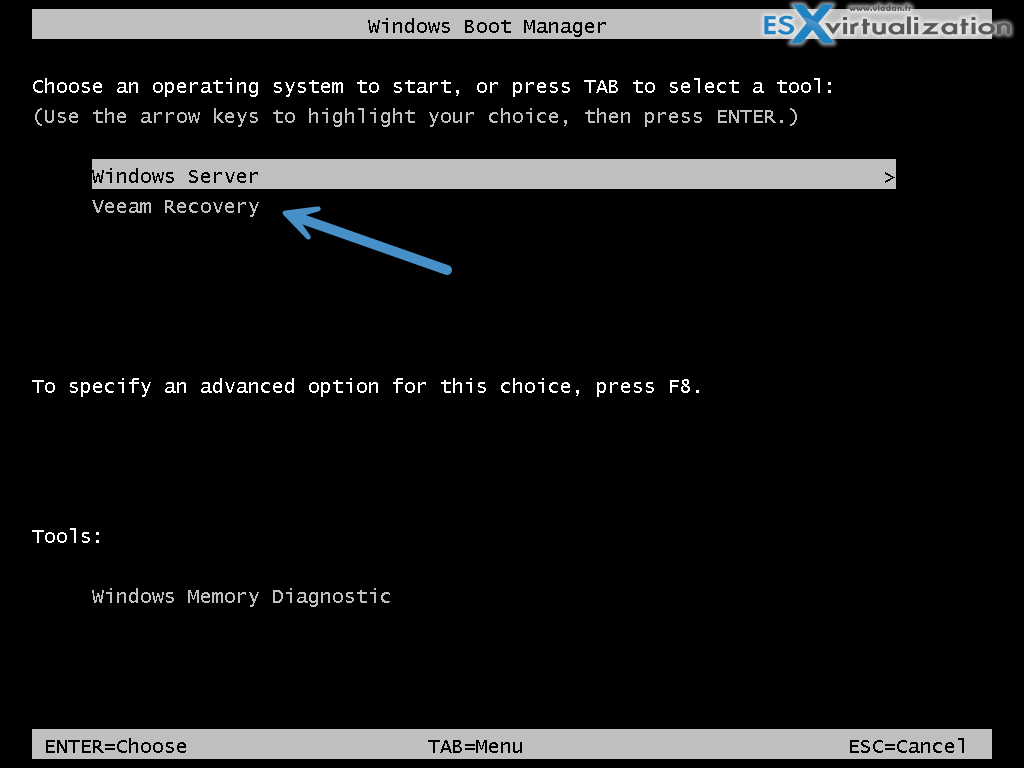
to boot to Veeam Recovery Environment
- Set Timeout: Changes the time (in seconds) the menu displays before booting the default.
bcdedit /timeout 10

- Remove Entry: To delete an entry from the store completely:
bcdedit /delete {New-GUID}
Note: This tip comes from Nico Stein, a fellow Veeam Vanguard. I saw his presentation during Veeam Summit 100 in Prague. I have already published this tip back in a day and used EasyBCD software community edition. However, some organizations aren't allowed to use other than Microsoft software within their organizations. Also, we're in 2026 so this was also a test with Windows Server 2025 environment. Everything worked as expected.
More posts from ESX Virtualization:
- Veeam Backup and Replication Upgrade on Windows – Yes we can
- Securing Your Backups On-Premises: How StarWind VTL Fits Perfectly with Veeam and the 3-2-1 Rule
- Winux OS – Why I like it?
- VMware Alternative – OpenNebula: Powering Edge Clouds and GPU-Based AI Workloads with Firecracker and KVM
- Another VMware Alternative Called Harvester – How does it compare to VMware?
- VMware vSphere 9 Standard and Enterprise Plus – Not Anymore?
- VMware vSphere Foundation (VVF 9) and VMware Cloud Foundation (VCF 9) Has been Released
- Vulnerability in your VMs – VMware Tools Update
- VMware ESXi FREE is FREE again!
- No more FREE licenses of VMware vSphere for vExperts – What’s your options?
- VMware Workstation 17.6.2 Pro does not require any license anymore (FREE)
- Two New VMware Certified Professional Certifications for VMware administrators: VCP-VVF and VCP-VCF
- Patching ESXi Without Reboot – ESXi Live Patch – Yes, since ESXi 8.0 U3
- Update ESXi Host to the latest ESXi 8.0U3b without vCenter
- Upgrade your VMware VCSA to the latest VCSA 8 U3b – latest security patches and bug fixes
- VMware vSphere 8.0 U2 Released – ESXi 8.0 U2 and VCSA 8.0 U2 How to update
- What’s the purpose of those 17 virtual hard disks within VMware vCenter Server Appliance (VCSA) 8.0?
- VMware vSphere 8 Update 2 New Upgrade Process for vCenter Server details
- What’s New in VMware Virtual Hardware v21 and vSphere 8 Update 2?
- vSphere 8.0 Page
- ESXi 7.x to 8.x upgrade scenarios
- VMware vCenter Server 7.03 U3g – Download and patch
- Upgrade VMware ESXi to 7.0 U3 via command line
- VMware vCenter Server 7.0 U3e released – another maintenance release fixing vSphere with Tanzu
- What is The Difference between VMware vSphere, ESXi and vCenter
- How to Configure VMware High Availability (HA) Cluster
Stay tuned through RSS, and social media channels (Twitter, FB, YouTube)





Leave a Reply