
Lab 2022-2024
A new lab since I left Reunion Island to move back to France (continental). I have sold all my 4 Supermicro servers where I run my VMware vSAN cluster.
So, right now my lab is:
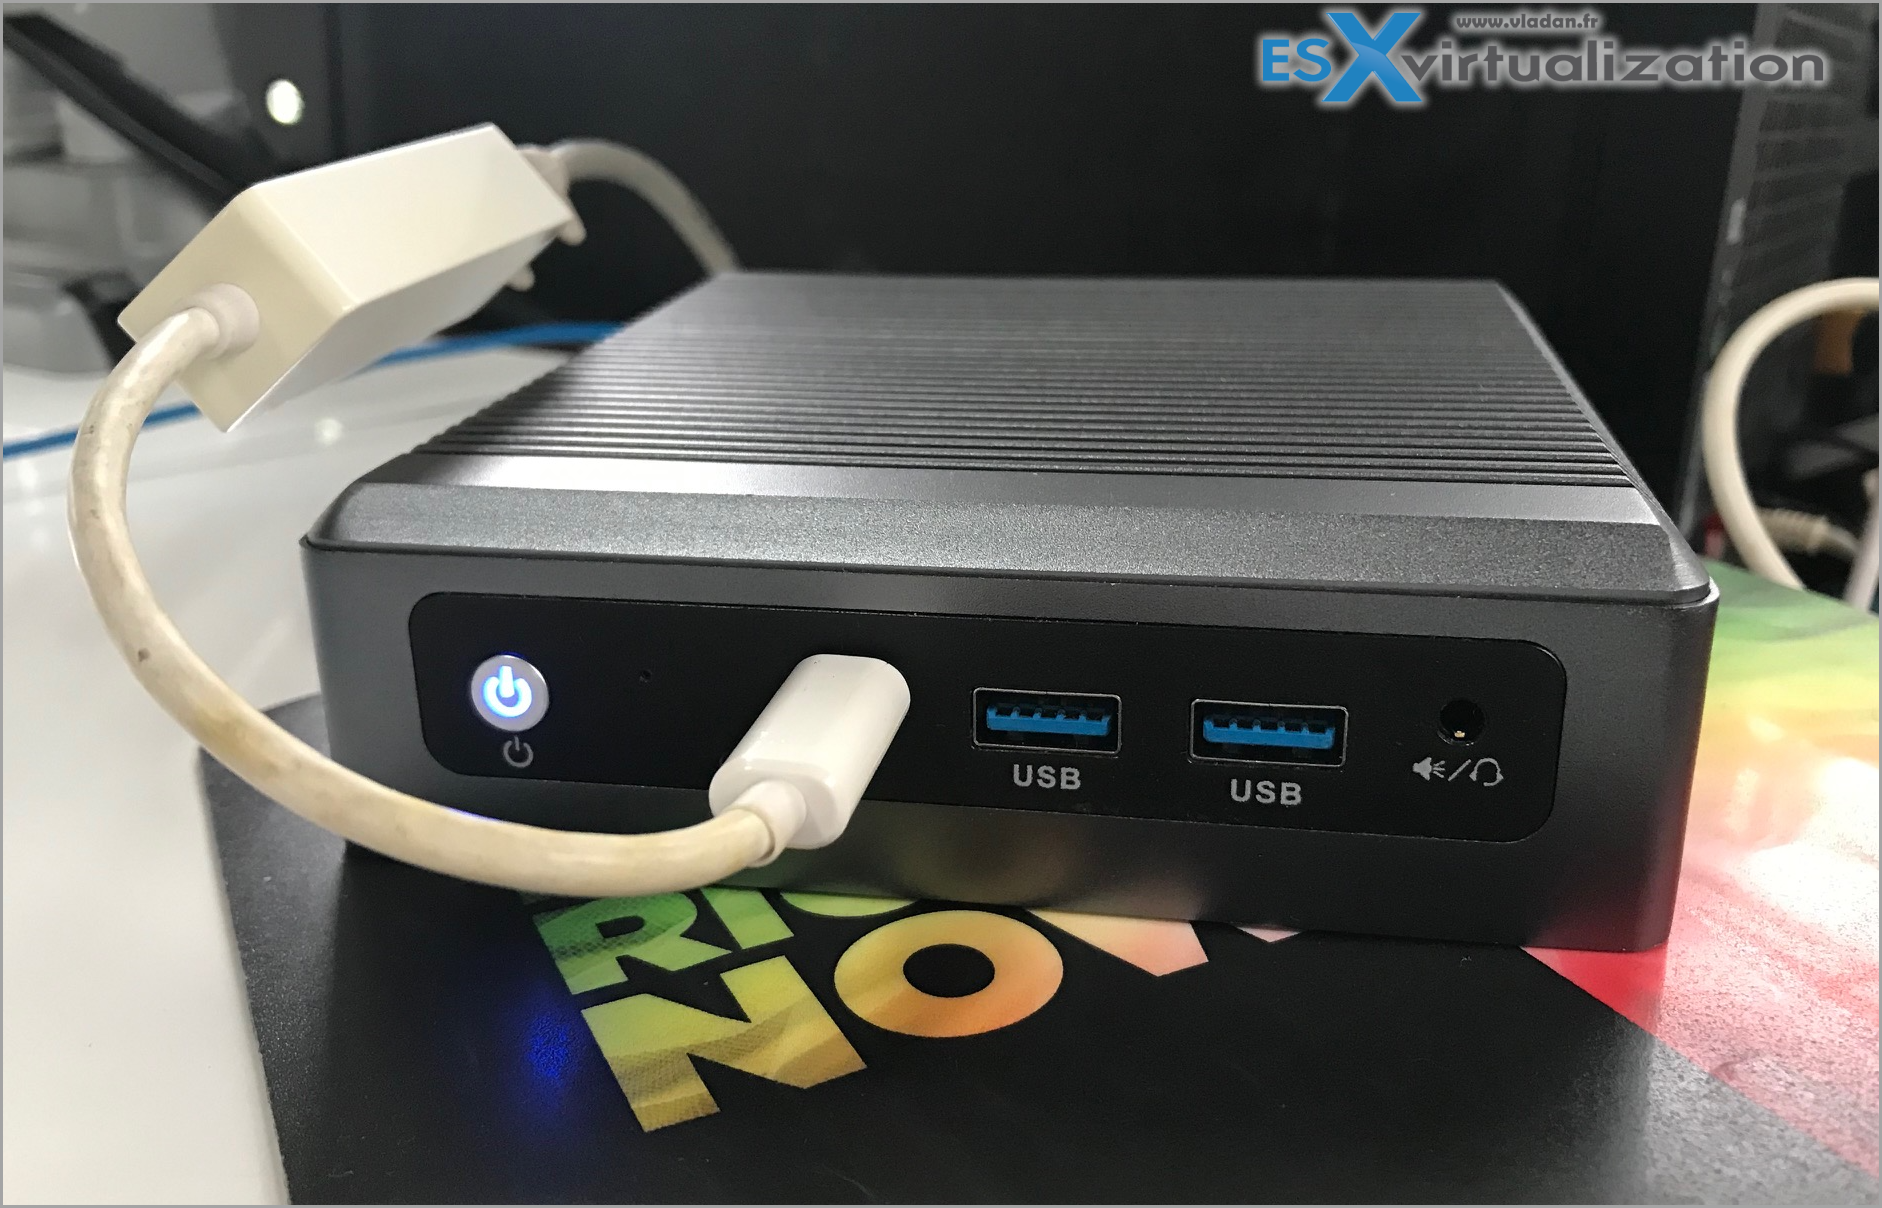
- I have one piece of energy efficient device made its apparition. A NXJ6412 Maxtang EHL30 that runs my vCenter, domain controller and some monitoring appliances.
- As a second piece of hardware, I have a consumer workstation running nested lab thanks to VMware Workstation 17 software. The workstation is my main gear for day-to-day tasks, multimedia/cinema/blogging/nested_lab. It is a personal choice as I'm on the move right now and don't have much space within my workspace.
I have detailed this in this post here:
ESX Virtualization new hardware for the lab.
The parts
- ASUS motherboard X570 TUF Gaming X570-Plus (WI-FI) – AM4 – https://amzn.to/3hMckBJ
- Corsair RM750, RM Series, 80 Plus Gold Certified, 750 W Fully Modular ATX Power Supply – Black – https://amzn.to/3wmec9J
- BenQ EL2870U 4k Display Monitor – https://amzn.to/3wuikoo
- AMD Ryzen 9 5950X 16-core, 32-Thread Unlocked Desktop Processor- https://amzn.to/3qTsJbP
- HyperX Fury RGB 64GB 2400MHz DDR4 CL15 DIMM (Kit of 2) HX424C15FB3AK2/64- https://amzn.to/3dNGHH1
- Cooler Master Hyper 212 Black Edition CPU Air Coolor, Silencio FP120 Fan, 4 CDC 2.0 Heatpipes, Anodized Gun-Metal Black, Brushed Nickel Fins for AMD Ryzen – https://amzn.to/3AEPogH
- WD_Black 1TB SN850 Game Drive Call of Duty Special Edition: Black Ops Cold War, Internal NVMe M.2 PCIe Gen4 SSD – WDBB2F0010BNC-WRSN – https://amzn.to/36js3TD
- Case Corsair 4000D black – https://amzn.to/3woWfXW
The lab was a great support for my table -:), but then I moved the unity to the back seat behind the table, close to the trailer's window.
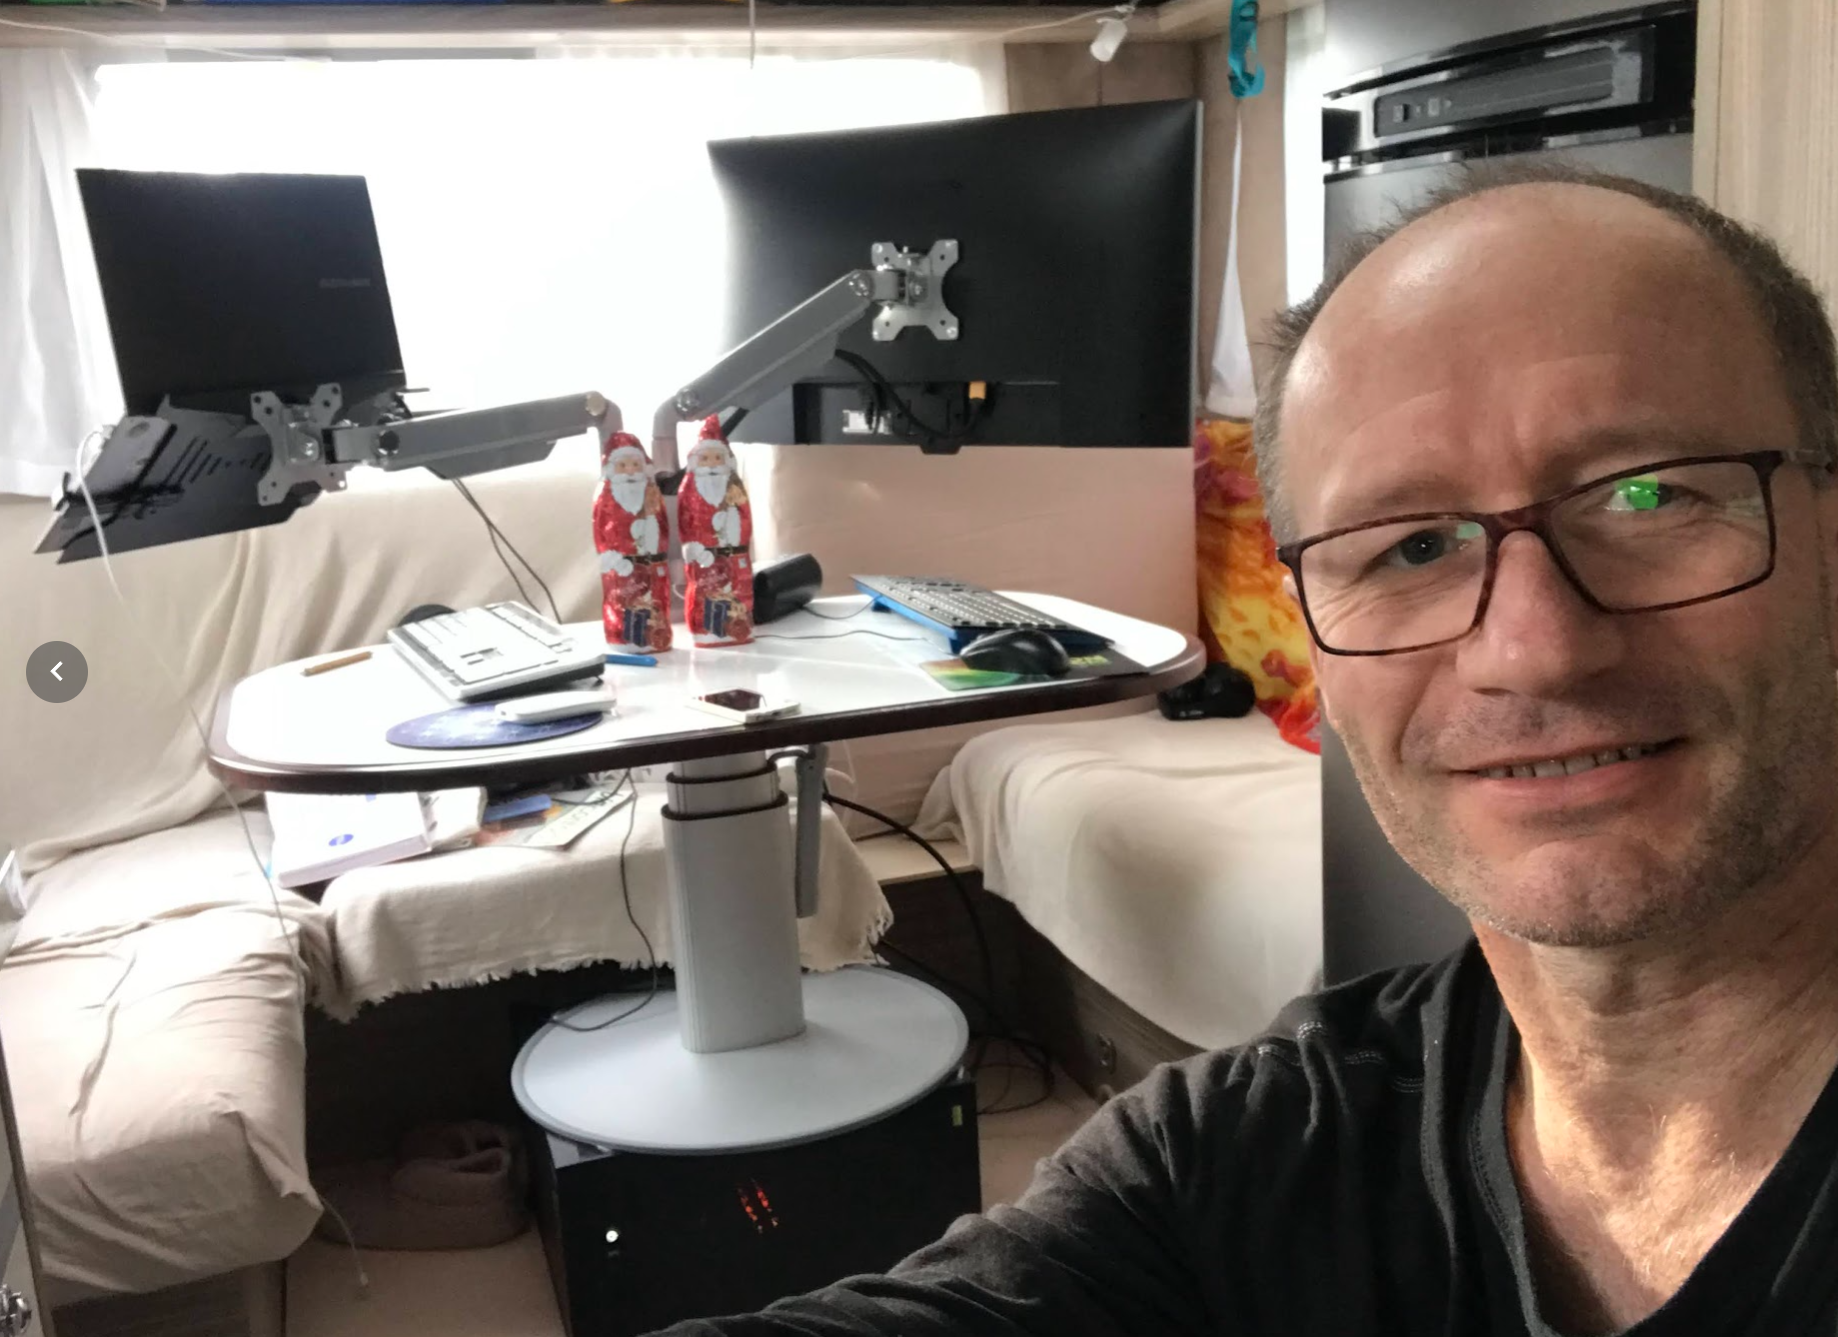
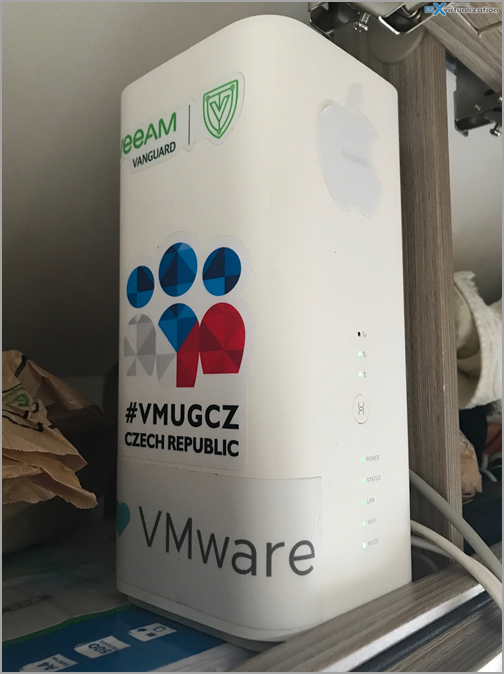
As the lab is located in a caravan, so mobile, I have a Mobile box with 500Gb of Internet volume (swapping 2 SIMs each month). If any of you asking why I did not get a campervan instead of a caravan, I'd like to say that it's just more convenient. Once you park in a campsite, you don't want to go shopping or on a sightseeing on a bike, right? A car + caravan setup is more convenient.
You park your caravan, then you can leave to go sightseeing around with your car (then for a hike). If you have to catch a flight somewhere, with just a car it's a better option too.
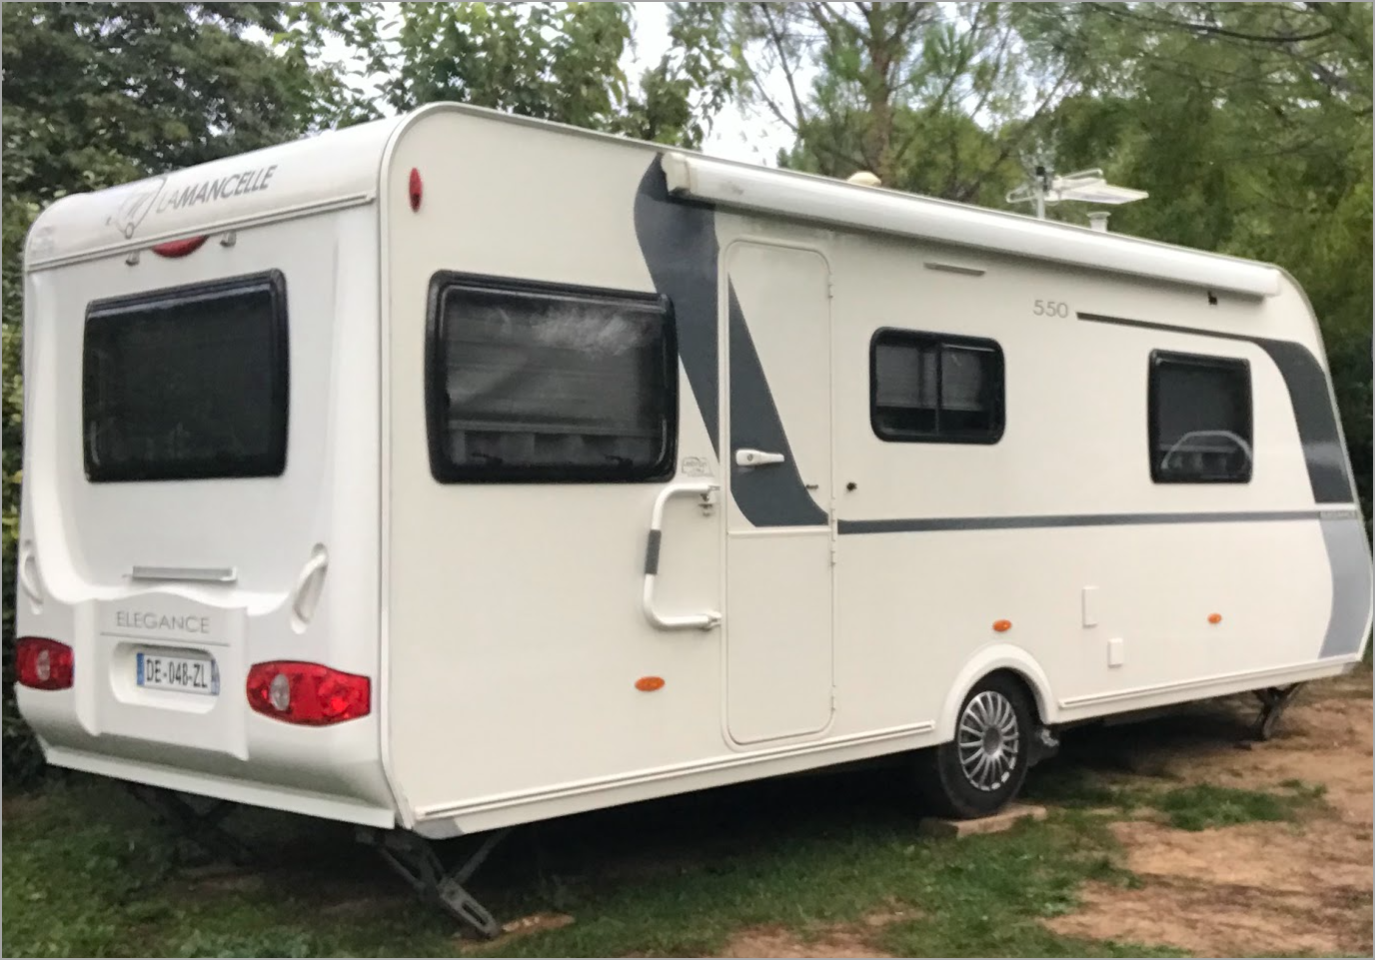
We're moving since our place is not ready yet…. -:). Our place is close to Ales, which is about 50km from Nimes, south of France.
This we have spend this winter (2023/2024) in Spain and Portugal. It's been 4 and a half months, where we have traveled into different places:
- Cordoba
- Seville
- Cadiz
- Sagres
- Lagos
- Valencia
And now back to Ales, move on with the construction – 🙂 Yes, it's been delayed …….
Lab 2018
The lab has been upgraded to vSphere 6.7. I know, too early because none of the backup vendors supports vSphere 6.7 just yet.
Note that I'm still using the original built from a few years back. The 3 lab hosts are based on X10SRH-CLN4F board which can go up to 521Gb RAM…
Energy Efficient ESXi Home Lab:
- Efficient Home Server – Start with an Efficient Power Supply
- ESXi Home lab – Get a quality and comfortable case
- Supermicro Single CPU Board for ESXi Homelab – X10SRH-CLN4F
- Supermicro Single CPU Board for ESXi Homelab – X10SRH-CLN4F – Part 2
- Supermicro Single CPU Board for ESXi Home lab – Upgrading LSI 3008 HBA on the X10SRH-CLN4F
- Building Energy Efficient ESXi Home Lab – parts list
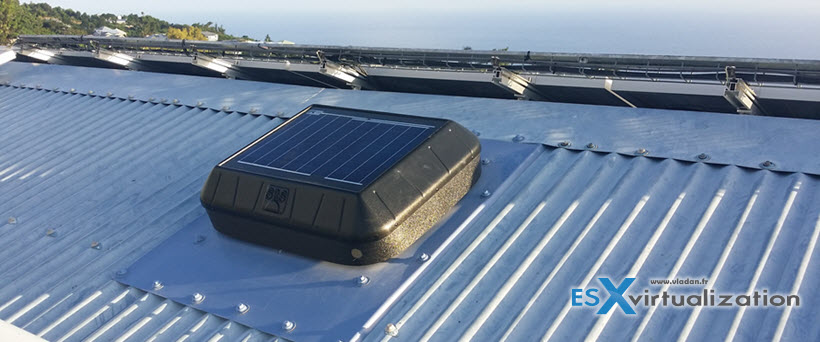
- Homelab – Airflow Solar System
- How To Enable Sparse Swap on VSAN [Guide]
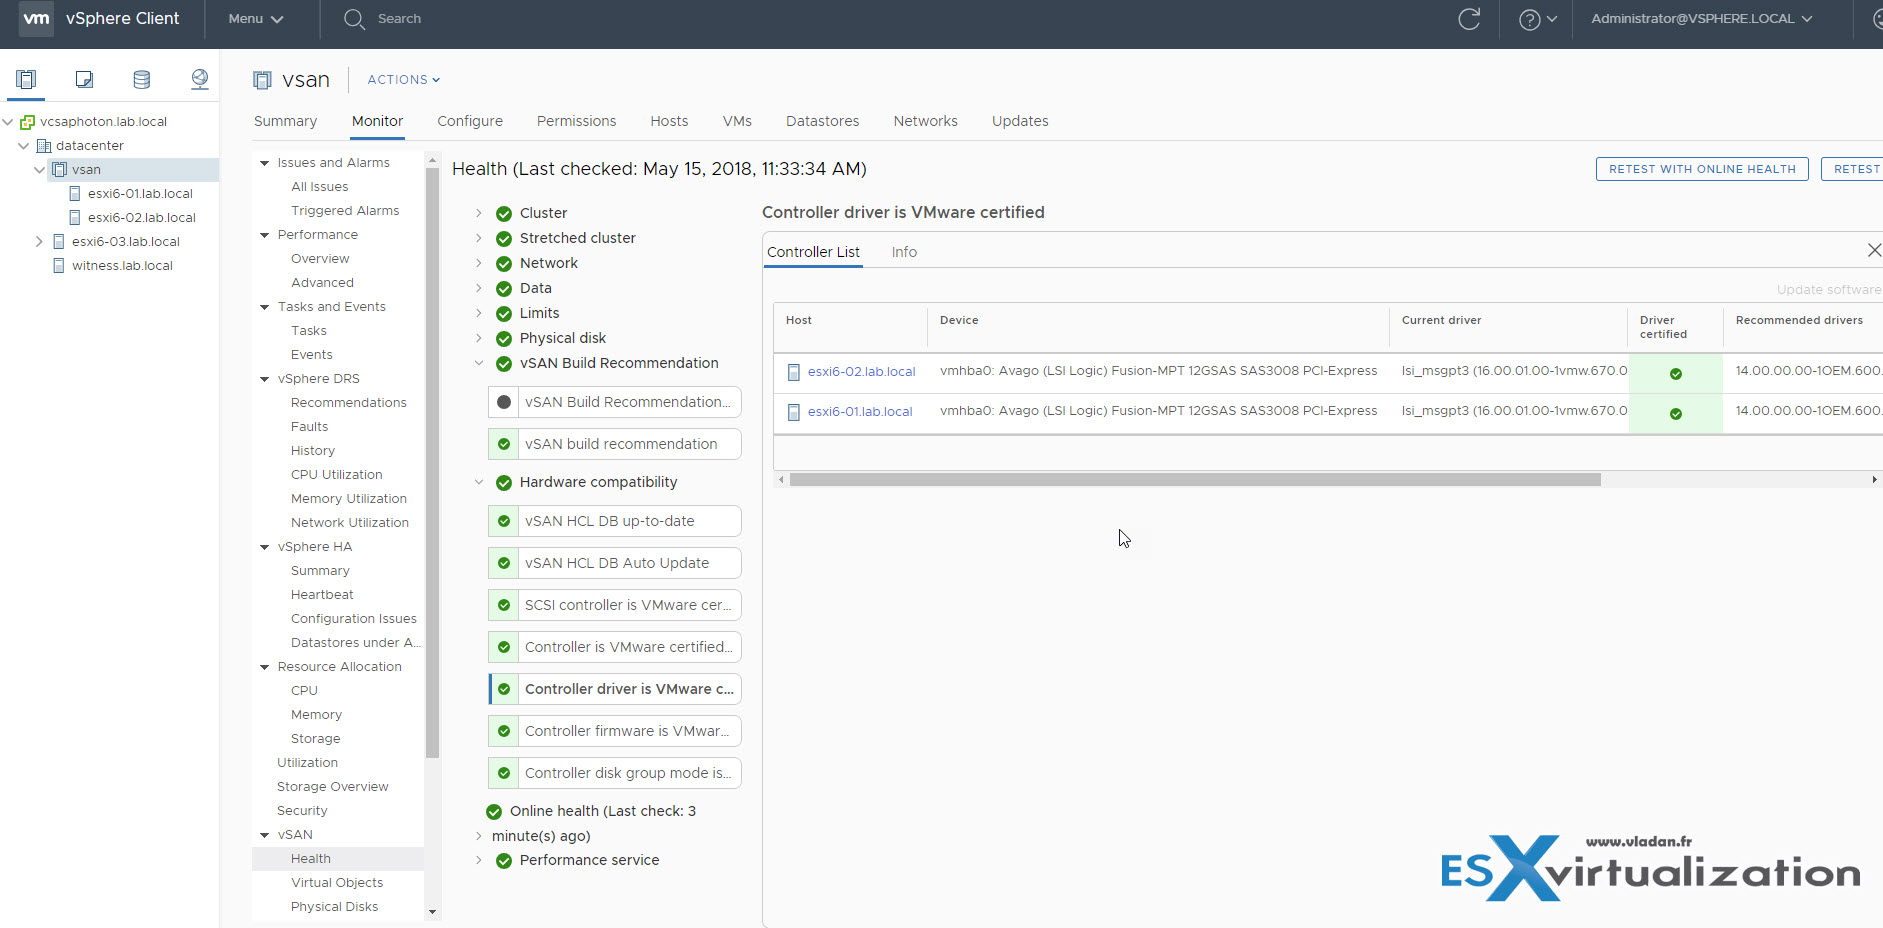
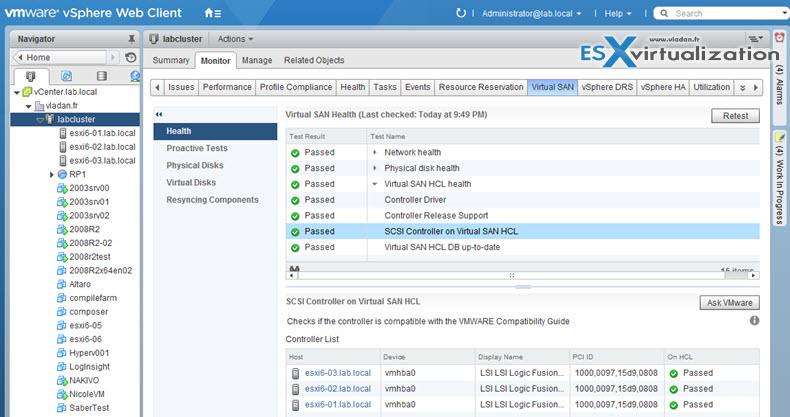
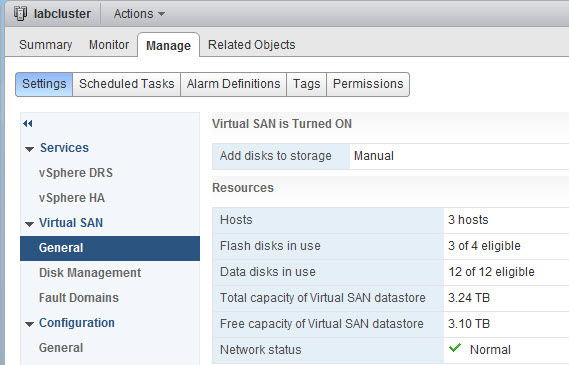
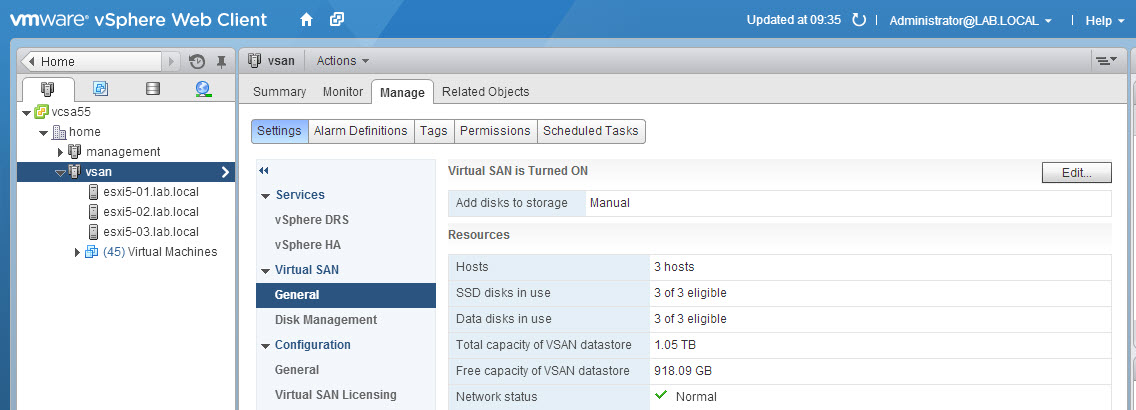
But the compatibility for VSAN 6.7 is still fine. (check image below).
I have done the upgrade via IDO and via CLI methods. Check it out here:
Here is an overview of the vSAN Health checks detailing the storage controller certified driver..
Shop VMware Cheapest lic.
- VMware vSphere Essentials Plus Kit Term (1 year)
- VMware vSphere Essentials Kit Term (1 year)
- VMware vSphere Essentials
- VMware vSphere Essentials Plus
Lab 2017
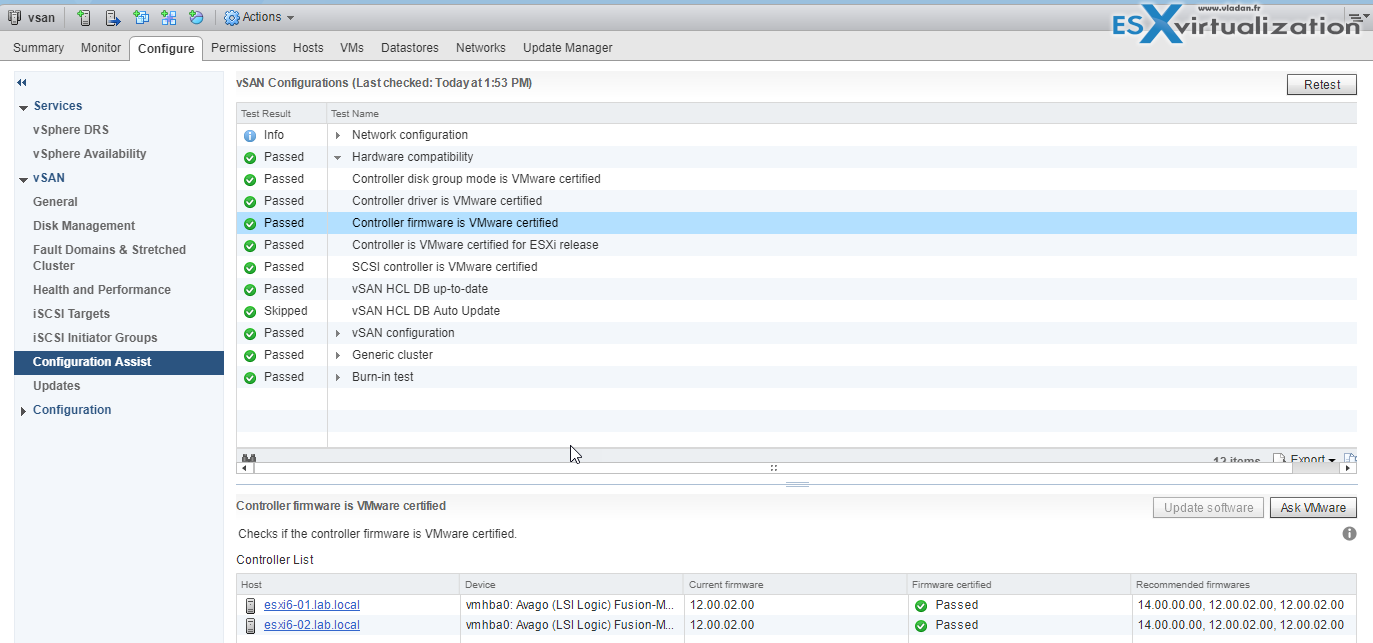
Update 3: I just found out that my LSI 3008 controller which is used by VSAN is still “Green” via VMware HCL health checks. This controller is a SAS/SATA controller, 12GBps which can drive up to 8 disks. In my case, I use it for vSAN and right after the upgrade, the controller seems to fall off the HCL, but a few months later, it's back again.
Note that while this controller can do software raid, I'm not using it. I'm passinng through the disks into my vSAN so it' is vSAN cluster which has a full management of the devices. You might be interested in reading this post about the latest lab upgrade to ESXi 6.5 and vSAN 6.6.
It seems that while VMware does not have priority on this Supermicro Motherboard (which is understandeable), the controller itself is still pretty valuable.
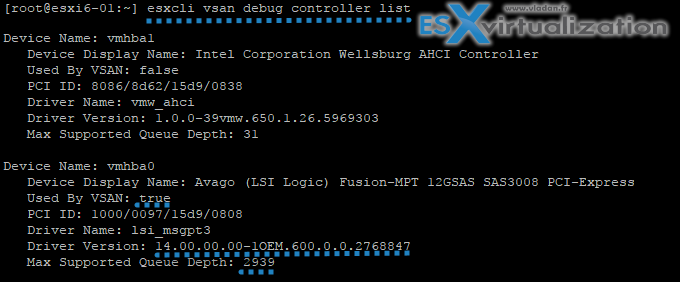
I also tried to use the new vSAN CLI command:
esxcli vsan debug controller list
Which basically gives you not only the details about the controller, driver and firmware but also the queue depth… -:) Pretty cool. This is the way VMware is going forward. Latest news from VMworld 2017 shows that Ruby vSphere Console will be phased out in the future and VMware will pack more CLI commands and PowerCLI commandlets in order to interract with vSAN clusters.
Updated view the September 24th:
Here is the lab's write up:
Energy Efficient ESXi Home Lab:
- Efficient Home Server – Start with an Efficient Power Supply
- ESXi Home lab – Get a quality and comfortable case
- Supermicro Single CPU Board for ESXi Homelab – X10SRH-CLN4F
- Supermicro Single CPU Board for ESXi Homelab – X10SRH-CLN4F – Part 2
- Supermicro Single CPU Board for ESXi Home lab – Upgrading LSI 3008 HBA on the X10SRH-CLN4F
- Building Energy Efficient ESXi Home Lab – parts list
Update2: Patch day today. There was a vSAN 6.6 release so, this is a big day for lab update to the latest release. While the VCSA upgrade went just fine, by attaching the upgrade ISO downloaded from the VMware Patch Download Center, I cannot say the same about one of my ESXi updates.
In fact, what happened is that after doing an upgrade via CLI (esxcli software vib update -d /vmfs/volumes/my volume/ESXi….zip) there was an error:
[InstallationError]
[Errno 32] Broken pipe
vibs = VMware_locker_tools-light_6.x.x-x.x.x
Please refer to the log file for more details.
I found a tip on one blog, which basically
esxupdate.log had a crucial detail regarding the /store directory: it was not found. /store (or the symlink, /locker) appear to be temporary storage locations for VIBs during upgrade operations. VMware even has a KB (KB2030665) detailing this error.
renaming the /store directory forced esxcli to refresh the locker, and the upgrade worked afterwards. So you can:
mv /store /store.old
And then run the
esxcli software profile update -d
————————————————————
Lab 2016
The 3 node VSAN got re-configured into 2-Node All Flash + Witness config (ROBO), for testing purposes. The third node, which is outside of VSAN cluster has just local storage to host vCenter Server, DC, DNS (backed up daily with Veeam). It hosts the Witness VM for VSAN too.
Update: The lab got upgraded to vSphere 6.5 with VCSA 6.5 (Linux). Part of it is also VUM now, so the All-In-one package is quite sweet.. There were problems to find good driver/firmware combination for my x710-DA2 NICs, but finally, the latest driver and latest firmware with uninstalling the stocked VIB from the VMware ESXi 6.5 iso did the trick.
One of the hosts got a RAM upgrade. Now it has 128Gb of RAM, so it's half full (there are still 4 slots free)…
Note if I left the i40e VIB from VMware along with the i40en from Intel within the same image, then there were connectivity problems. (no connection). So I had to uninstall the original VMware vib and leave only the Intel's one…

- How to Upgrade ESXi 6.0 to 6.5 via ISO
- How to Upgrade ESXi 6.0 to 6.5 via CLI [On Line]
- How to upgrade ESXi 6.0 to ESXi 6.5 via Offline Bundle
- How to upgrade an ESXi 6.0 to ESXi 6.5 via VMware Update Manager
The Haswell ESXi built got transformed into a Hyper-V host….
As for my main desktop system I'm using the 64 Gb of RAM box with Hexacore i7 CPU. The main desktop runs W10 and VMware Workstation. Additionally, I can boot into El Capitan too as the box is configured as multiboot Windows + Hackintosh.
Lab 2015
The 3 lab hosts are based on X10SRH-CLN4F board which can go up to 521Gb RAM… (currently only 64Gb of DDR4, cause of the high prices of DDR4)
Energy Efficient ESXi Home Lab:
- Efficient Home Server – Start with an Efficient Power Supply
- ESXi Home lab – Get a quality and comfortable case
- Supermicro Single CPU Board for ESXi Homelab – X10SRH-CLN4F
- Supermicro Single CPU Board for ESXi Homelab – X10SRH-CLN4F – Part 2
- Supermicro Single CPU Board for ESXi Home lab – Upgrading LSI 3008 HBA on the X10SRH-CLN4F
- Building Energy Efficient ESXi Home Lab – parts list
- Homelab – Airflow Solar System
- How To Enable Sparse Swap on VSAN [Guide]

Supermicro X10SRH-CLN4F board
Storage Controler
The LSI Logic Fusion-MPT 12GSAS SAS 3008 PCI-Express. It's the built-in onboard SAS.
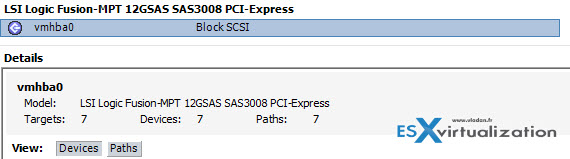
The LSI 3008 SAS controller (built-in) present on the mobo is part of VMware HCL.
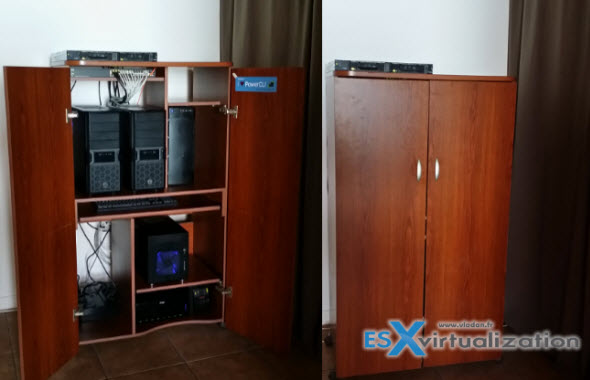
The lab…
Here is the look from the Inside. The whole lab “sits” on a mounted garage rack bought at the local hardware store, where at the bottom there is a 10Gb Switch and on the shelf there are 3 hosts. (Four actually as the fourth host is a management box – 64Gb RAM box). I'm running vSphere 6.0.

Each of the 3 hosts has only the two 10 GbE ports plugged in + the iPMI port used by Supermicro's motherboards.
The Network
As concerning the network I took the plunge, broke the bank and went for a 10GbE switch from Cisco – SG500XG-8F8T. The same switch that Erik Bussink uses in his lab.

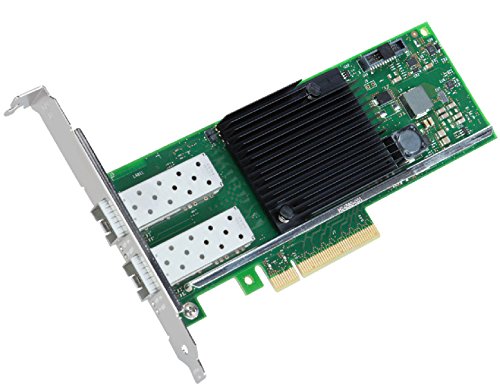
Concerning the 10GbE network cards I opted for low power, low consumption Intel Ethernet Controller X710-da2 cards with SFP+ connectors, So each host has two 10Gb ports.
Buyers Guide:
| Item | Power Efficient ESXi Lab Host 2015 based on Haswell-EP architecture | Notes | Shop |
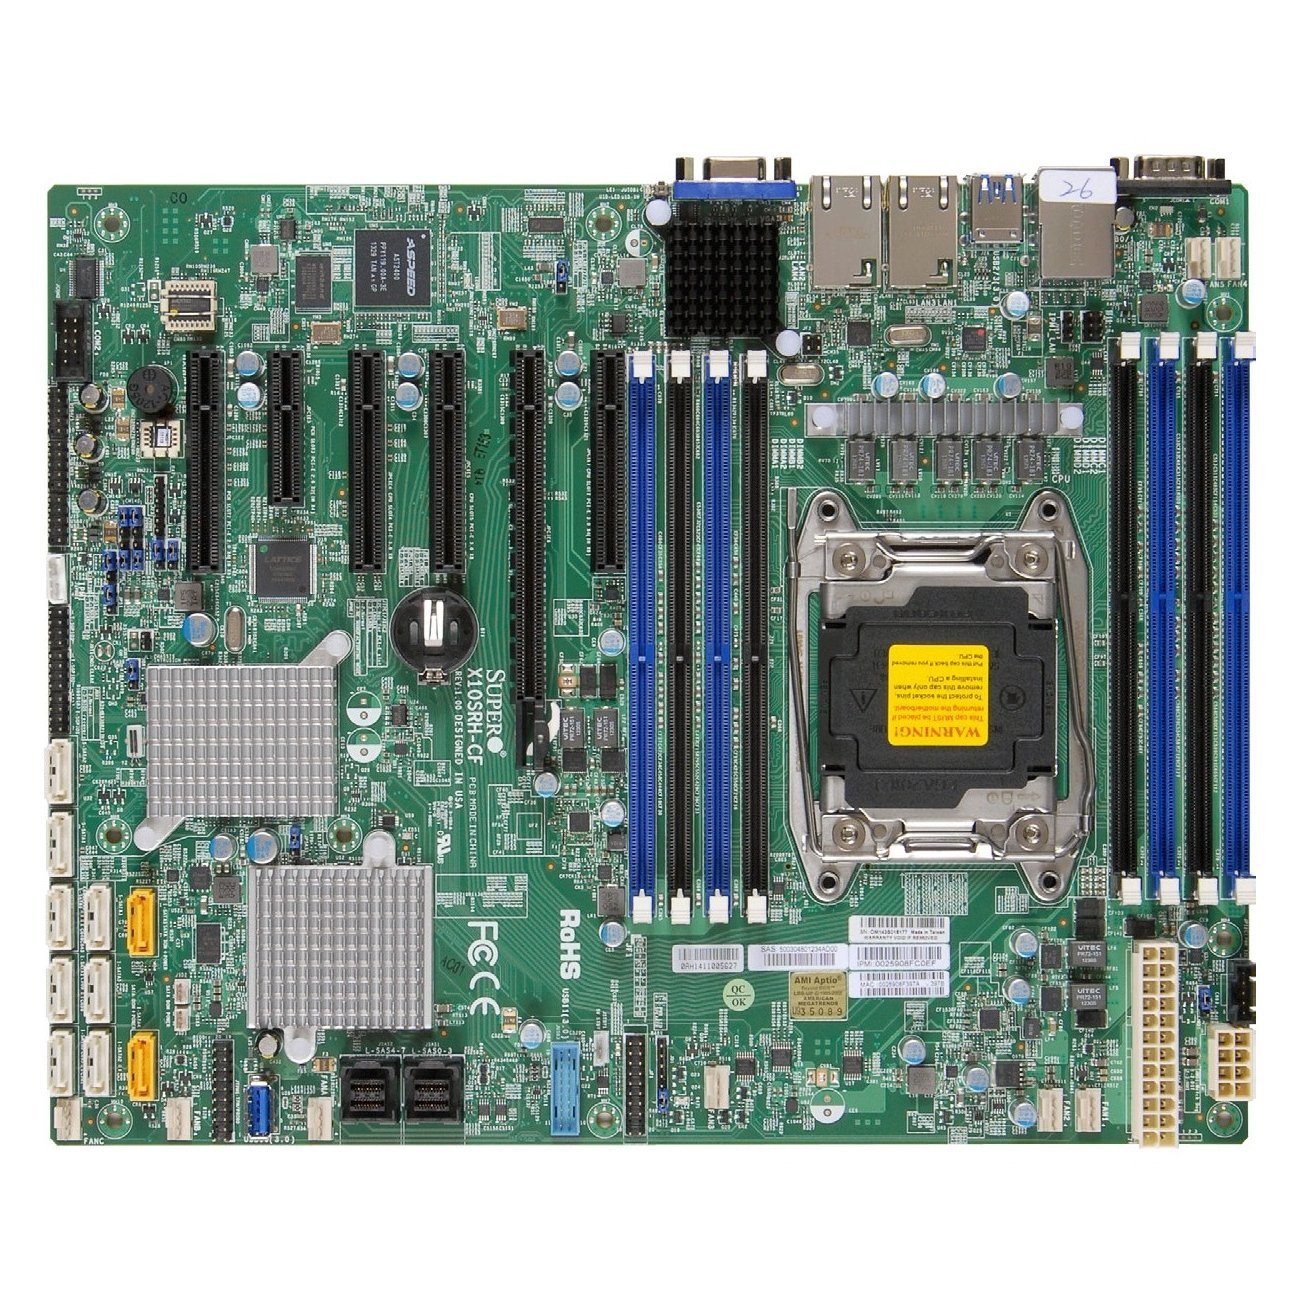 |
Supermicro ATX DDR4 LGA 2011 X10SRH-CLN4F-O (with LSI 3008) My Choice.. | SAS, SATA, 4NICs | Amazon US |
 |
Supermicro ATX DDR4 LGA 2011 X10SRH-CF-O (with LSI 3008) | SAS, SATA, 2NICs | Amazon US |
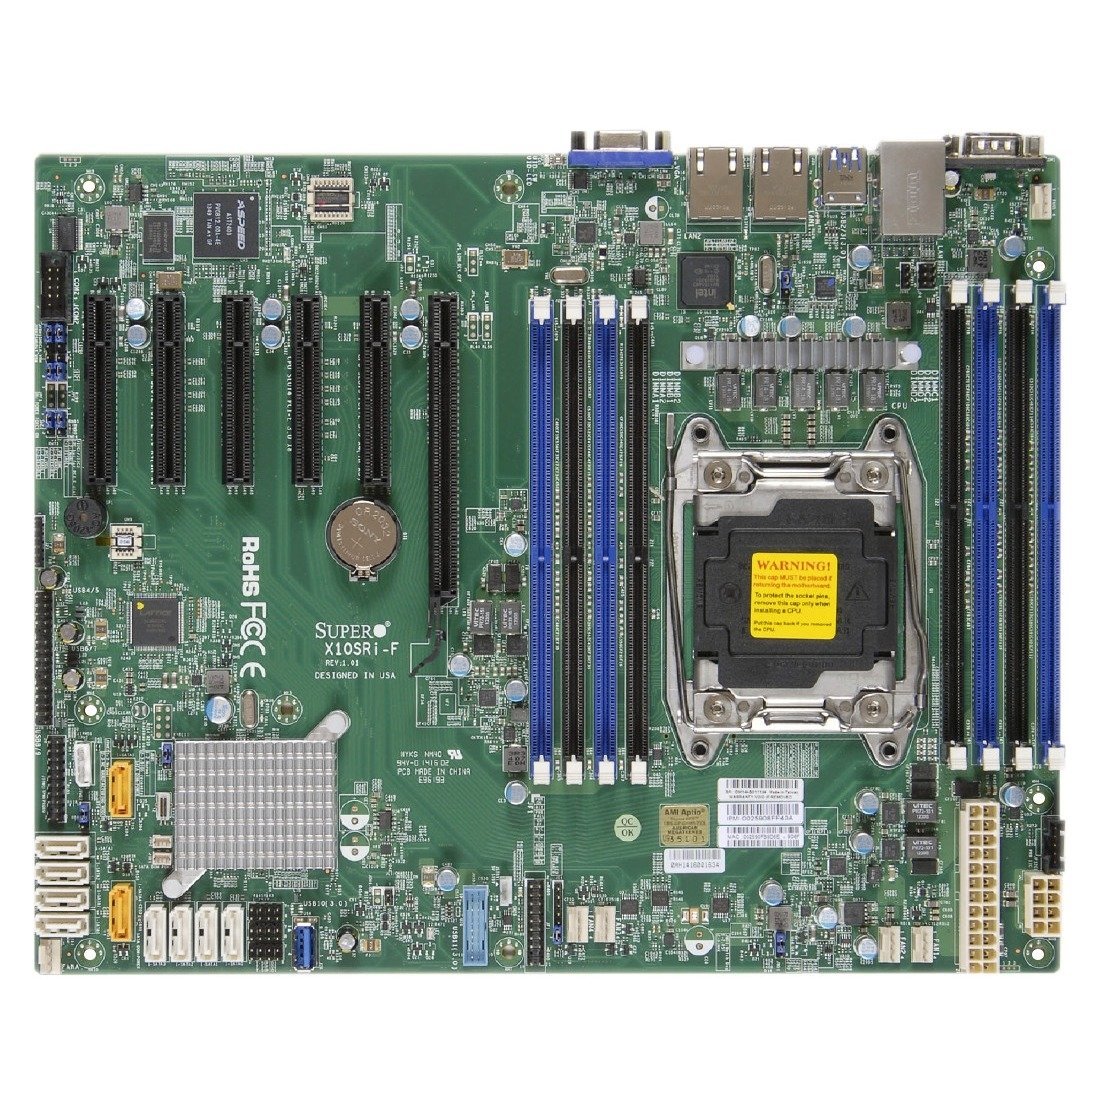 |
Supermicro ATX DDR4 LGA 2011 X10SRI-F-O (No LSI 3008 card on this board…) | SATA, 2NICs | Amazon US |
 |
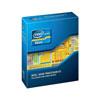
Intel Xeon E5-2630L v3 – 8 cores, 1.8 GHZ (55W TDP) – My Choice.. | 20 Mb Cache | Amazon US |
|
Intel Xeon E5-2630 v3 – 8 cores, 2.4GHz ( 85W TDP) | 20 Mb Cache | Amazon US |
 |
Xeon E5-2620 v3 – 6 Cores, 2.40 GHz (85W TDP) | 15 Mb Cache | Amazon US |
 |
Xeon E5-2609 V3 – 6 cores, 1.90GHz (85 TDP) | 15 Mb Cache | Amazon US |
|
Intel Xeon E5-2603 V3 – 6 cores, 1.6GHz (85 W TDP) | 15 Mb Cache | Amazon US |
|
Xeon E5-1650 v3 – 6 cores, 3.50 GHz (140W TDP) | 15 Mb Cache | Amazon US |
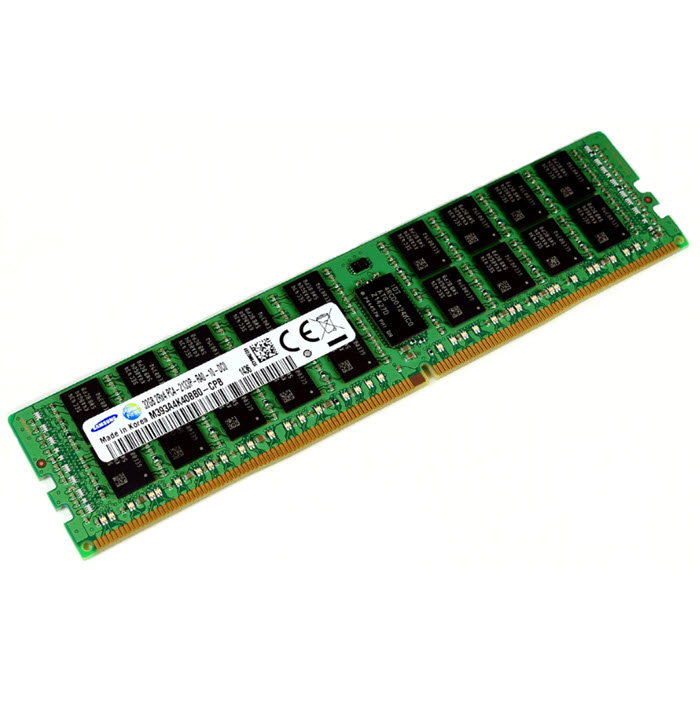 |
Supermicro Certified MEM-DR432L-SL01-LR21 Samsung 32GB DDR4-2133 4Rx4 LP ECC LRDIMM Memory – My choice | 32 Gb | Amazon US |
 |
Samsung DDR4-2133 16GB/2Gx72 ECC/REG CL15 Server Memory (M393A2G40DB0-CPB0) | 16 Gb | Amazon US |
|
Supermicro Certified MEM-DR416L-CL01-ER21 Micron Memory – 16GB DDR4-2133 2Rx4 ECC REG RoHS | 16 Gb | Amazon US |
|
Hynix DDR4-2133 16GB/2Gx72 ECC/REG CL13 Hynix Chip Server Memory | 16 Gb | Amazon US |
|
Samsung DDR4-2133 8GB/1Gx72 ECC/REG CL15 Server Memory (M393A1G40DB0-CPB) | 8 Gb | Amazon US |
|
Supermicro Certified MEM-DR480L-CL01-ER21 Micron Memory – 8GB DDR4-2133 1Rx4 ECC REG RoHS | 8 Gb | Amazon US |
|
Supermicro certified MEM-DR480L-HL01-ER21 Hynix Memory – 8GB DDR4-2133 1Rx4 ECC REG RoHS | 8 Gb | Amazon US |
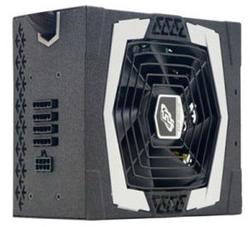 |
FSP Group 450W Modular Cable Power Supply 80 PLUS Platinum AURUM 92+ Series (PT-450M) | 450W | Amazon US |
|
FSP Group 550W Modular Cable Power Supply 80 PLUS Platinum AURUM 92+ Series (PT-550M) | 550W | Amazon US |
|
FSP Group 650W Modular Cable Power Supply 80 PLUS Platinum AURUM 92+ Series (PT-650M) | 650W | Amazon US |
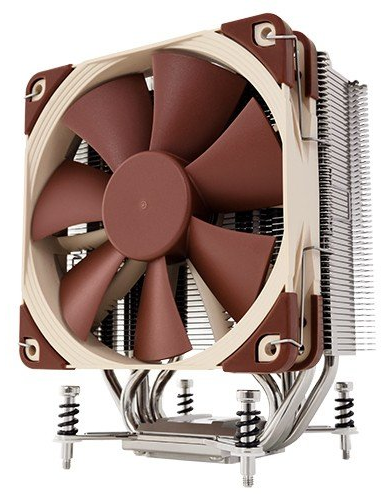 |
Noctua i4 CPU Cooler for Intel Xeon CPU_ LGA2011, 1356 and 1366 Platforms NH-U12DXi4 (support the Narrow ILM socket) | Amazon US | |
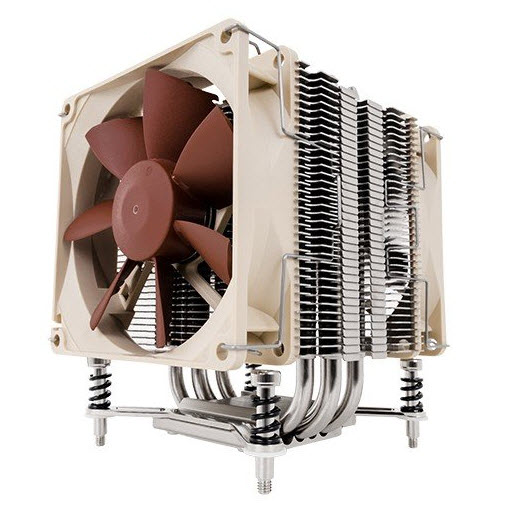 |
Noctua i4 CPU Cooler for Intel Xeon CPU_ LGA2011, 1356 and 1366 Platforms NH-U9DXi4 (support Narrow ILM and Square ILM) | Amazon US | |
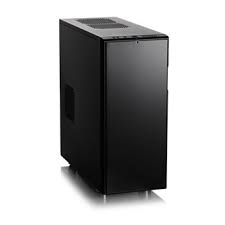 |
Fractal Design Define R4, Black Pearl | Amazon US | |
 |
Fractal Design Define R5, Black Pearl, ATX Mid Tower, Case (Black) | Amazon US |
A vSphere 6 is running for the moment in All-Flash VSAN 6.0 configuration…
The storage in the VSAN All-Flash config:
- Capacity Tier – 9x 256Gb OCZ SABER 1000 – [Enterprise grade SATA ]
- Capacity Tier – 3x 480 Gb Crucial M500 [Consumer grade SATA ]
- Cache Tier – 3 x 120 Gb Intel 530 [Consumer grade SATA SSD] – for now…
The Solar Airflow system is an autonomous Solar extractor…
……………………………………………………………………………………………………………………………………
Lab 2014:
This was my lab in 2014.
- Haswell i7 whitebox, with 32 Gigs of RAM.
- 2 physical ESX(i) hosts with 24Gigs of RAM each, plus 1 Haswell Whitebox with 32Gb of RAM participating in VSAN cluster.
- 1 Whitebox with 16 Gb of RAM running vCenter, DC, a Backup server VM and some other VMs, in a management cluster.
- 1 switch (Cisco SG300-28) – L3 switch, running VLANs with inter VLAN routing.
- Plus one Drobo Elite iSCSI SAN with SATA disks. Slow, but good to store the backups of my critical VMs.
The Network is handled now with the SG300-28 Cisco Small Business switch. It's a bigger brother of the SG300-10, which configuration you can follow here – My homelab – The Network design with Cisco SG 300 – a Layer 3 switch for €199. (with a complete schema).
Both models SG300-10 and SG300-28 are fan-less so no noise at all….. -:)
The SG300-28 configuration can be done all through GUI, but when you switch from L2 to L3 you loses all your settings. So that's why probably it's best to do this as a first step. CLI is also possible way to do the config, but you must know the commands…
VSAN in the Homelab – the whole serie:
- My VSAN Journey – Part 1 – The homebrew “node”
- My VSAN journey – Part 2 – How-to delete partitions to prepare disks for VSAN if the disks aren’t clean
- Memory Channel per Bank getting non active when using PERC H310 Contoler card – Fixed!
- Infiniband in the homelab – the missing piece for VMware VSAN
- Cisco Topspin 120 – Homelab Infiniband silence
- My VSAN Journey Part 3 – VSAN IO cards – search the VMware HCL
- My VSAN journey – all done!
- How-to Flash Dell Perc H310 with IT Firmware To Change Queue Depth from 25 to 600
I had a little trouble with Memory Channel per Bank getting non active when using PERC H310 Contoler card – Fixed! when those Dell PERC H310 controller cards used with my two Nehalem boxes, but glad it's been “solved”… Those cards are on VMware HCL for VSAN. They are quite cheap (seek on eBay), but not the ones with the most performance.
Here is what the lab looks like – physically. Note that in the room is also a laundry washing machine and dishes washer so it’s most likely the piece where is the most noise. So even if the lab itself isn’t too noisy still you can hear the spinning disks and some fans. But it’s not a noisy system. At the top you can see sitting an Infiniband switch which role is the storage VSAN back-end network and VSAN network. VMotion over 10Gb looks pretty much the same as over 1Gb network, but much faster…
Haswell i7 whitebox, with 32 Gigs of RAM. Energy efficient i7-4770S model from Intel, which has VT-d, VT-x and vPro, and at the same time has only 65w TDP. The 4 cores, with 8Mb of cache and hyper threading gives me enough power and flexibility to play with.
Used Parts:
- Intel i7-4770s
- G.Skill F3-10666CL9Q-32GBXL (4x8Gb)
- ASRock H87m PRO4
- Antec NEO ECO 620C 620W
- Zalman ZM-T1U3
The other two of my ESXi hosts are also whiteboxes running on non server hardware. It's basically a PC with a lot's of RAM (24 Gigs) each. Both boxes are running latest VMware ESXi hypervizors, which are installed onto USB Flash 2 gigs each.
Both boxes runs on Intel i7 Nehalem CPU architecture. The CPU are not the same, since the first box is the one I started few years ago, and I added one more box. One of those boxes has Intel i7 920 and the other i7 960.
Here is my list of pieces with are present in those 2 ESXi boxes:
- Kingston DataTraveler G3 – 2 Go – USB stick to install the VMware ESXi hypervizors
- Antec HCG – 400W – Power Supplies
- Intel PRO/1000 GT Desktop (OEM) – NICs
- Asus Sabertooth X58 – Motherboard
- Intel Core i7 950 (and i7920)
- G.Skill Kit Extreme3 3 x 4 Go PC10600 Ripjaws CAS 9 – DDR3 RAM kit
The 2 physical boxes with the Antec power supply make almost no noise. I must say that I took a special attention to pick this particular model of Antec, since the fan in those models is 135 mm large and the efficiency is 82%.
The silence of those power supplies is just ….. awesome ! Also, I must say that the original Intel CPU Fans were replaced by more silent models. I think that everyone confirms, that those original Intel Fans are quite noisy.
I also I digged in bios of both systems to find an option where on can setup “quiet mode” for CPU fan. Once activated, the RPM went down… and the noise level too..
Storage Adapters.
When I started my VSAN journey I went for cheap storage controller cards on eBay – the Dell Perc H310. But those were the lower ends adapters. At the beginning those adapters were on VMware HCL but then VMware has decided to take them out due to performance problems during rebuild and resync operation on VSAN enabled clusters.
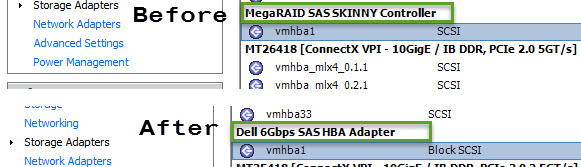
In fact the queue depth of those adapters is only 25 when used with the original firmware. That's why I flashed those Dell H310 cards with an IT firmware (from Dell) – How-to Flash Dell Perc H310 with IT Firmware To Change Queue Depth from 25 to 600..
Storage network
The storage network uses Cisco Topspin 120 (I think other references this switch as Cisco 7000 model too) which has 24 ports.
- Infiniband switch (Topspin 120 from eBay – you can find one of those for roughly $200 + shipping) providing me with 10Gb for VSAN traffic and 10Gb for VMotion traffic.
- The Mellanox HCA cards do provide 2x10Gb network speed and are also from eBay (HP 452372-001 Infiniband PCI-E 4X DDR Dual Port Storage Host Channel Adapter HCA – €26 each).
- Infiniband Cables – MOLEX 74526-1003 0.5 mm Pitch LaneLink 10Gbase-CX4 Cable Assembly – roughly €29 a piece.
VSAN 5.5 cluster
Now when VSAN is out I configured my 3 hosts with VSAN. Each of the 3 hosts has one spinning disk and one SSD. I might add more internal storage later.
The Power consumption
 The lab draws less than 500W according to my powermeter. This is quite good considering that I’m running 4 physical hosts and with two switches and one iSCSI SAN device. Two Nehalem CPUs are the most power hungry as the Haswell low power CPU has TDP 65W only.
I now have enough resources to run the VMs I want and test solutions which I find interesting or emerging. As my two Nehalem boxes are maxing on 24Gb of RAM I think that this will be the first resource which I might run out. No problem, with VSAN I can just add another host to my VSAN cluster…
During the config process if you for example forget to check box on the vmkernel port group for the VSAN traffic, the VSAN assistant won’t let you activate the VSAN cluster and you’ll get a nice warning “Misconfiguration detected”. You can see it in my post which was done on testing VSAN on nested ESXi hypervisors
@erikbussink asked me if I had a video showing how noisy was the infiniband switch after I replaced the original fans with a Noctua ones. The switch has finally received a new Noctua fans (Noctua nf-a4x10) which do have 3 wires. (any fans with 2 wires won't will work but the switch will shut itself down after 2 min….). For my particular situation I had to change the order of those wires. The write up is in the My VSAN Journey – All done article.
I've recorded a short video showing the noise (or I should rather say silence) of the lab. When I first bought the Infiniband switch, it was noisy… oh man. Impossible to stay in the house. More noisy than a washing machine.
The video shows also the individual components. The latest minibox is my “management” cluster. It has only 16Gb of RAM and I run there the vCenter, DC, DHCP, DNS services as well as my backup servers.